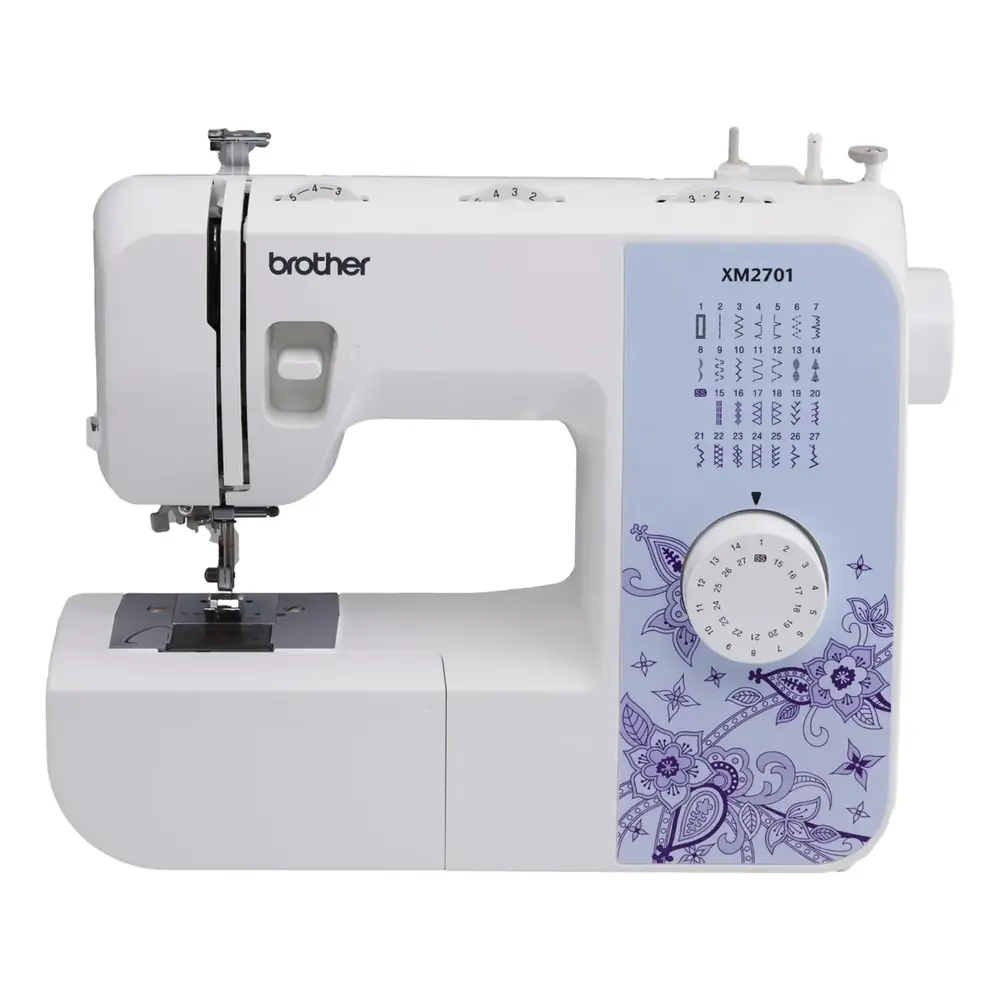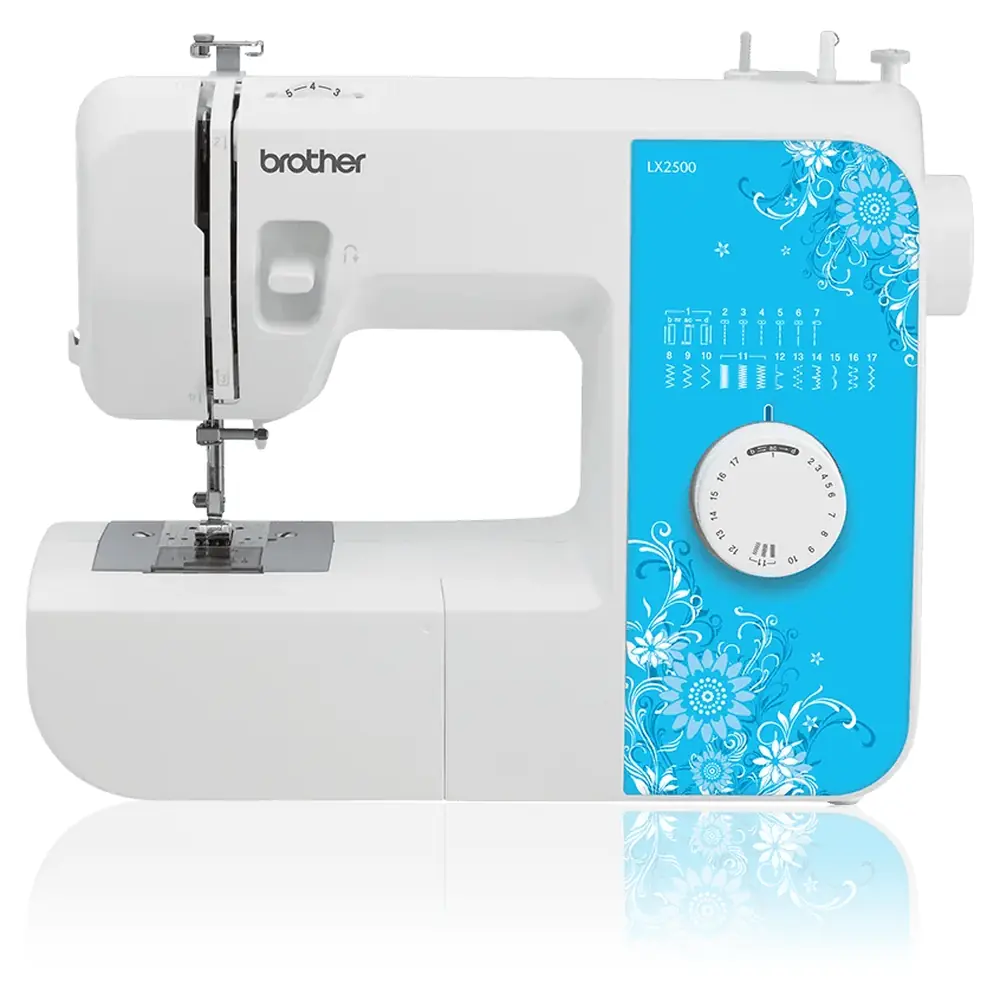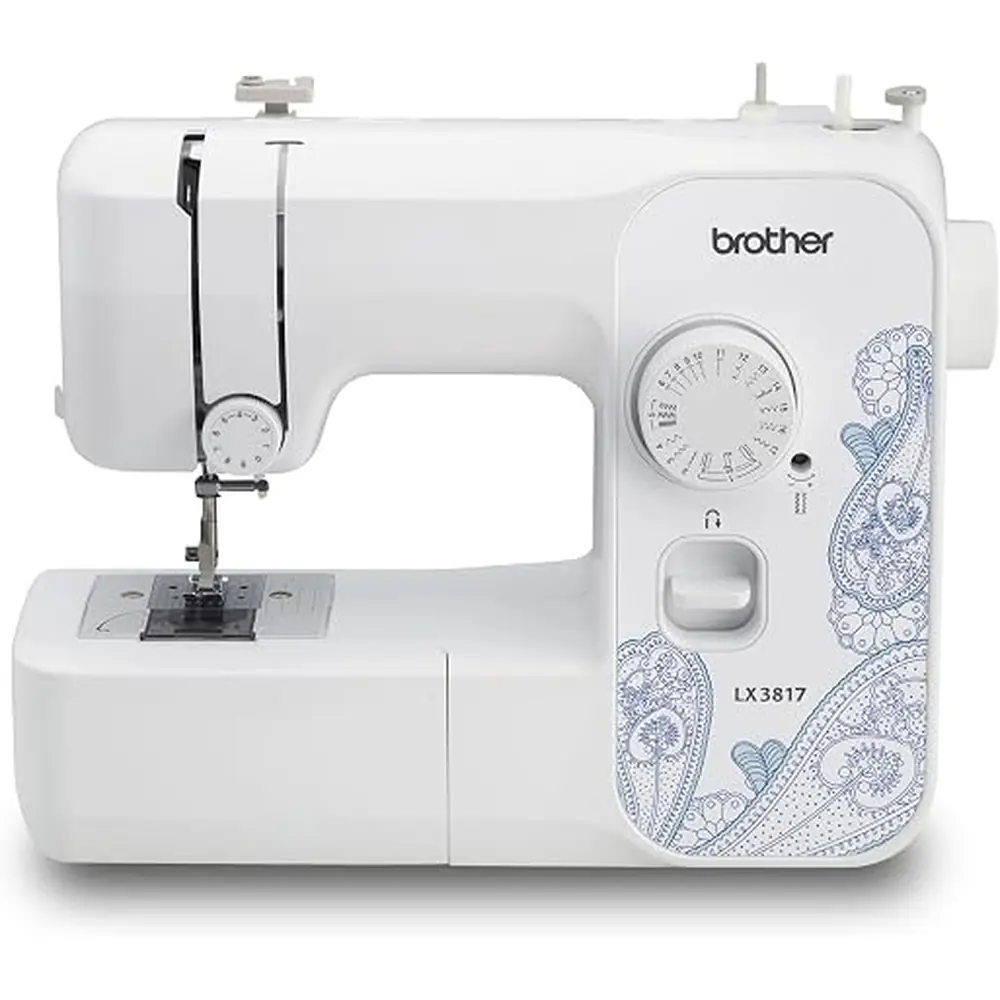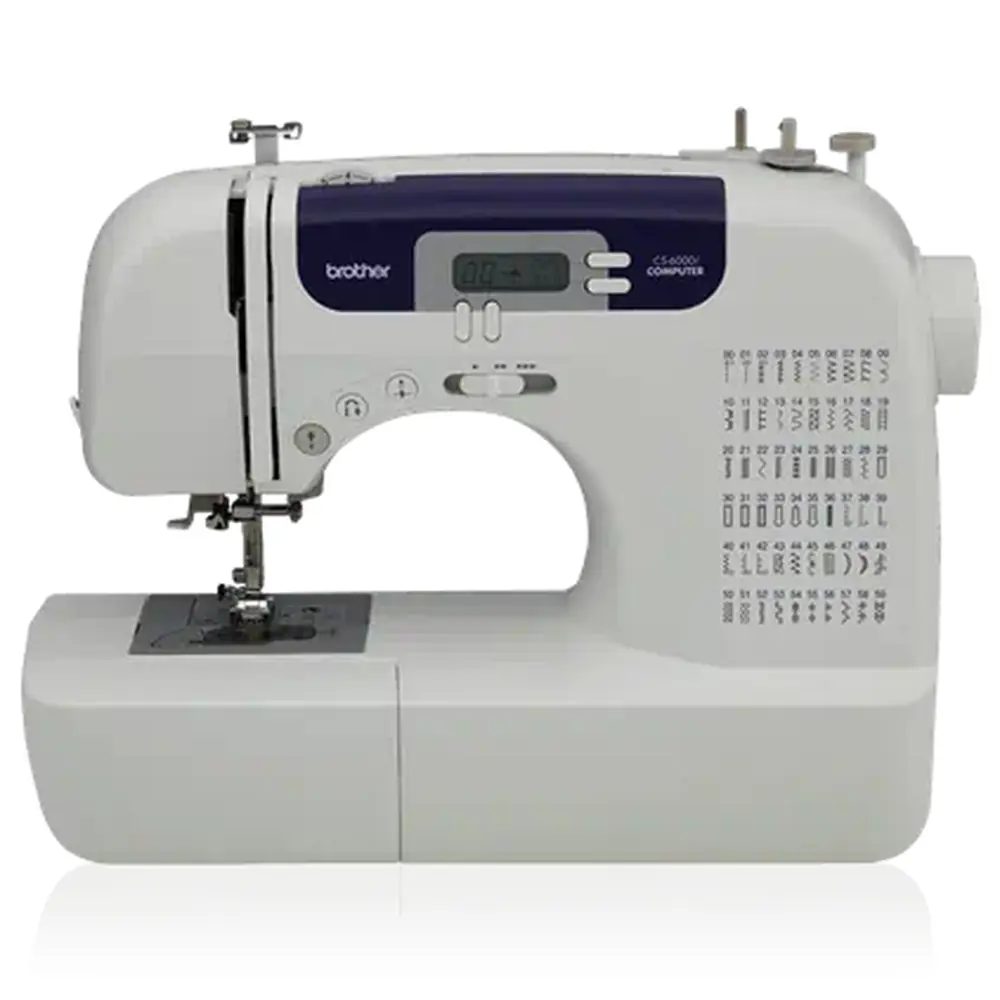
Brother LS14S Sewing Machine Instruction Manual
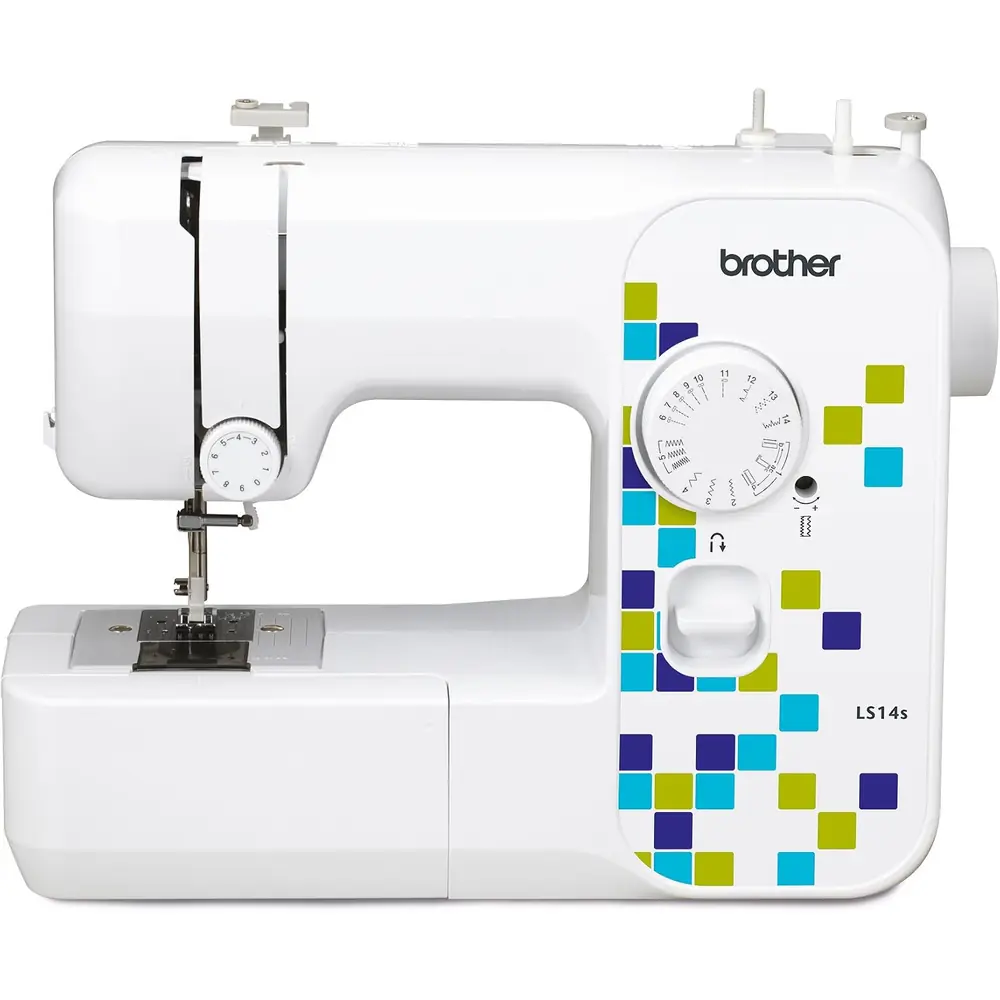
Brother LS14S Sewing Machine

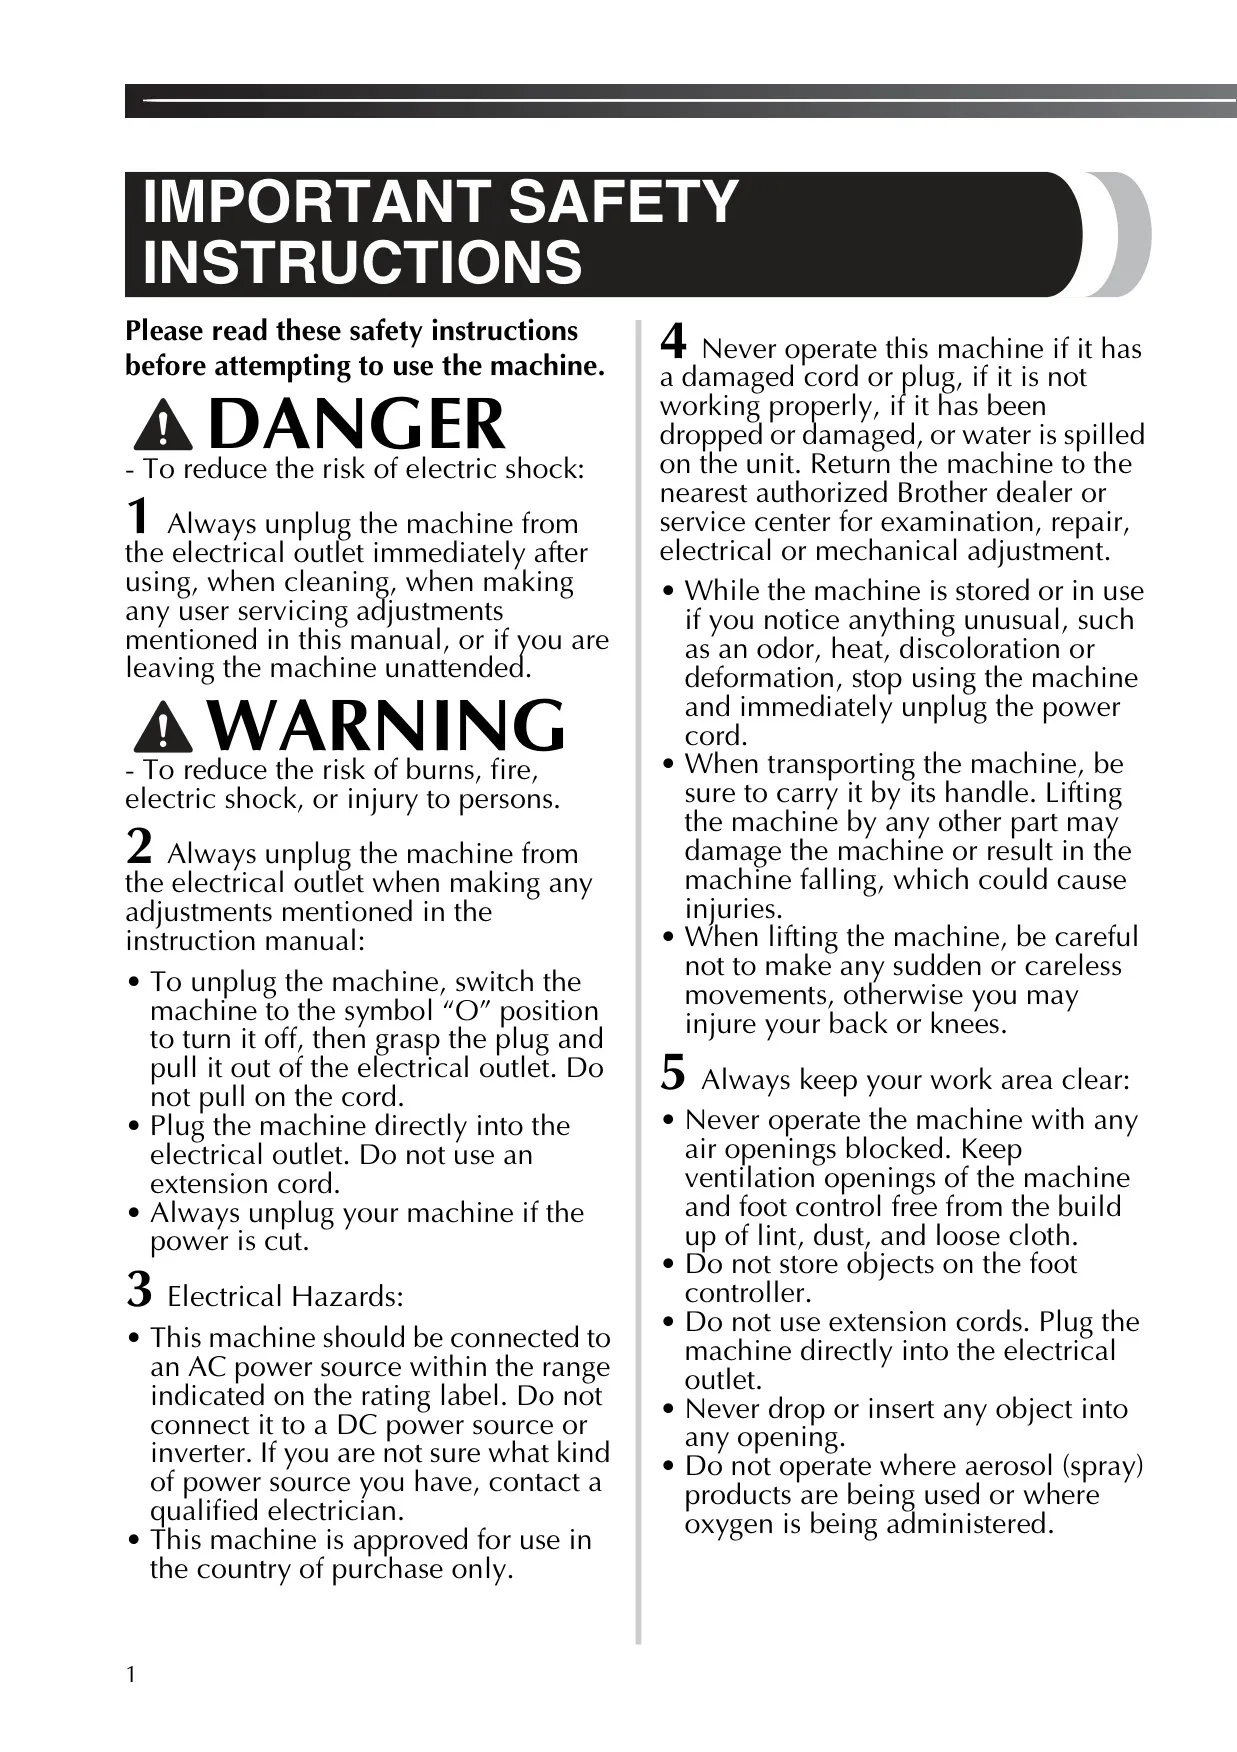
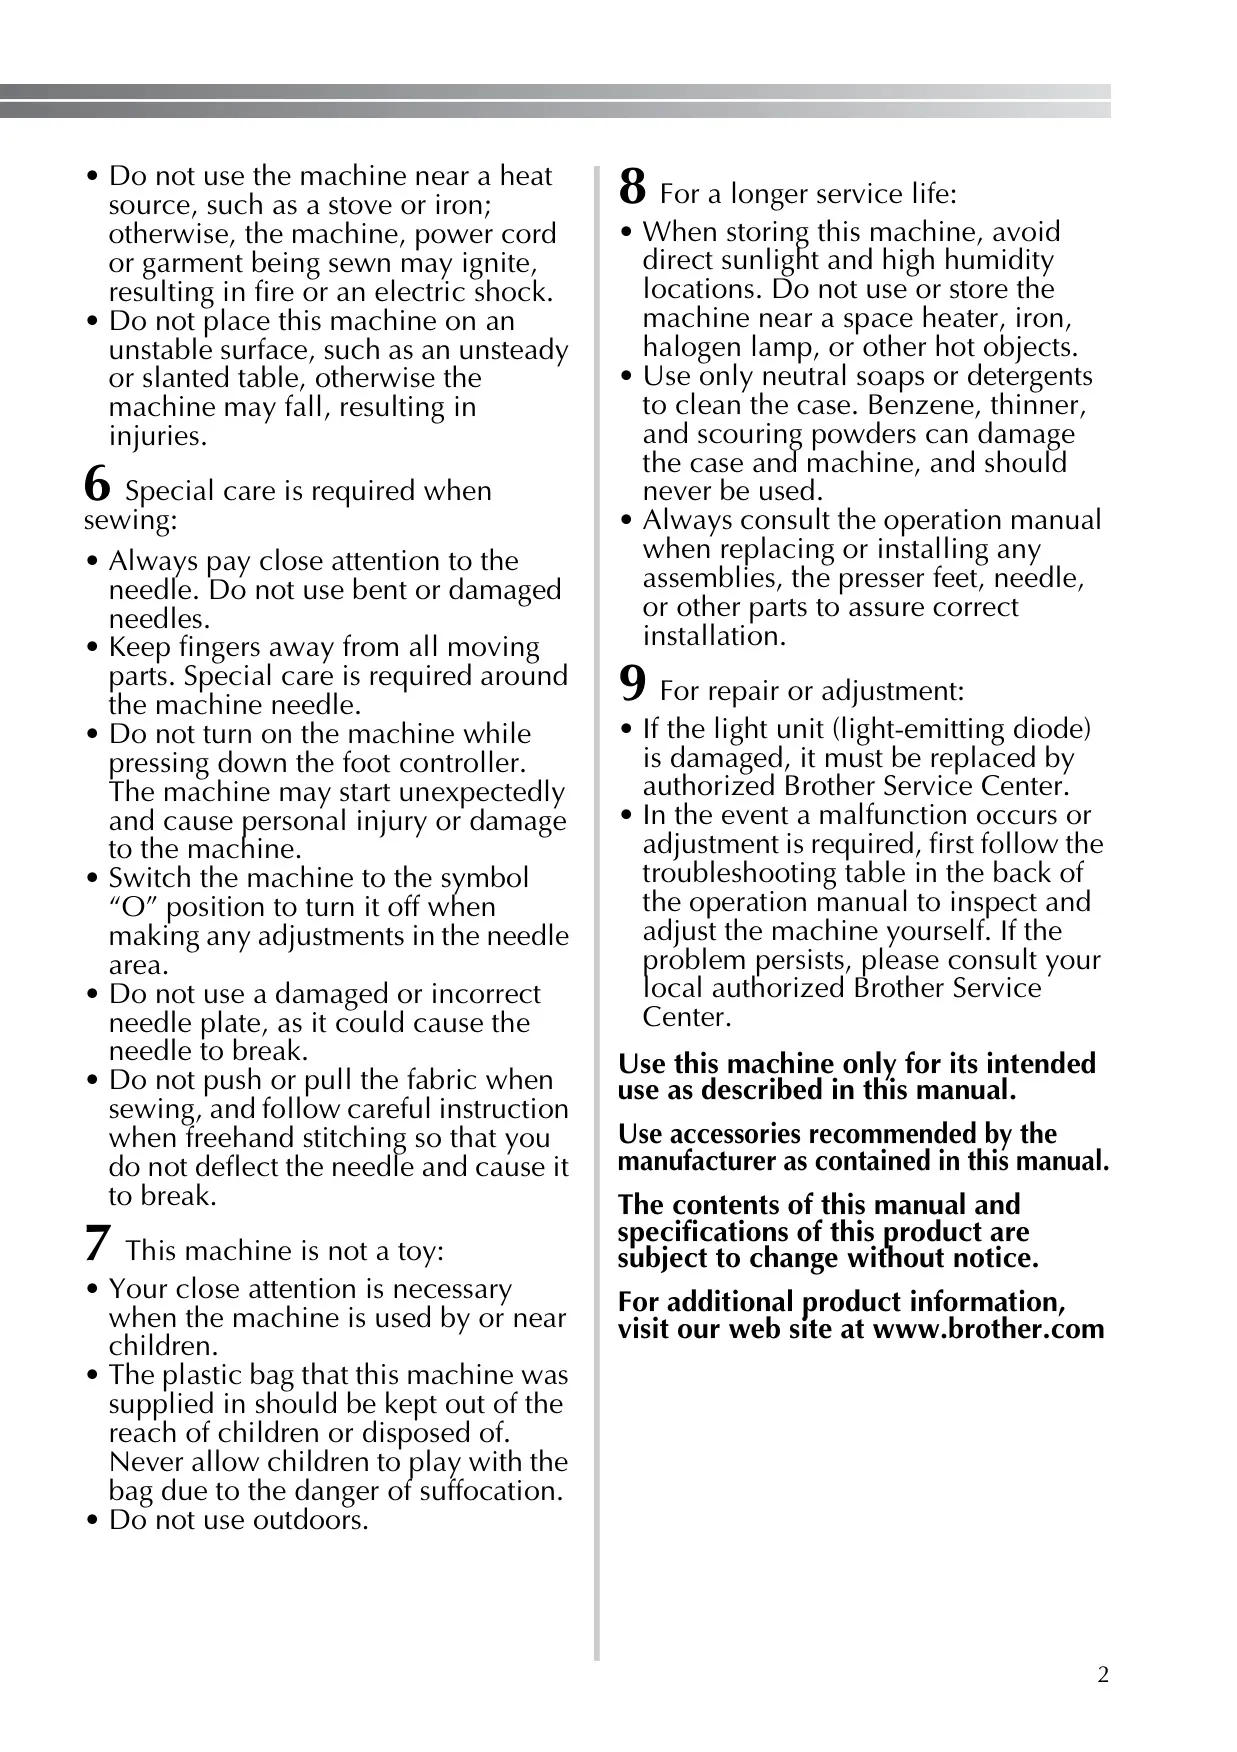

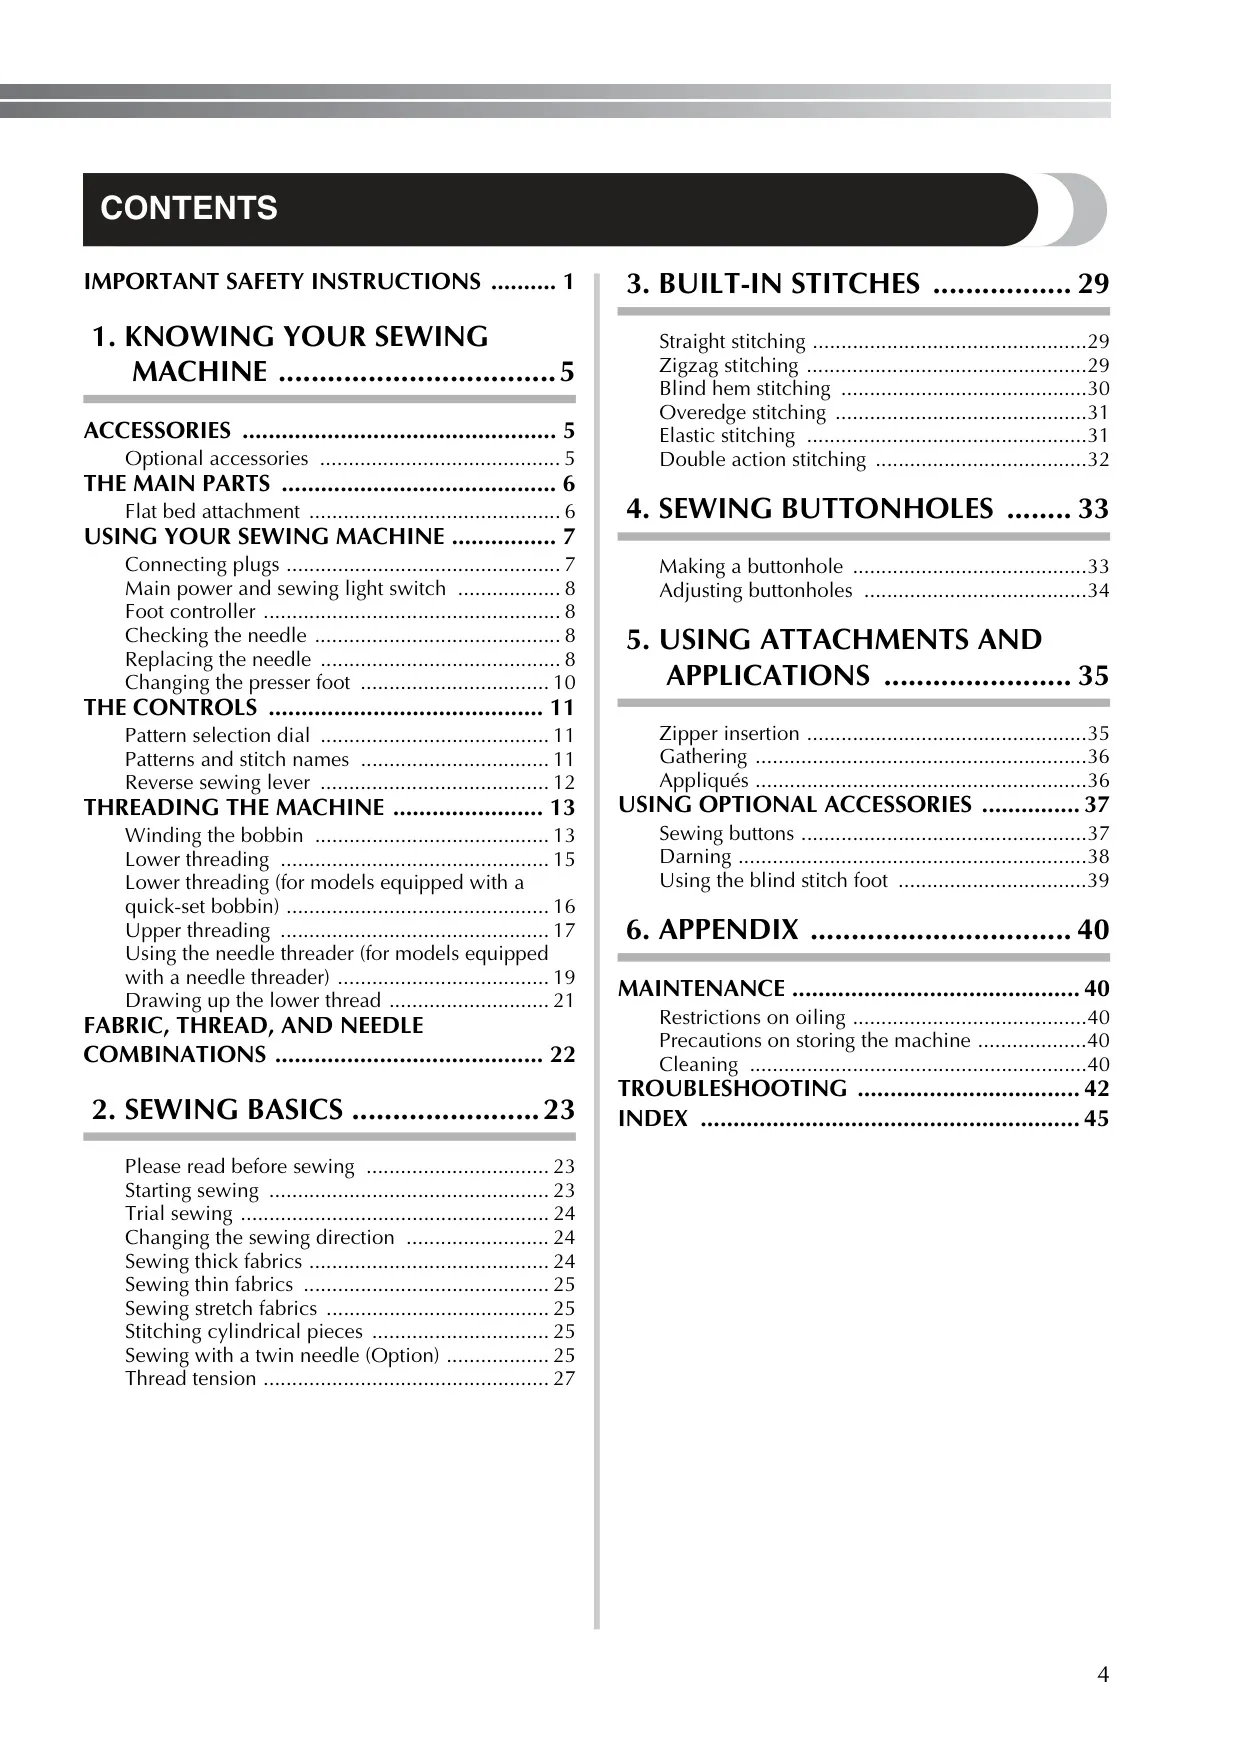














Brother LS14S Sewing Machine
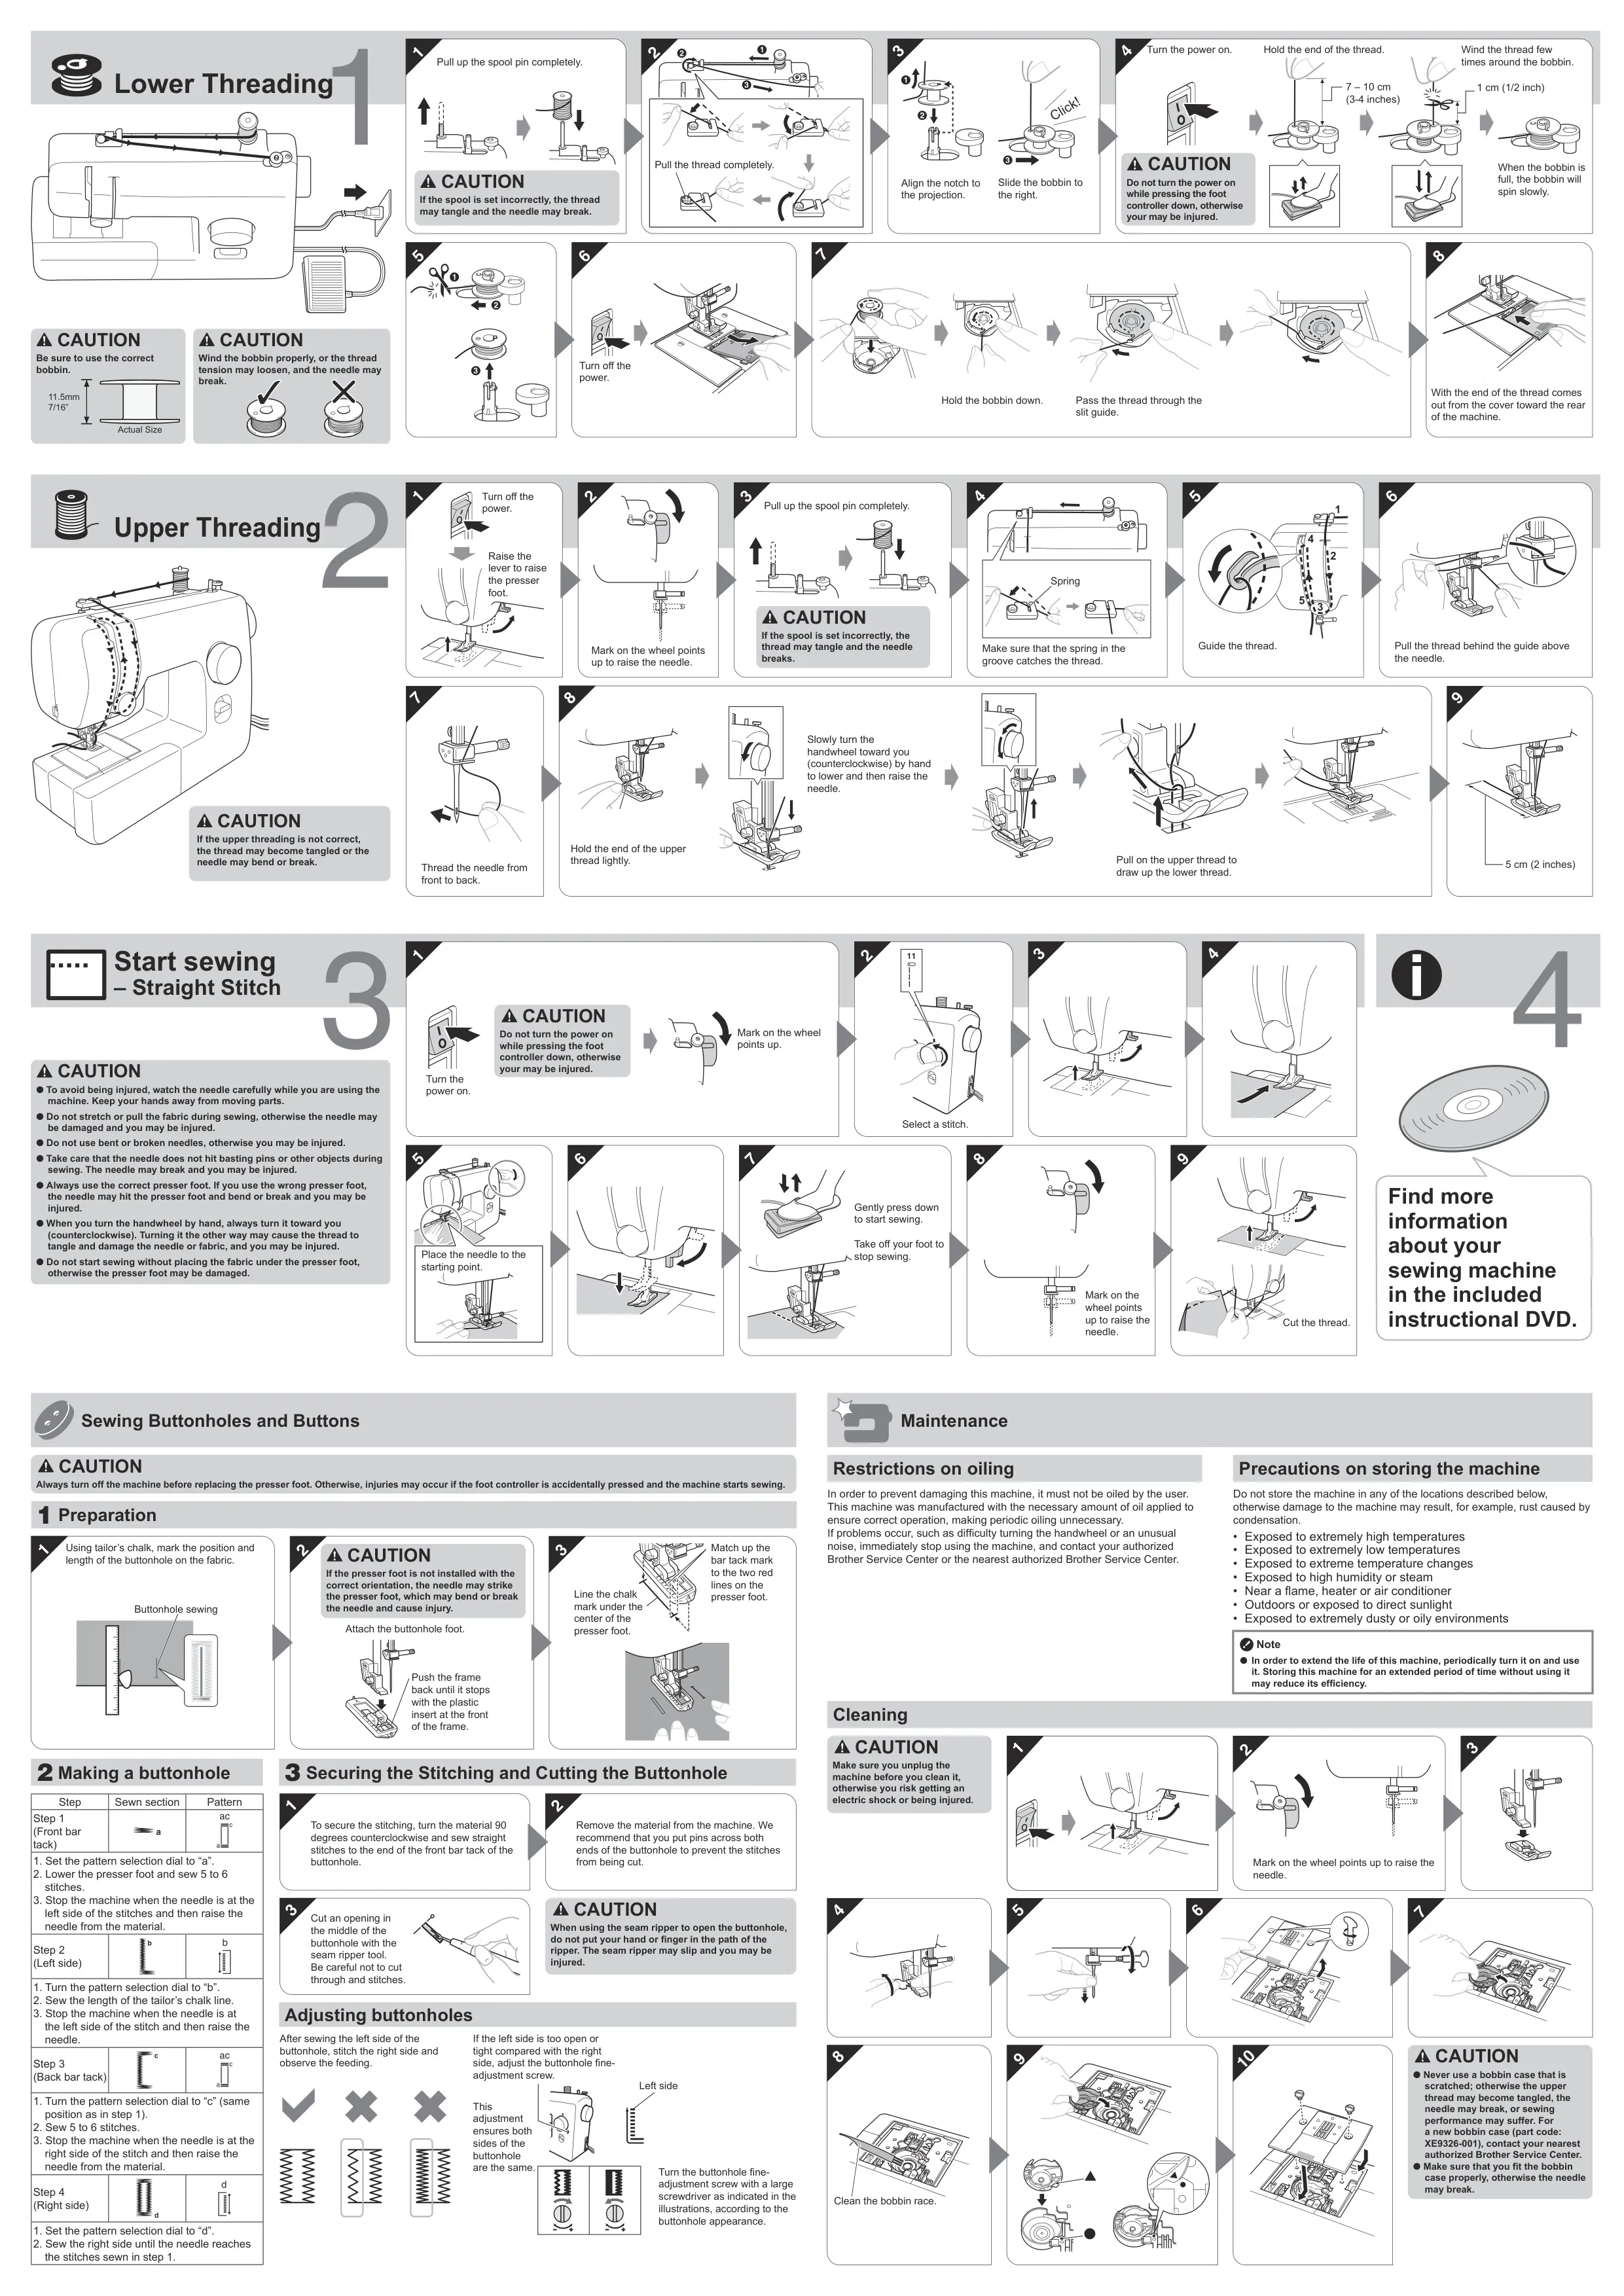

Brother LS14S Sewing Machine Instructions
Here we offer the Brother LS14S Sewing Machine manual completely free and in English. We have cataloged this manual in the Sewing Machines section on Manualverse, and it has been rated by 1 users with an average rating of 5. If you have any specific questions about Brother LS14S Sewing Machine, we suggest checking the Frequently Asked Questions (FAQs) section of this manual.
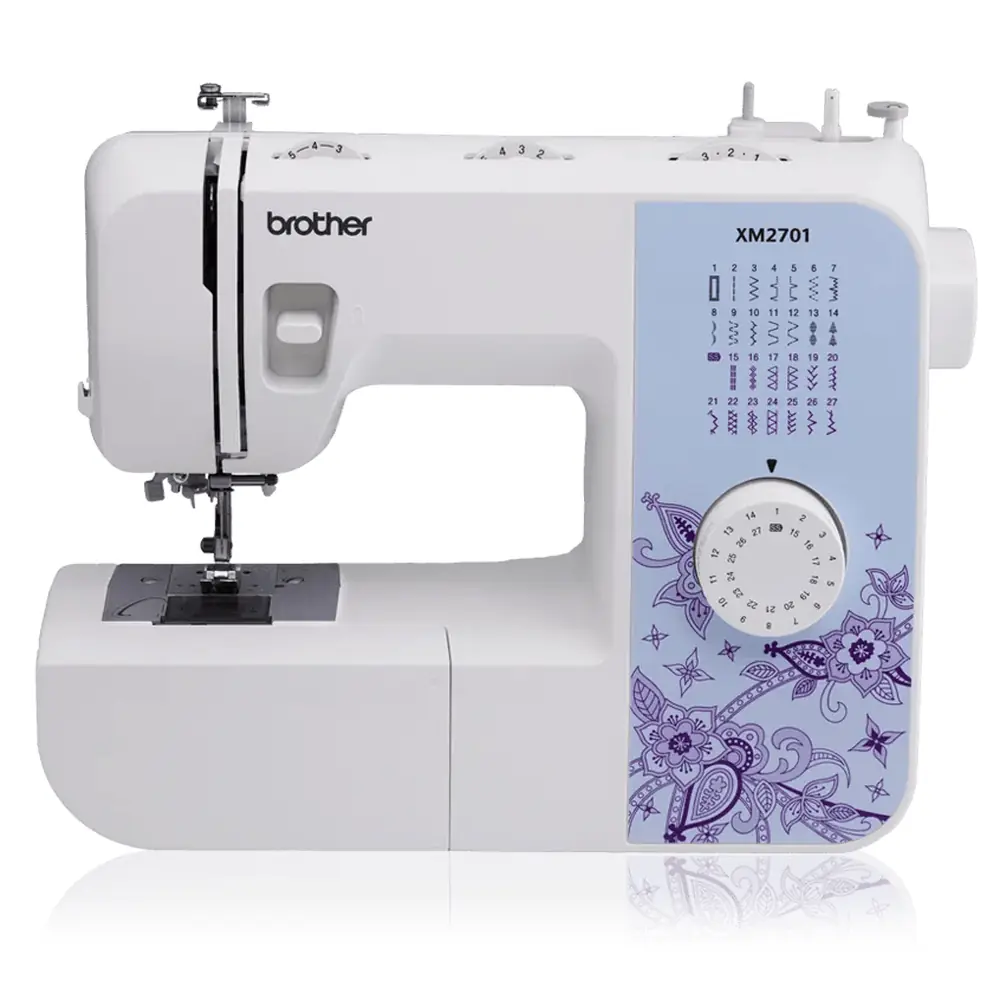
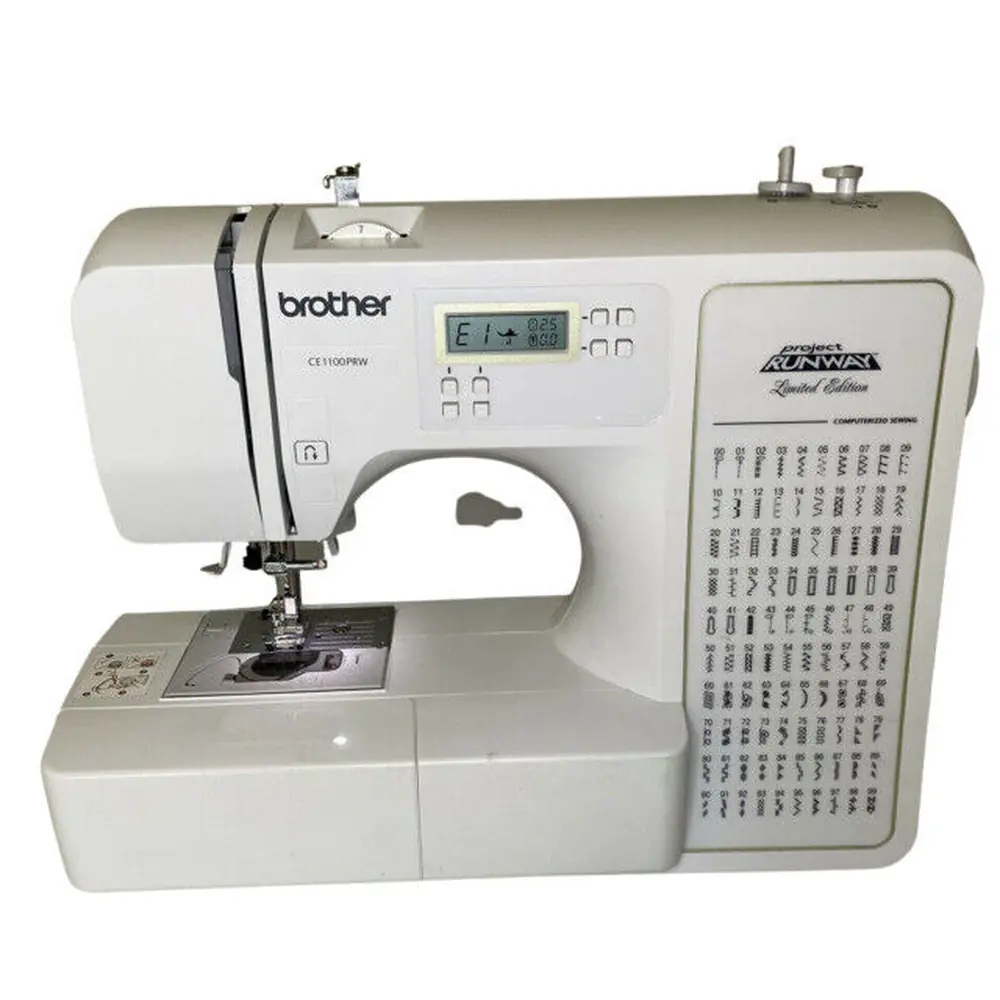
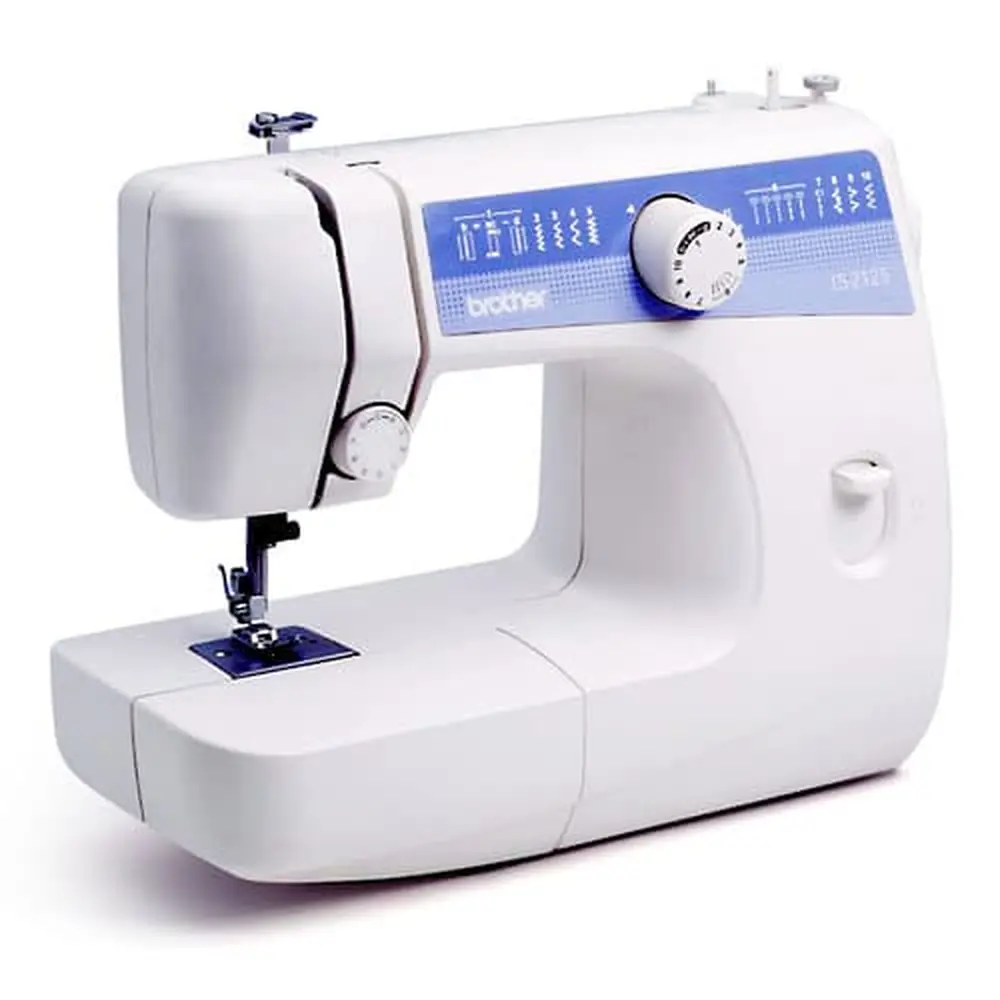
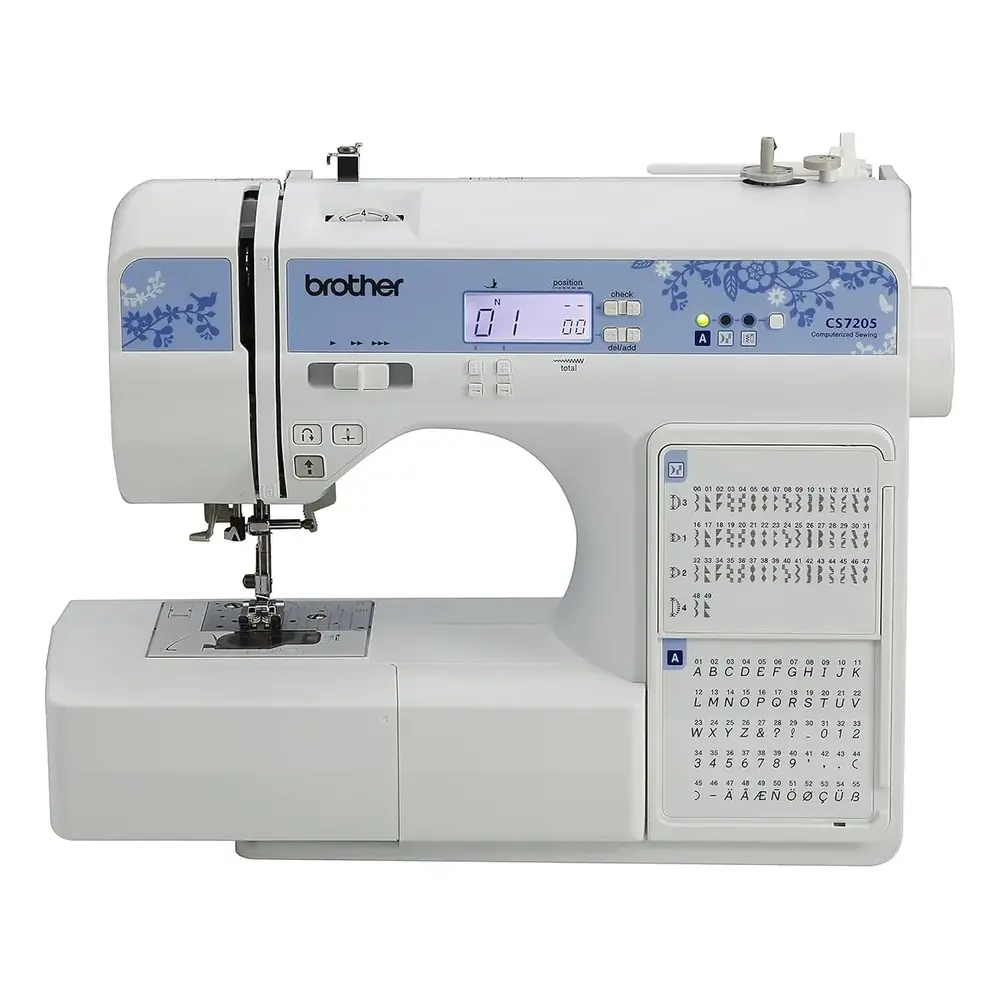
Product Images

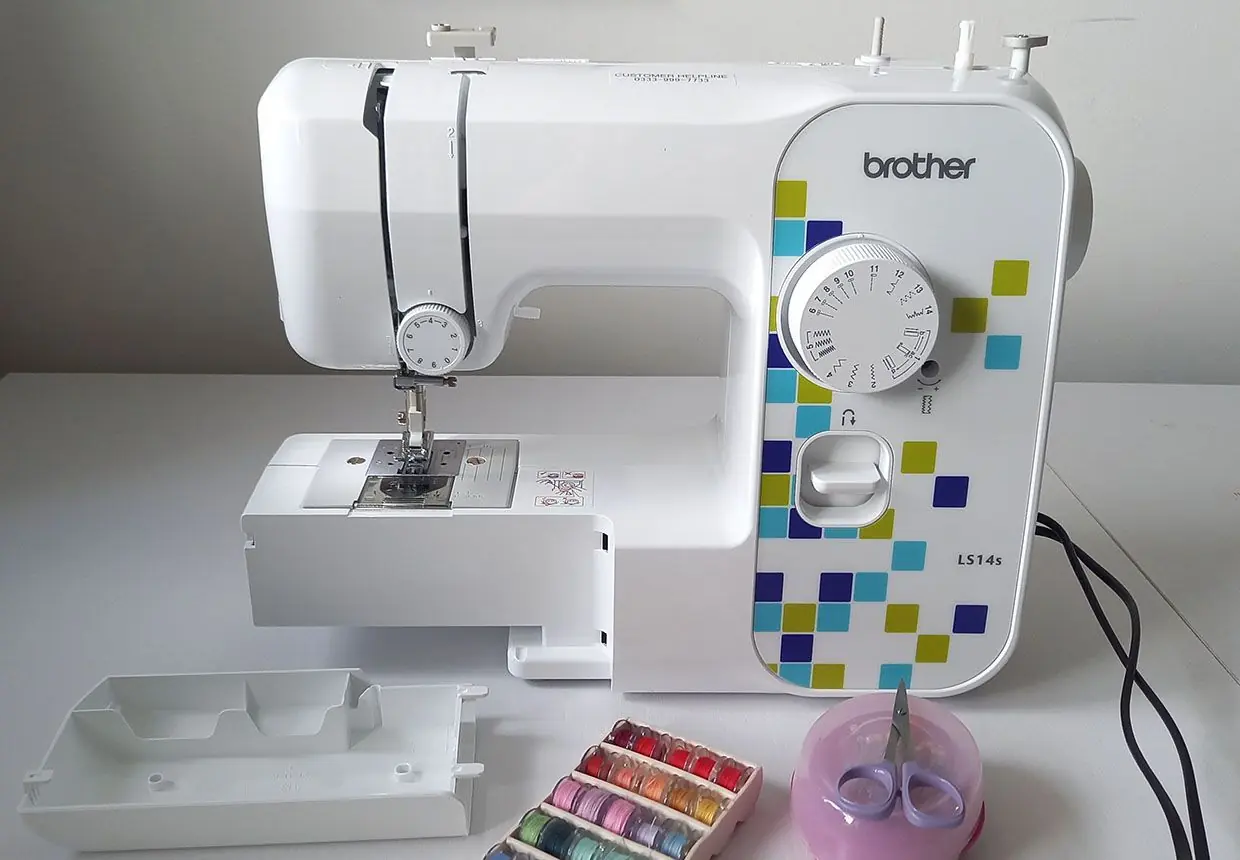
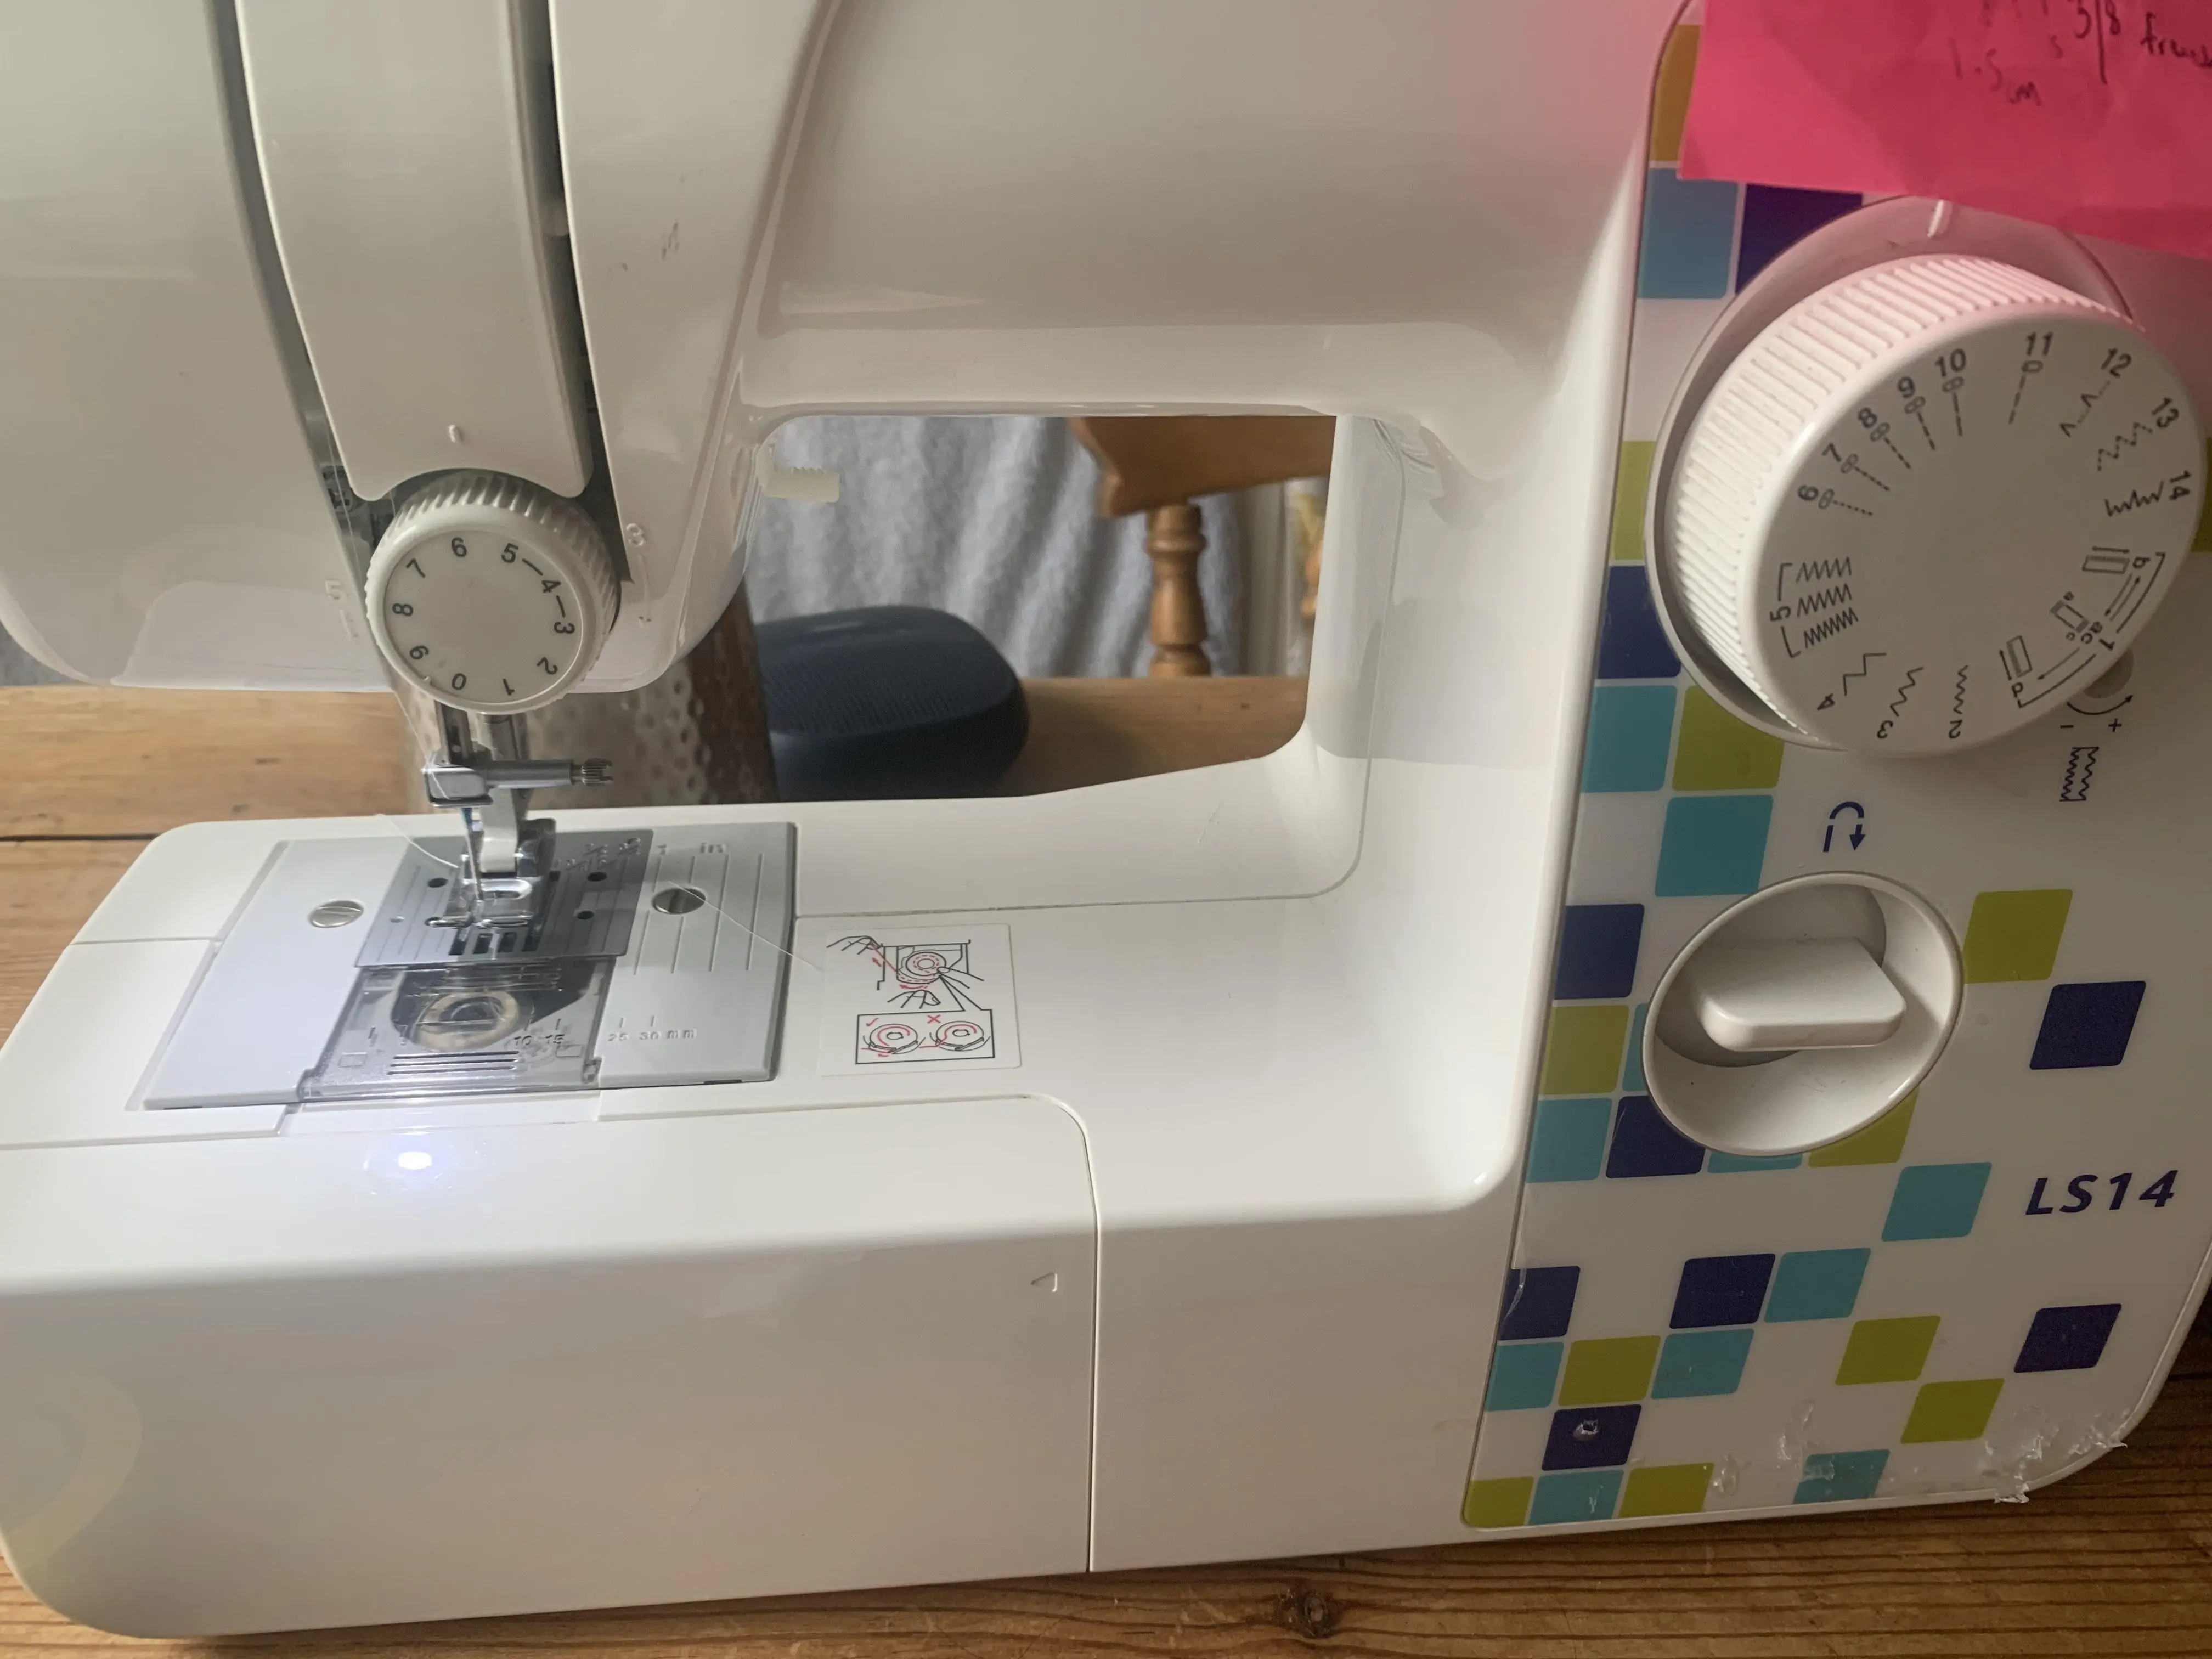
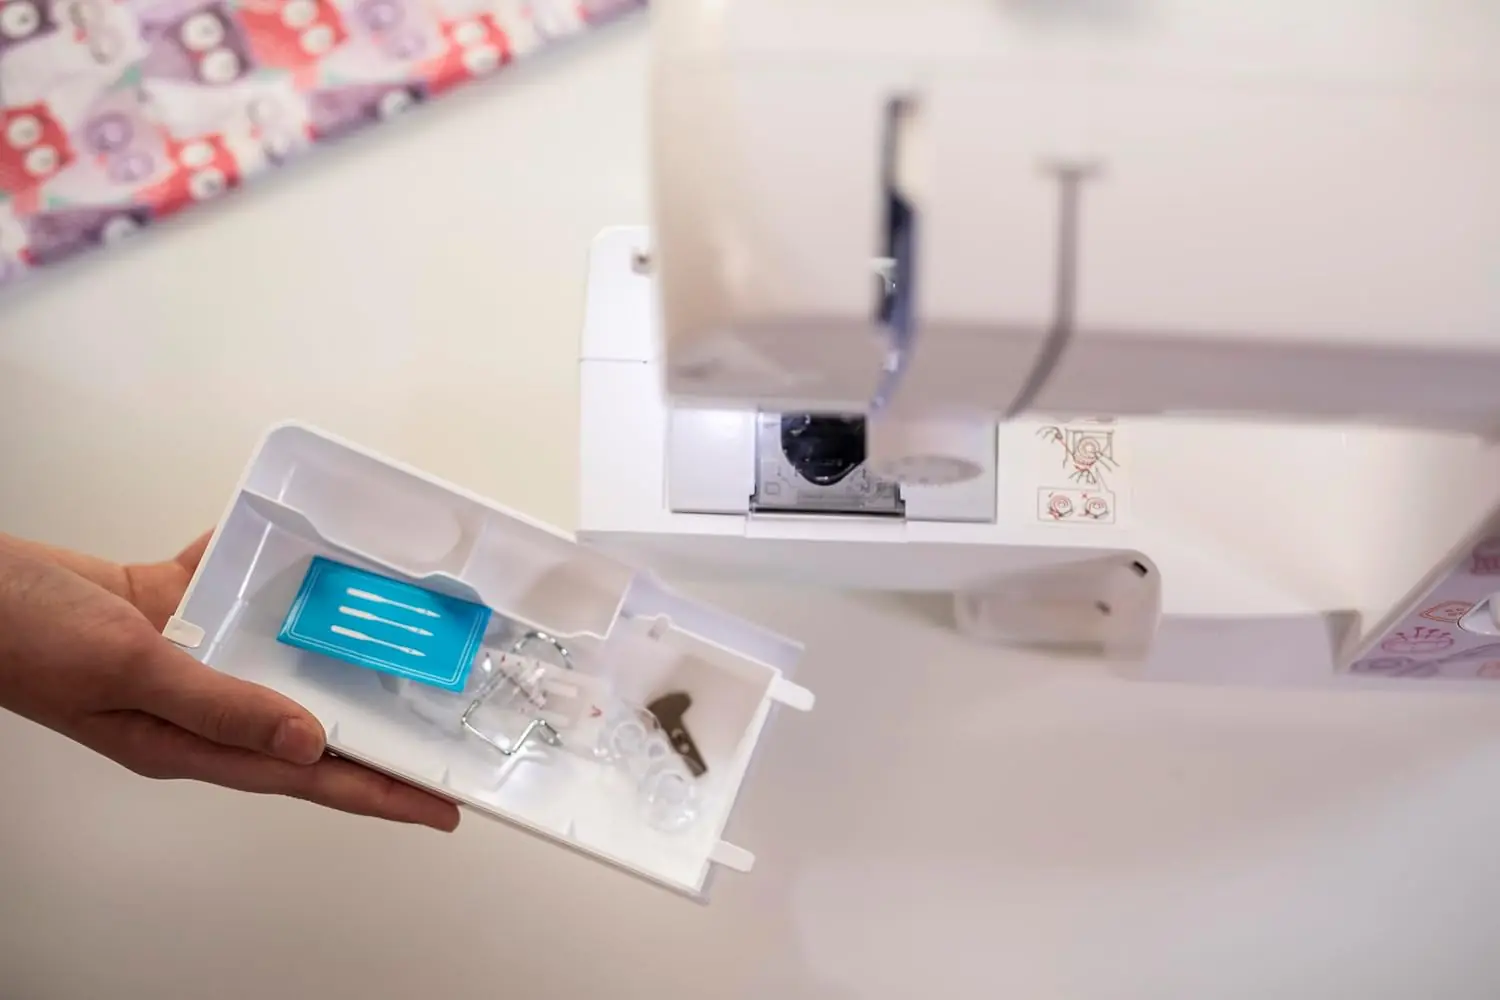
Brother LS14S Sewing Machine Specifications
| Feature | Specification |
|---|---|
| Manufacturer | Brother |
| Model | LS14S |
| Product Code (manual series) | 888-X64 / X74 / X84 / X67 / X77 / X87 |
| Machine Type | Mechanical household sewing machine with free arm |
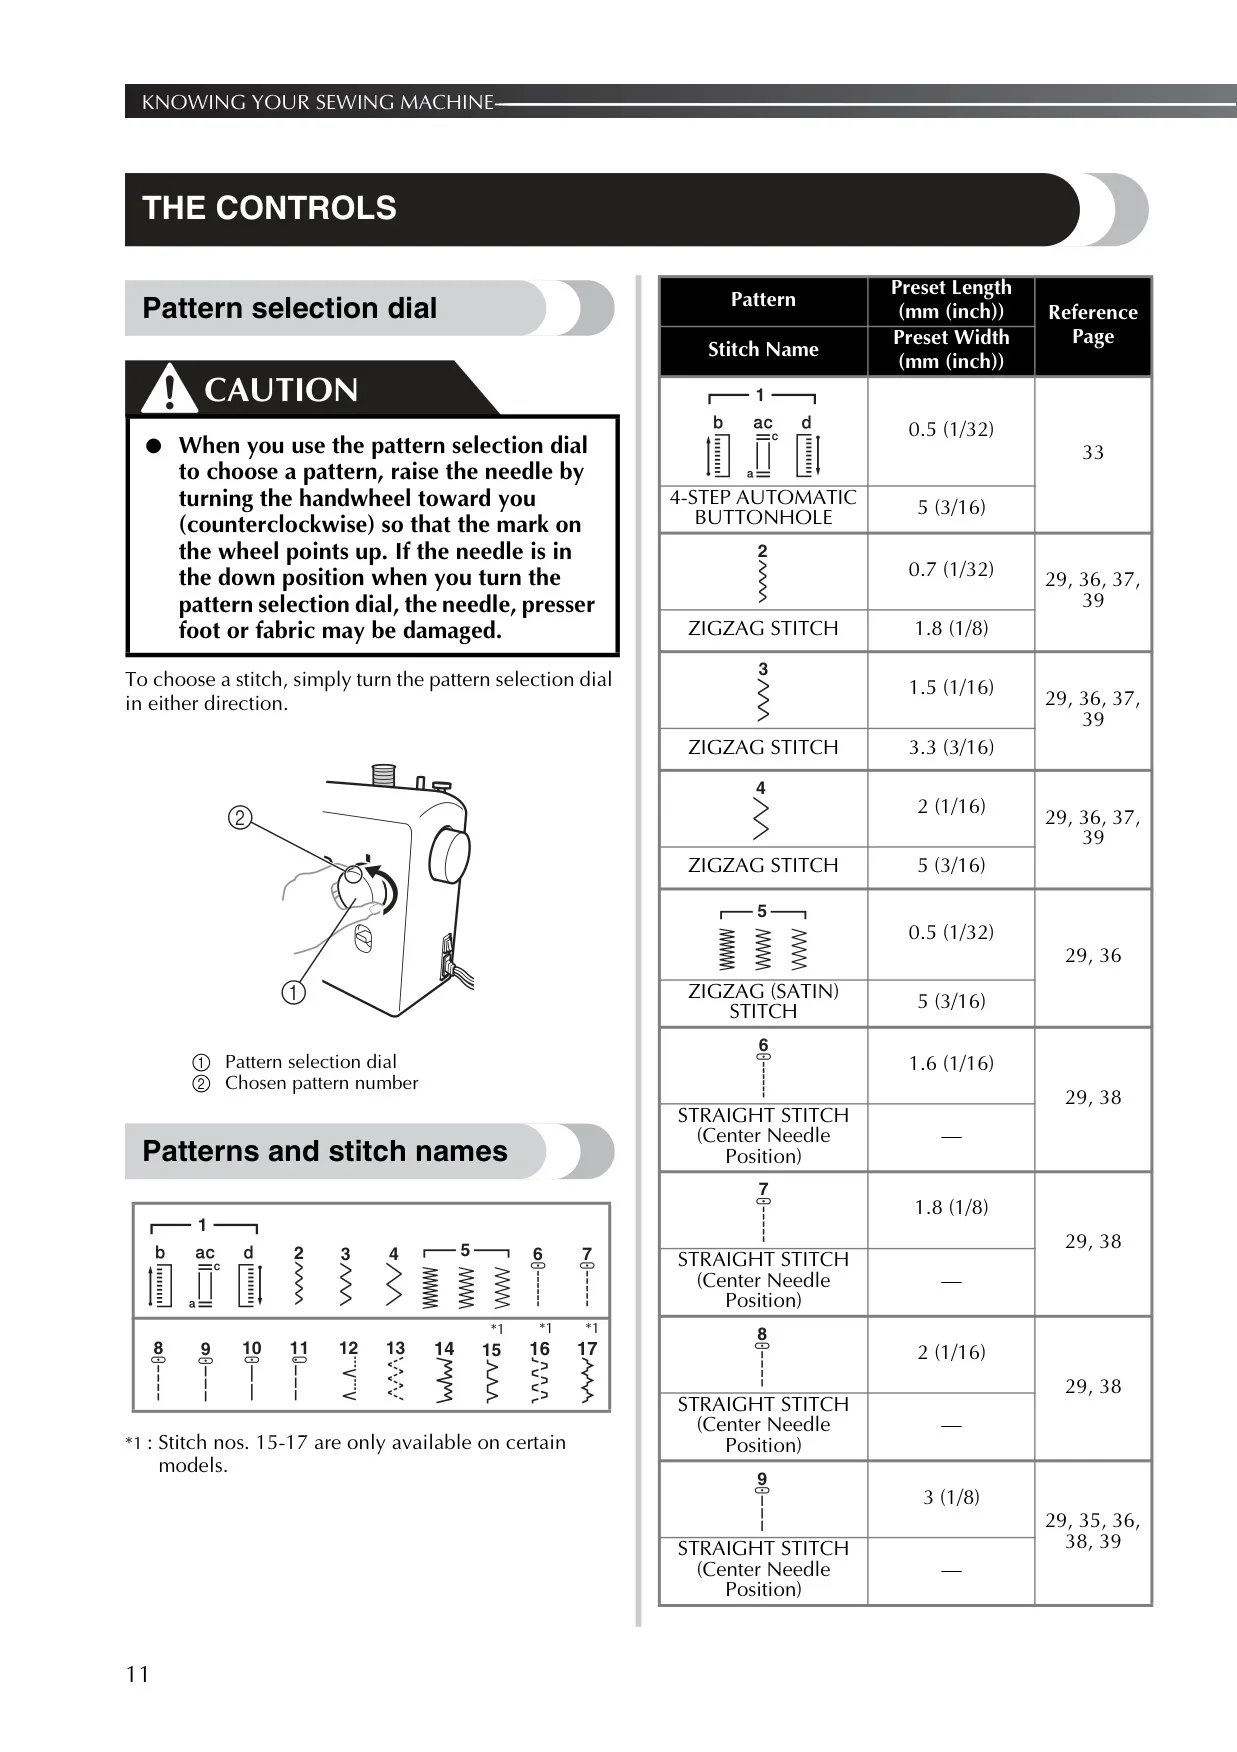
| Stitch Selection | Rotary pattern selection dial (turns in either direction) |
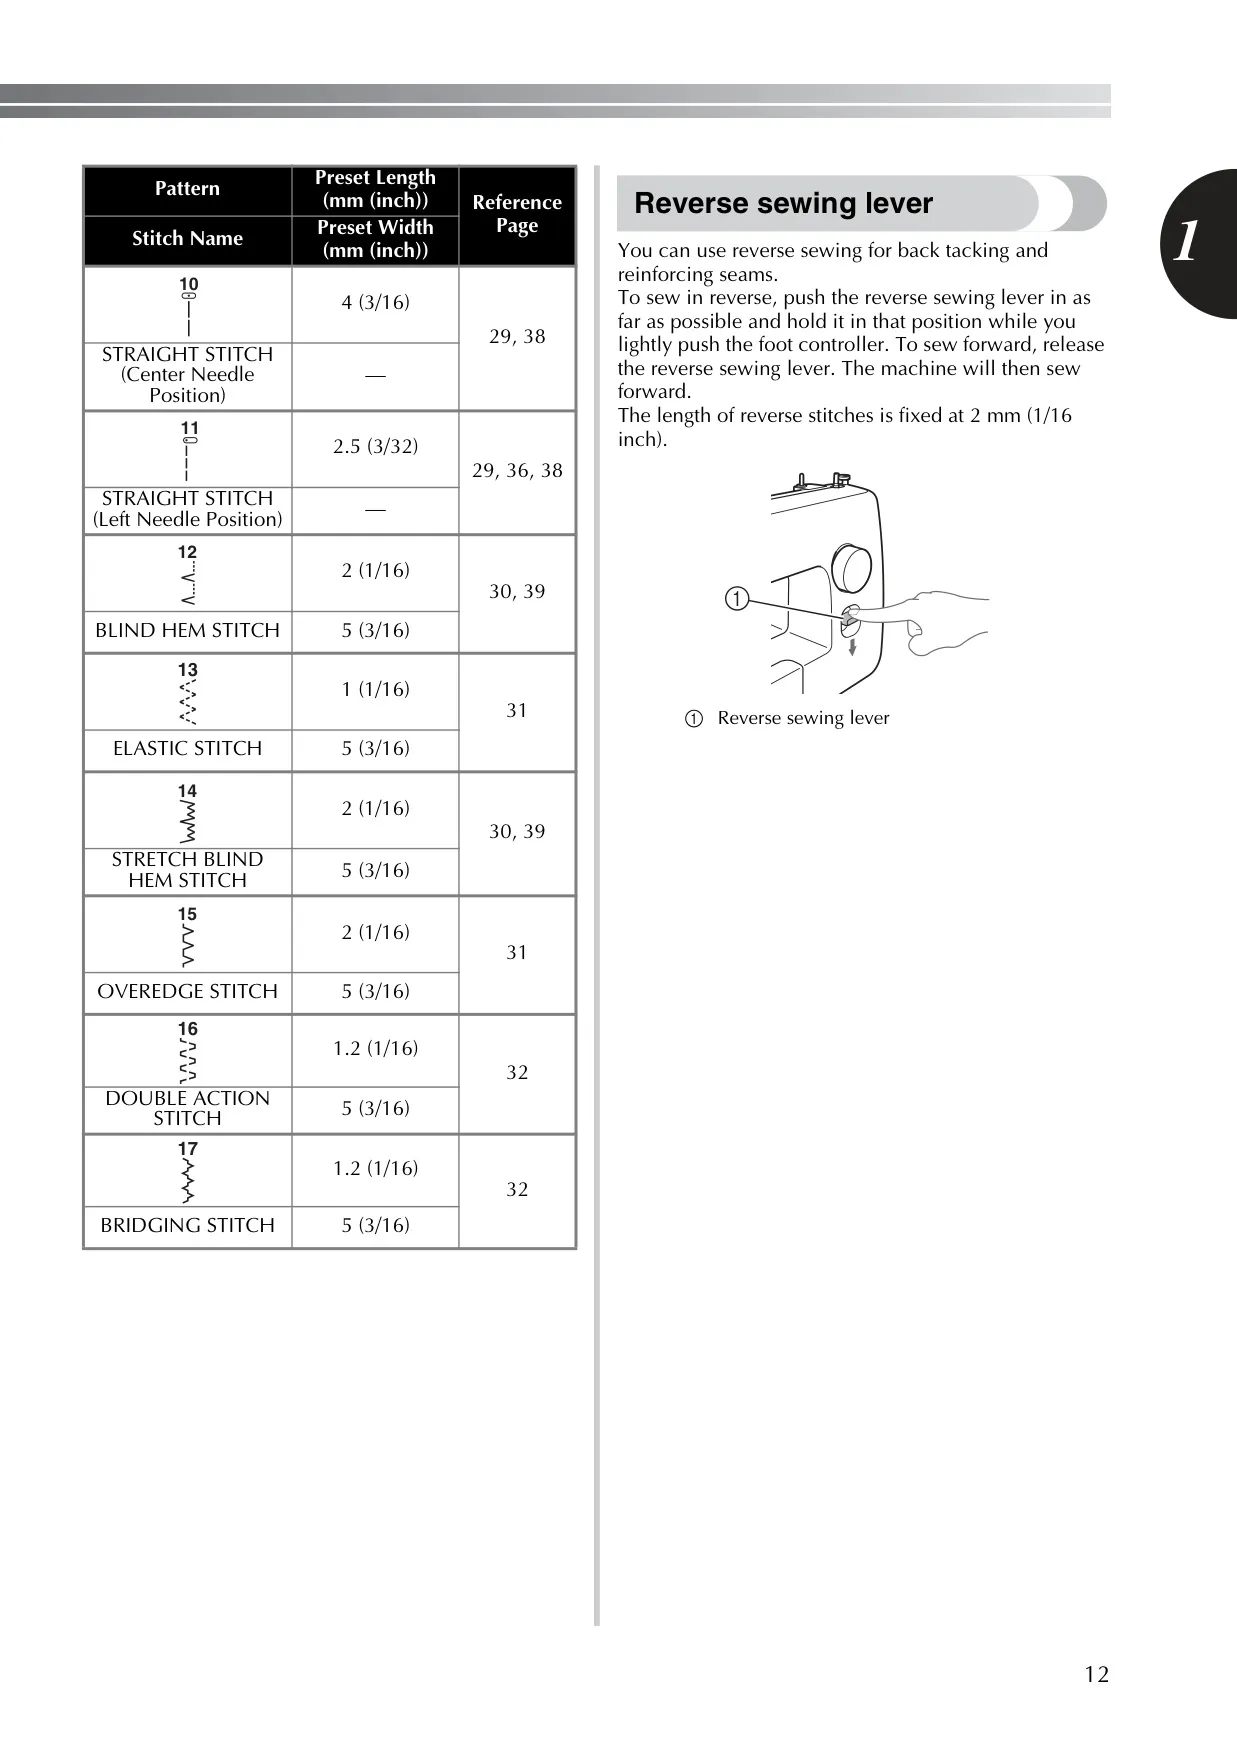
| Built-in Stitch Patterns | 14 (patterns 1–14); patterns 15–17 (overedge, double action, bridging) only on certain models in the series |
| Buttonhole Type | 4-step automatic buttonhole (pattern 1) |
| Buttonhole Stitch Length / Width | 0.5 mm (1/32 in) / 5 mm (3/16 in) |
| Straight Stitch Lengths (center needle) | 1.6, 1.8, 2, 3 and 4 mm (patterns 6–10) |
| Straight Stitch (left needle position) | 2.5 mm (3/32 in) length (pattern 11) |
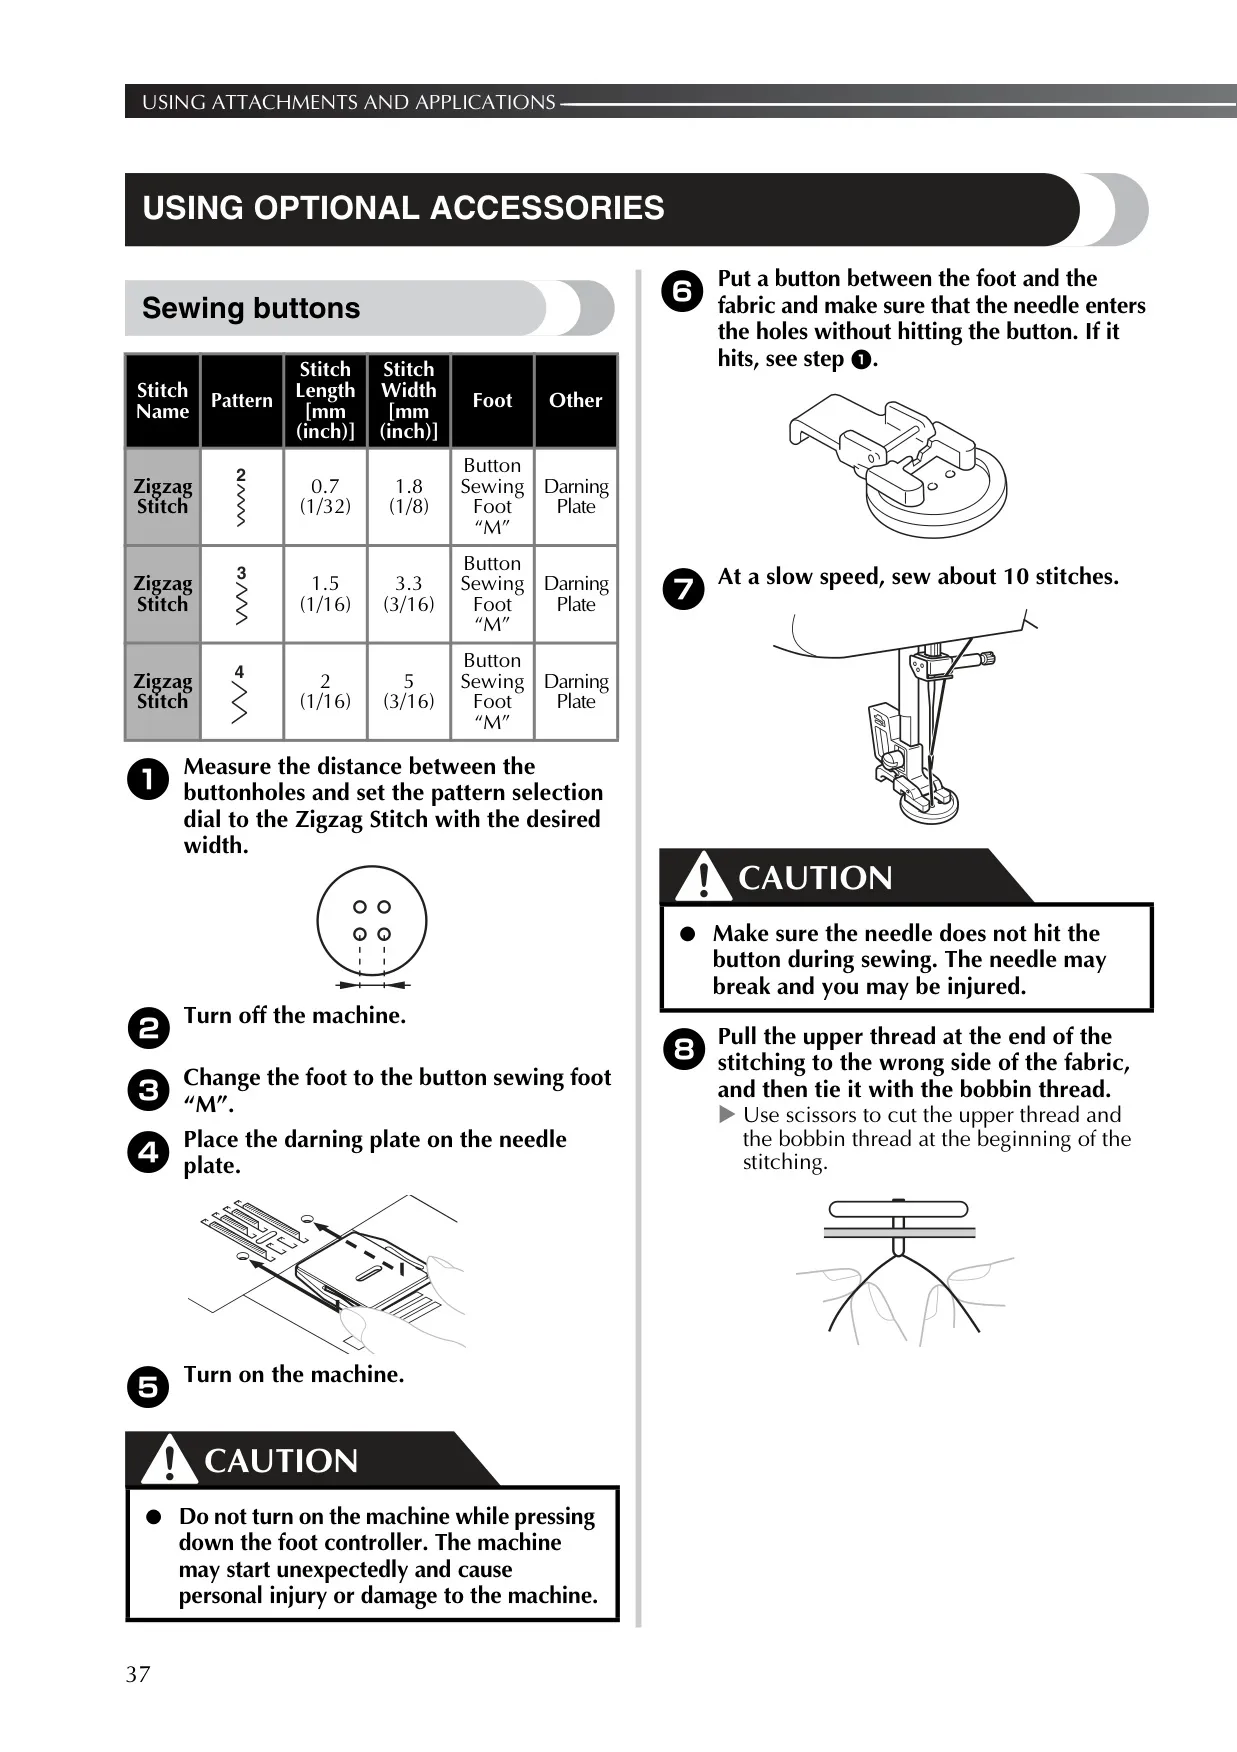
| Zigzag Stitch Settings | 0.7 × 1.8 mm, 1.5 × 3.3 mm, 2 × 5 mm (length × width, patterns 2–4) |
| Zigzag (Satin) Stitch | 0.5 mm length × 5 mm width (pattern 5), three selectable length positions |
| Blind Hem / Stretch Blind Hem | 2 mm length × 5 mm width (patterns 12 and 14) |
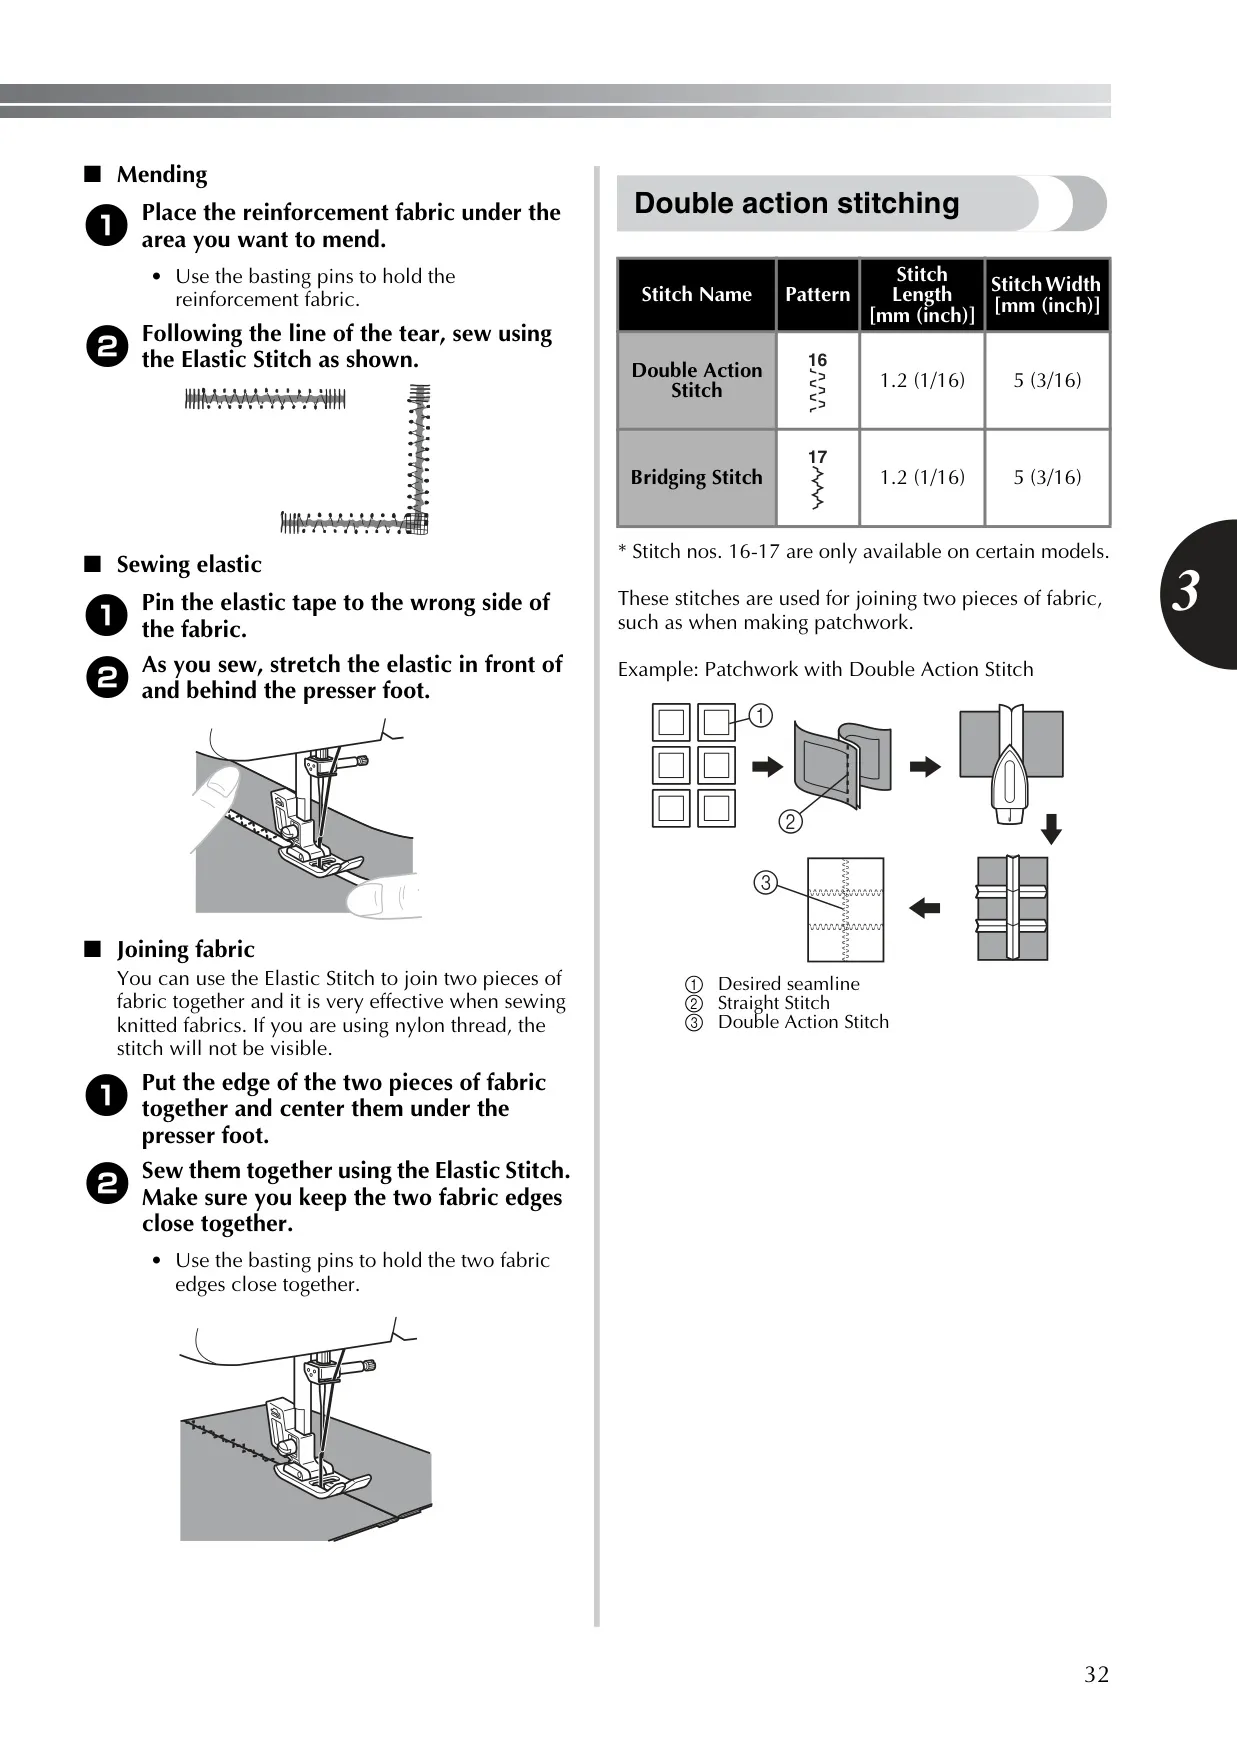
| Elastic Stitch | 1 mm length × 5 mm width (pattern 13) |
| Maximum Stitch Width | 5 mm (3/16 in) |
| Maximum Stitch Length | 4 mm (3/16 in) |
| Reverse Stitch Length | Fixed at 2 mm (1/16 in) |
| Maximum Fabric Thickness | 6 mm (15/64 in) |
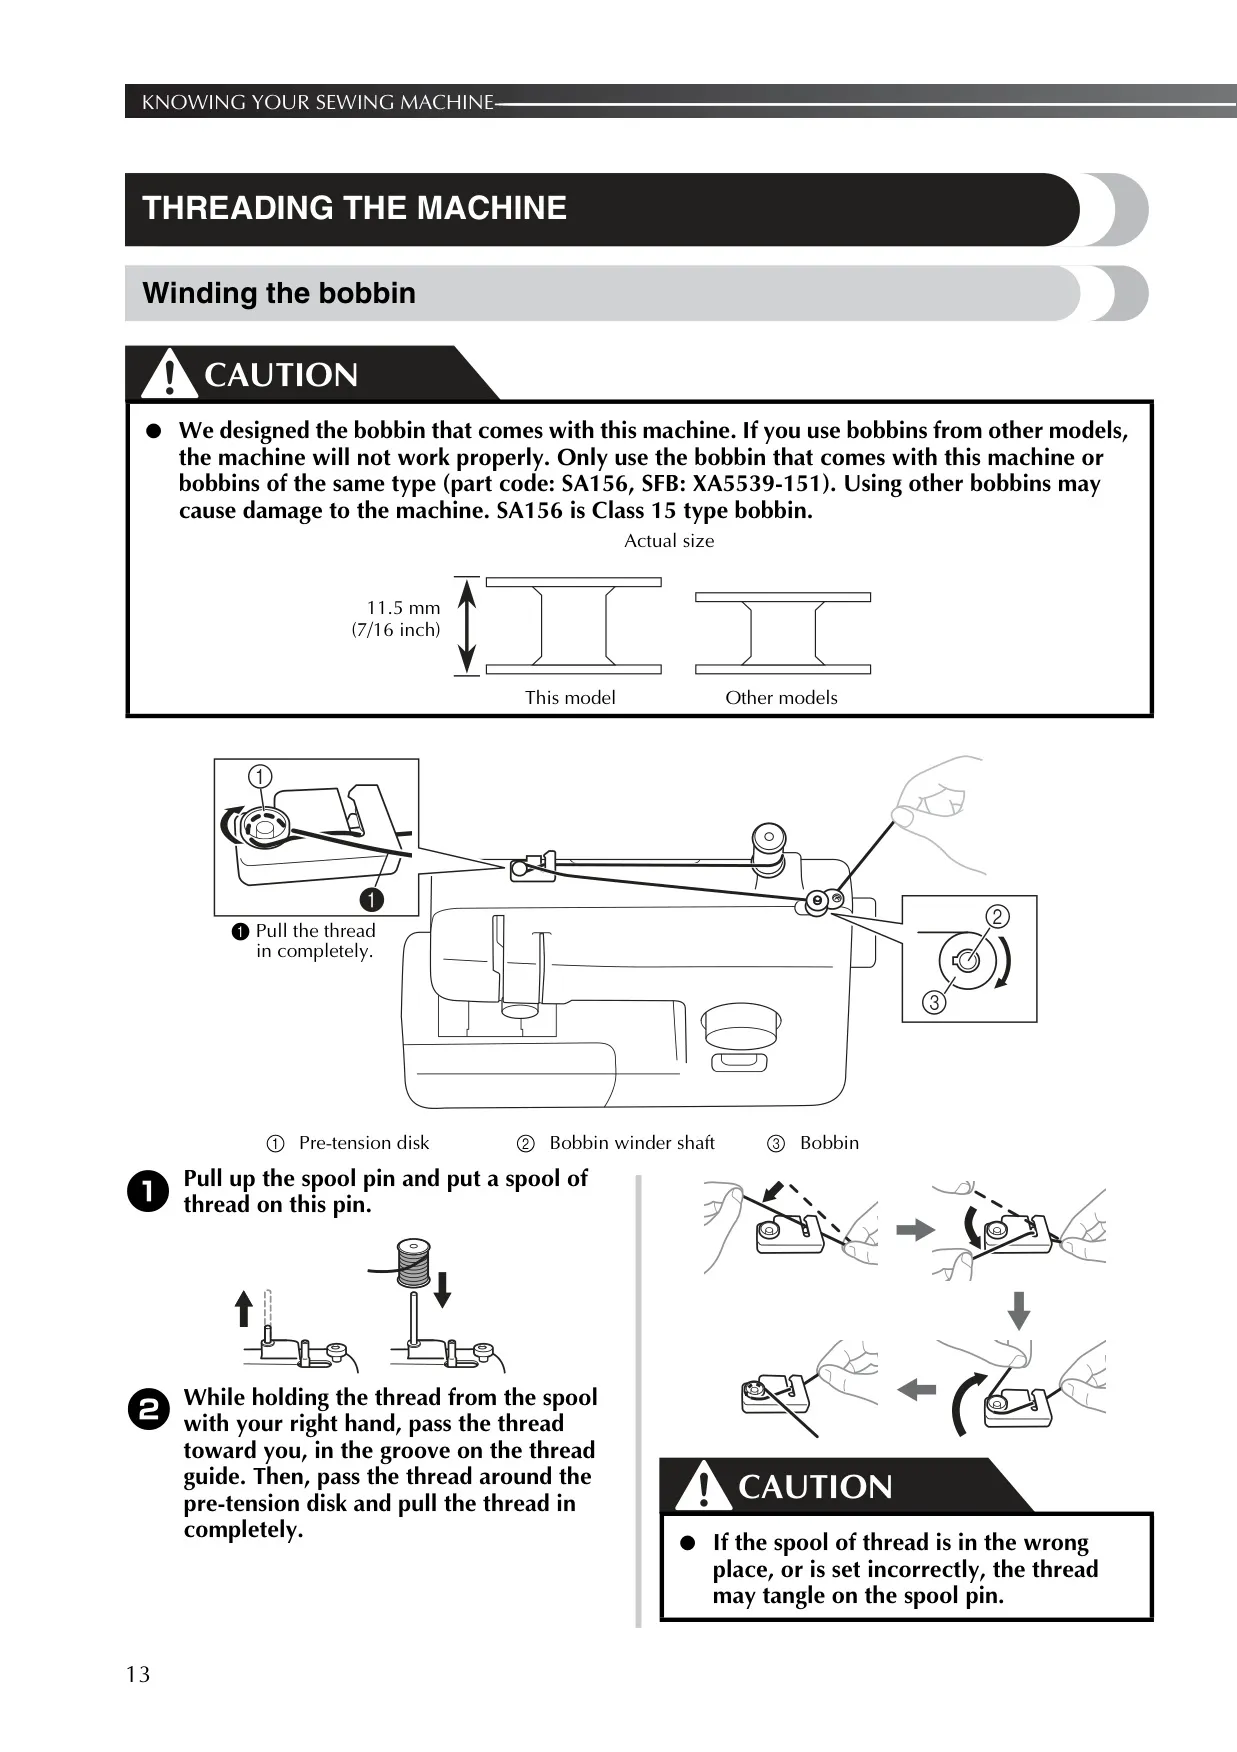
| Bobbin Type | Class 15, part code SA156 (SFB: XA5539-151), 11.5 mm (7/16 in) height |
| Replacement Bobbin Case | Part code XE9326-001 |
| Included Needles | 90/14 needle set (3-piece XE5328-001 or 2-piece XE7064-001) |
| Needle Threader Compatibility | 75/11 to 100/16 home sewing needles (not 65/9, twin or wing needles); threader only on certain models |
| Twin Needle (optional) | X57521-021, 2.0/75, 2 mm width |
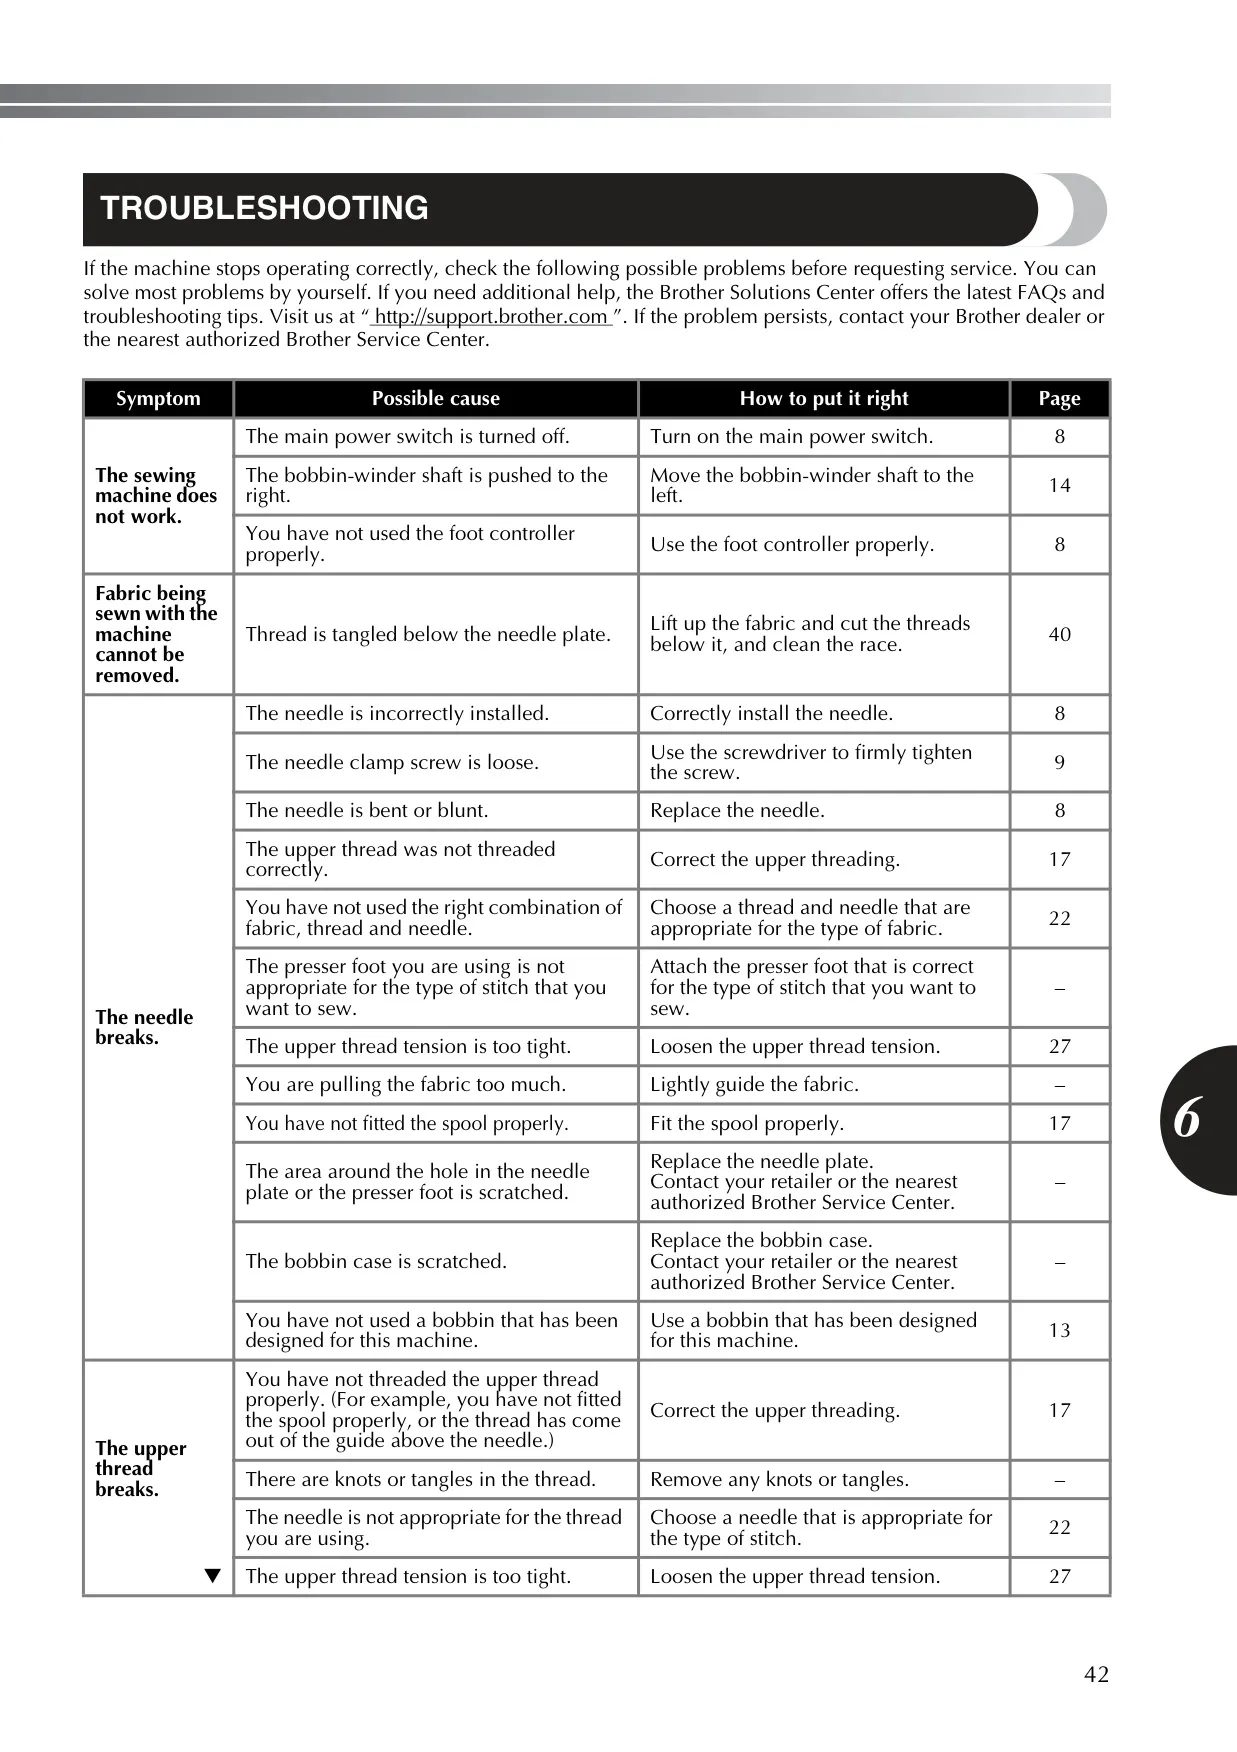
| Minimum Thread Weight | Heavier than #20 (never use #20 or lower) |
| Sewing Light | LED (light-emitting diode), service-replaceable only |
| Power Switch | Combined main power and sewing light switch (I / O) |
| Foot Controller | KD-1902 (110–120 V; 110–127 V Brazil), KD-2902 (220–240 V) |
| Power Plug (U.S.A.) | Polarized plug (one blade wider than the other) |
| Included Presser Feet | Zigzag foot "J" (XC4901-121), Buttonhole foot "A" (X59369-321), Zipper foot "I" (XE9369-001) |
| Other Included Accessories | Bobbins, needle set, screwdriver (XF3557-001), foot controller (varies by model) |
| Optional Accessories | Extra spool pin, twin needle, darning plate, button sewing foot "M", walking foot, quilting foot, 1/4-inch quilting foot, narrow hemmer foot, blind stitch foot, quilting guide |
| Free Arm | Yes, via removable flat bed attachment with accessory compartment |
| Lubrication | Factory-oiled; user oiling not permitted |
| Intended Use | Household use |
| Additional Learning Material | Instructional DVD with video tutorials included |
Brother LS14S Sewing Machine Details
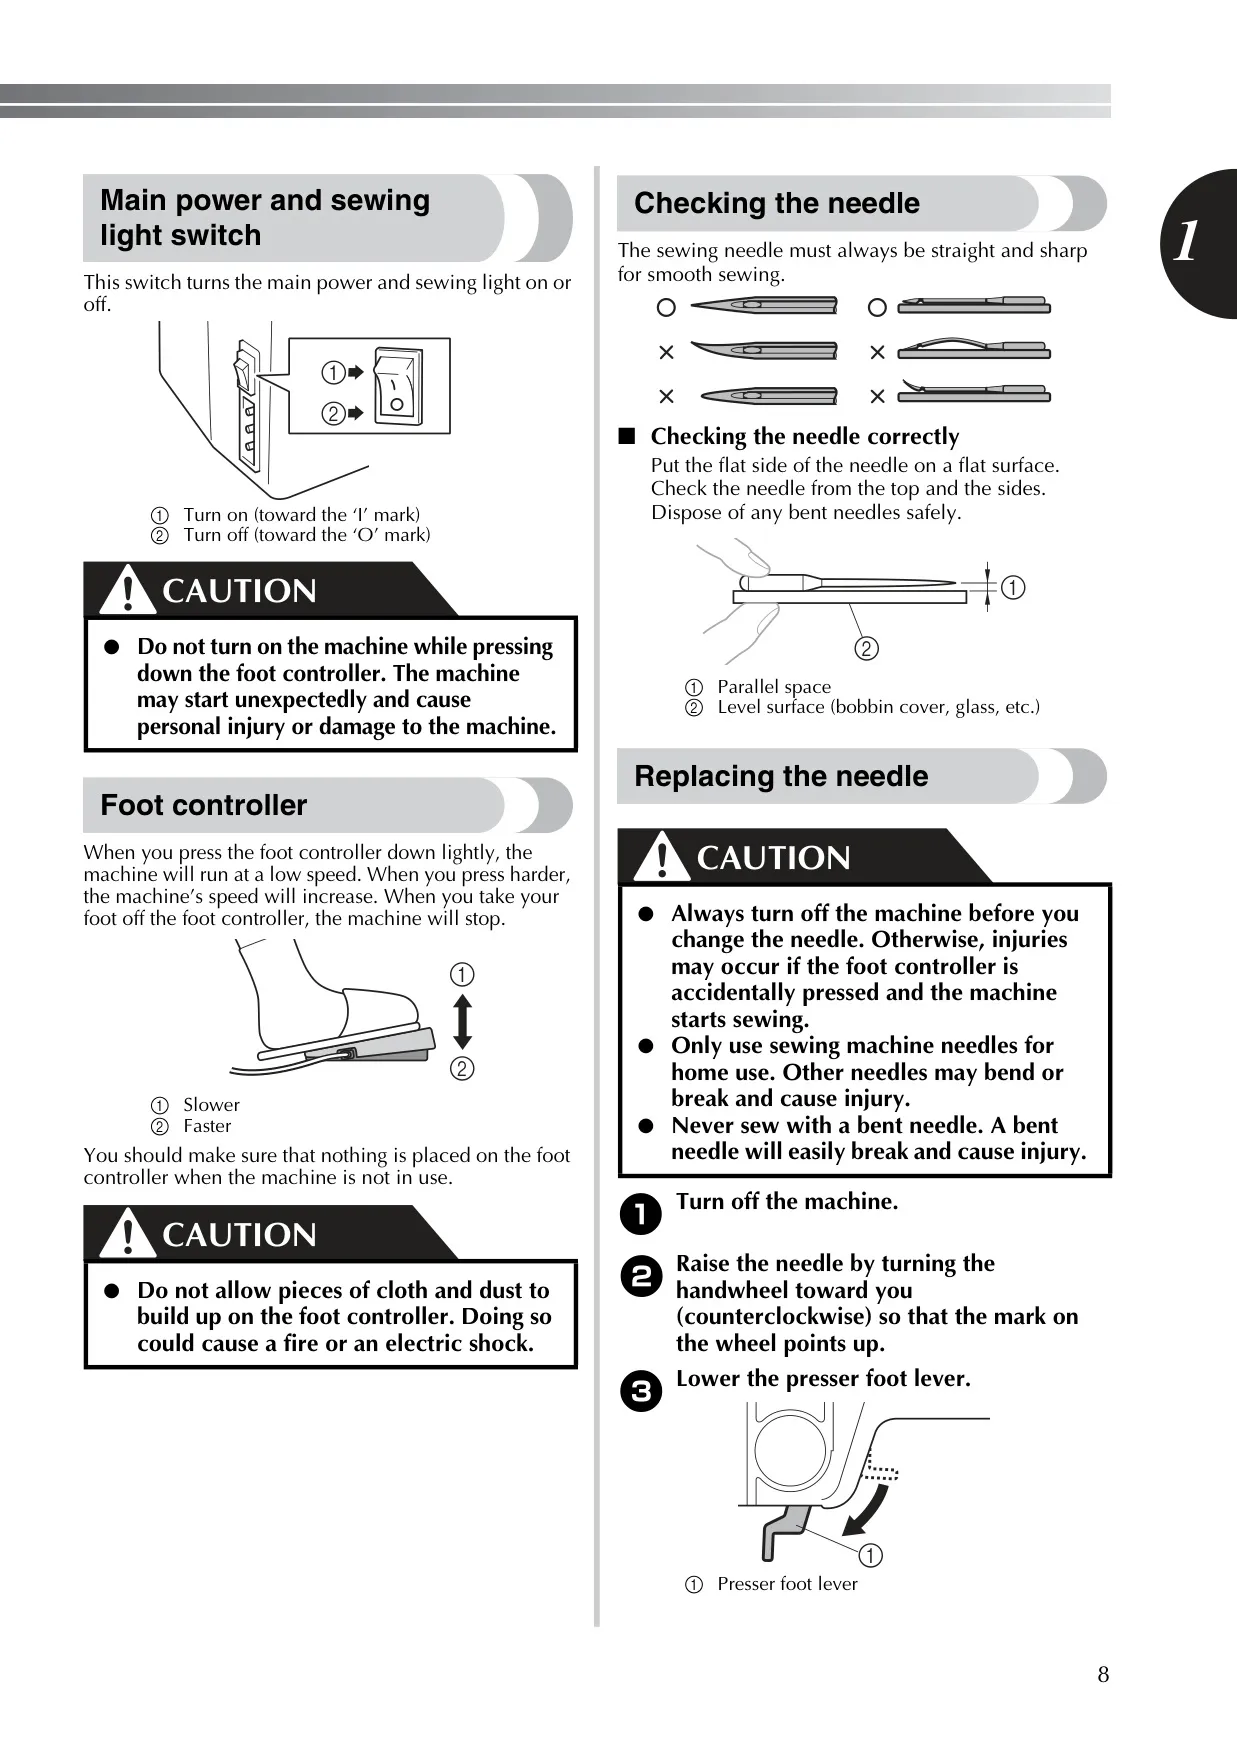
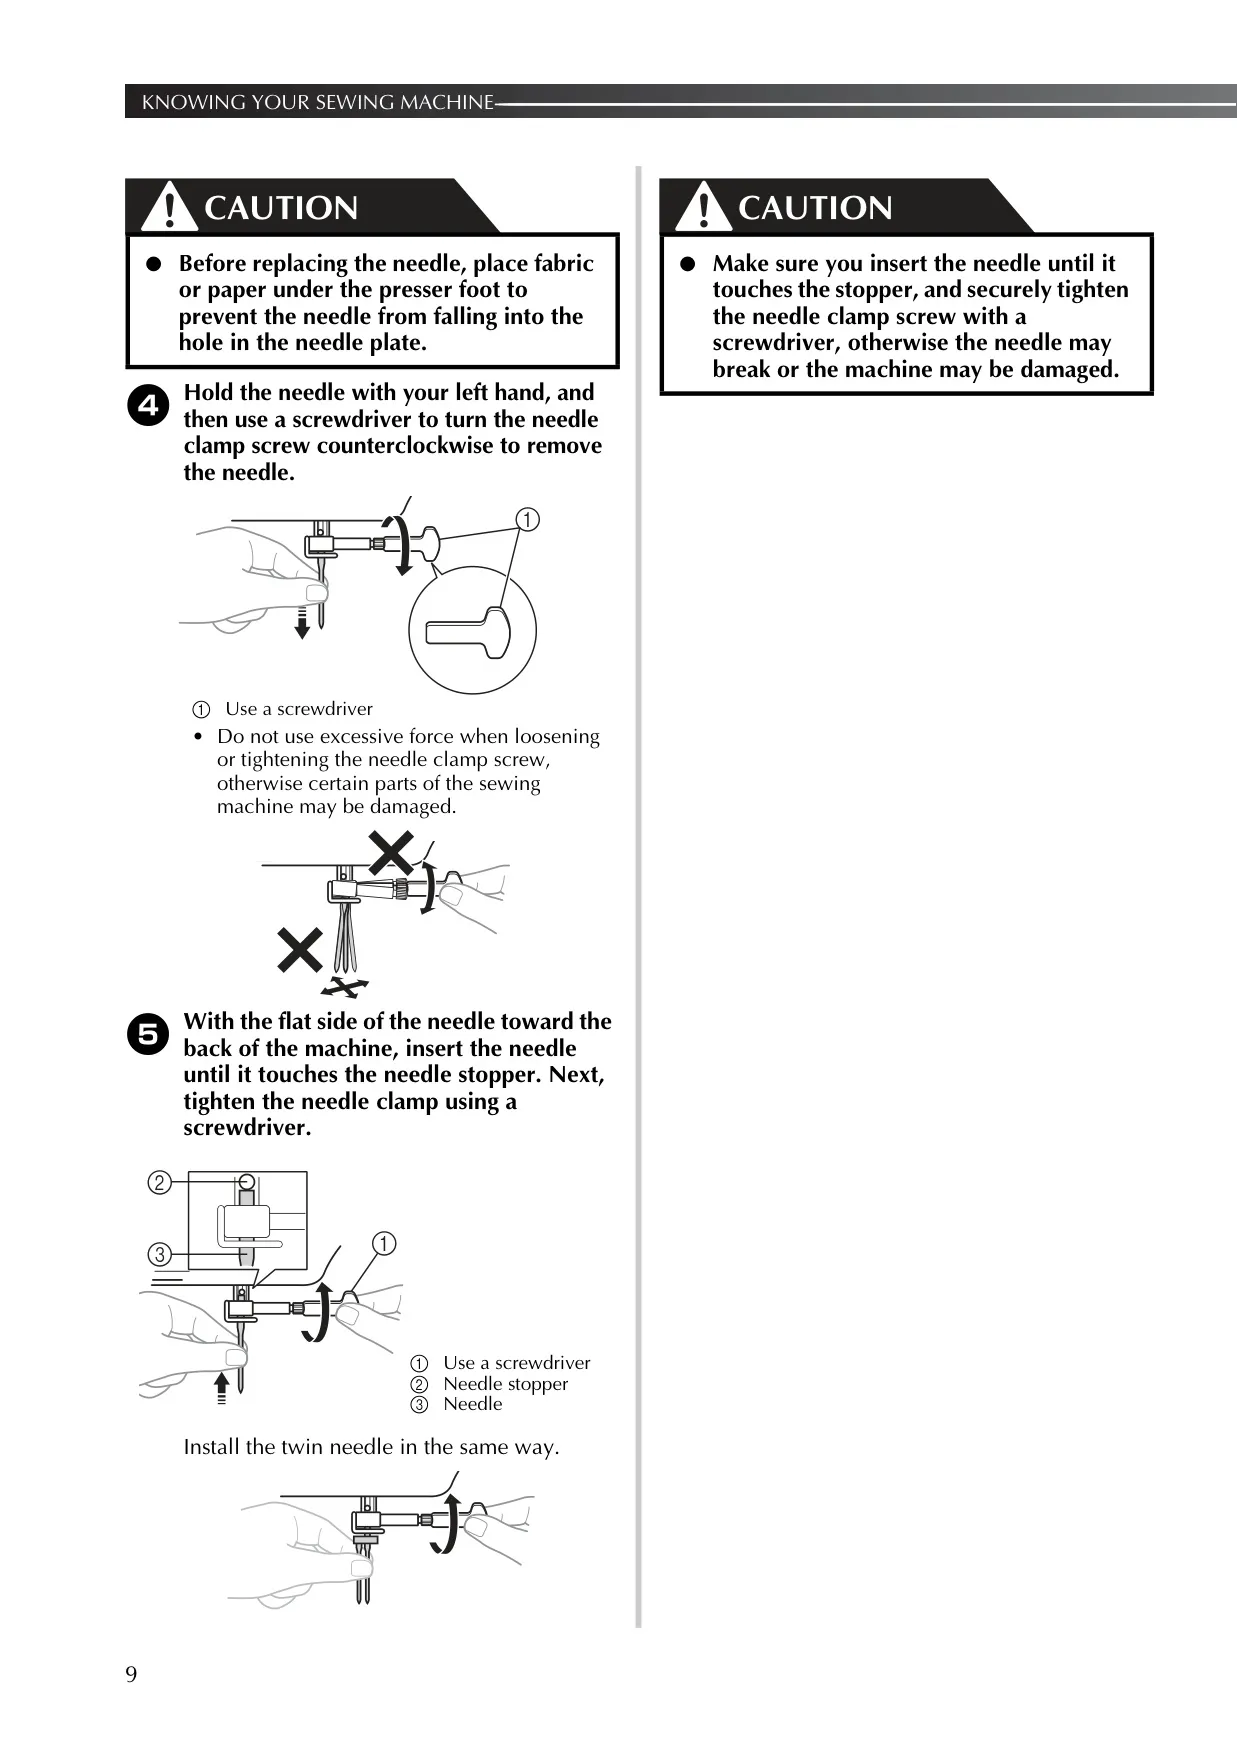
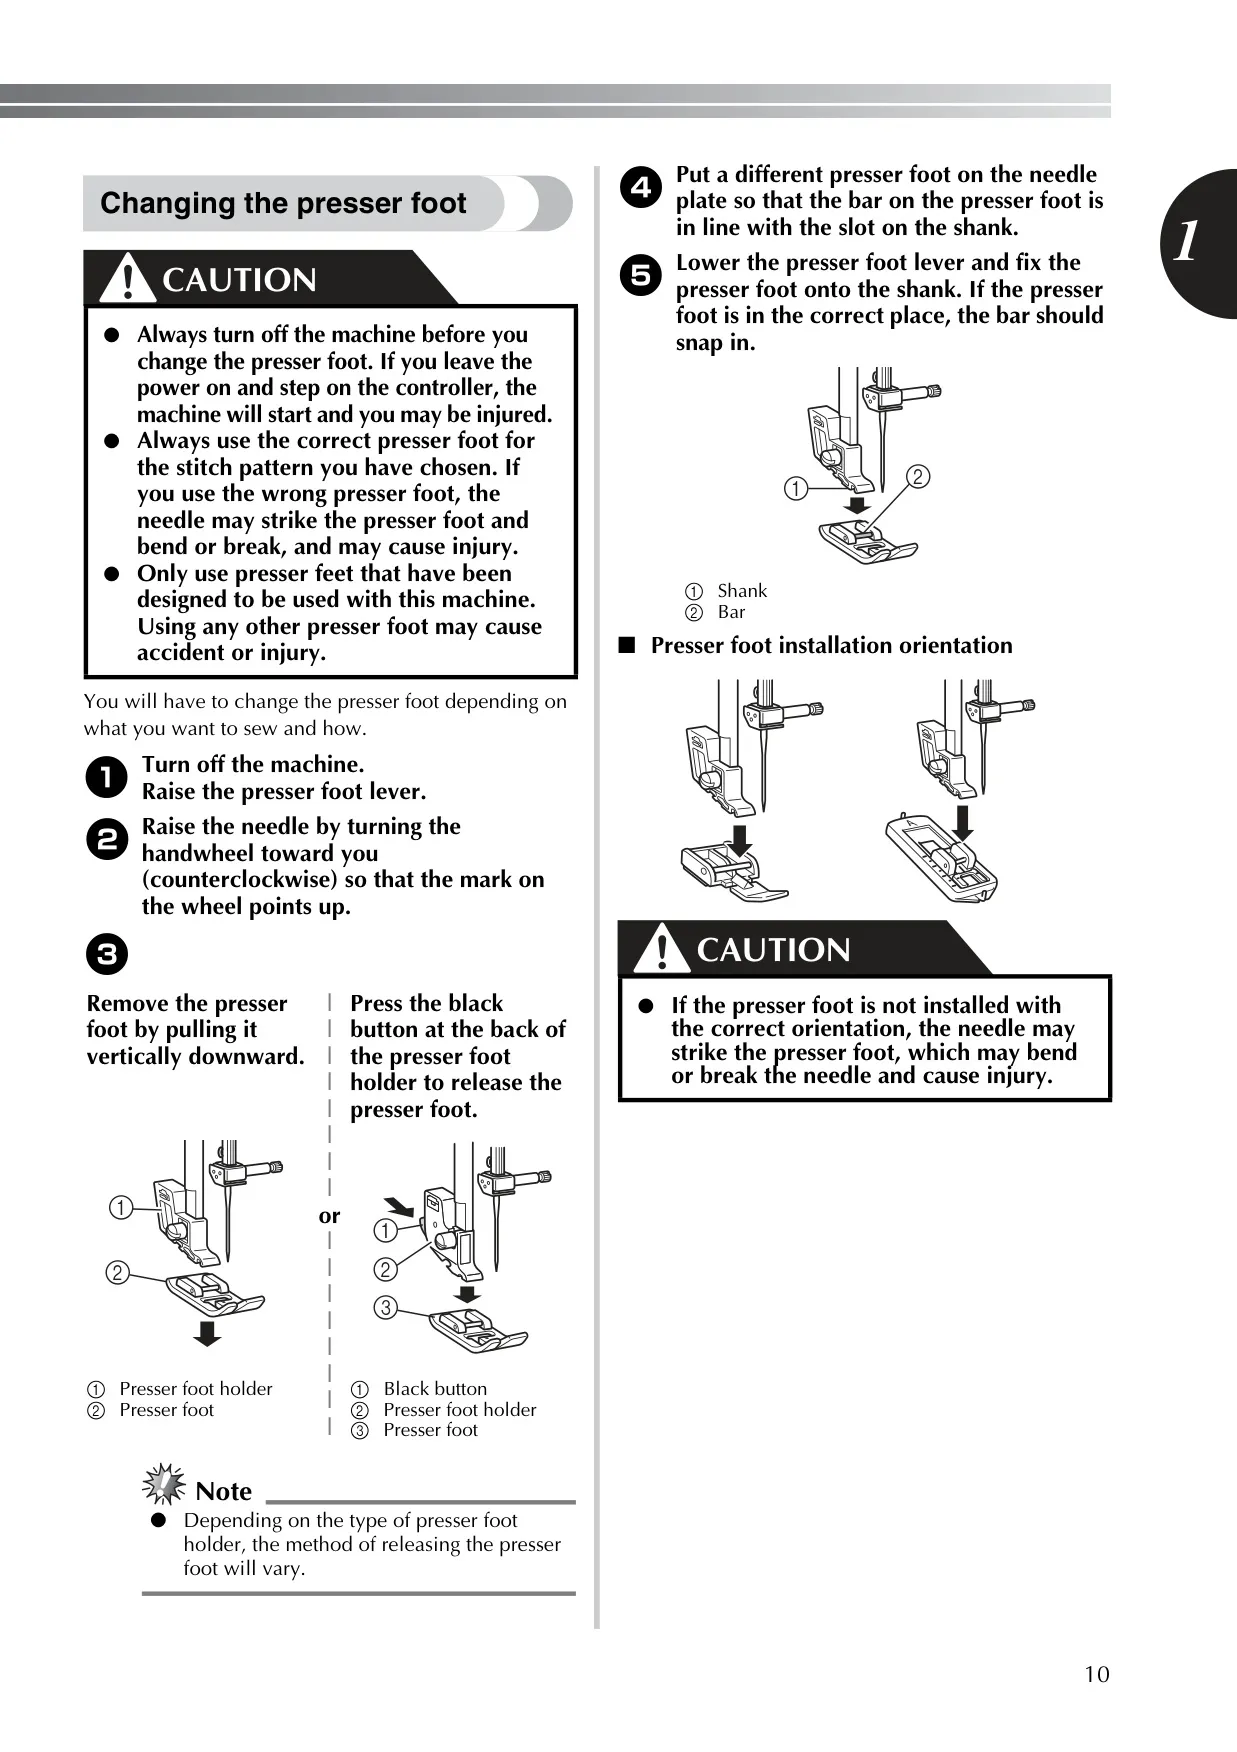
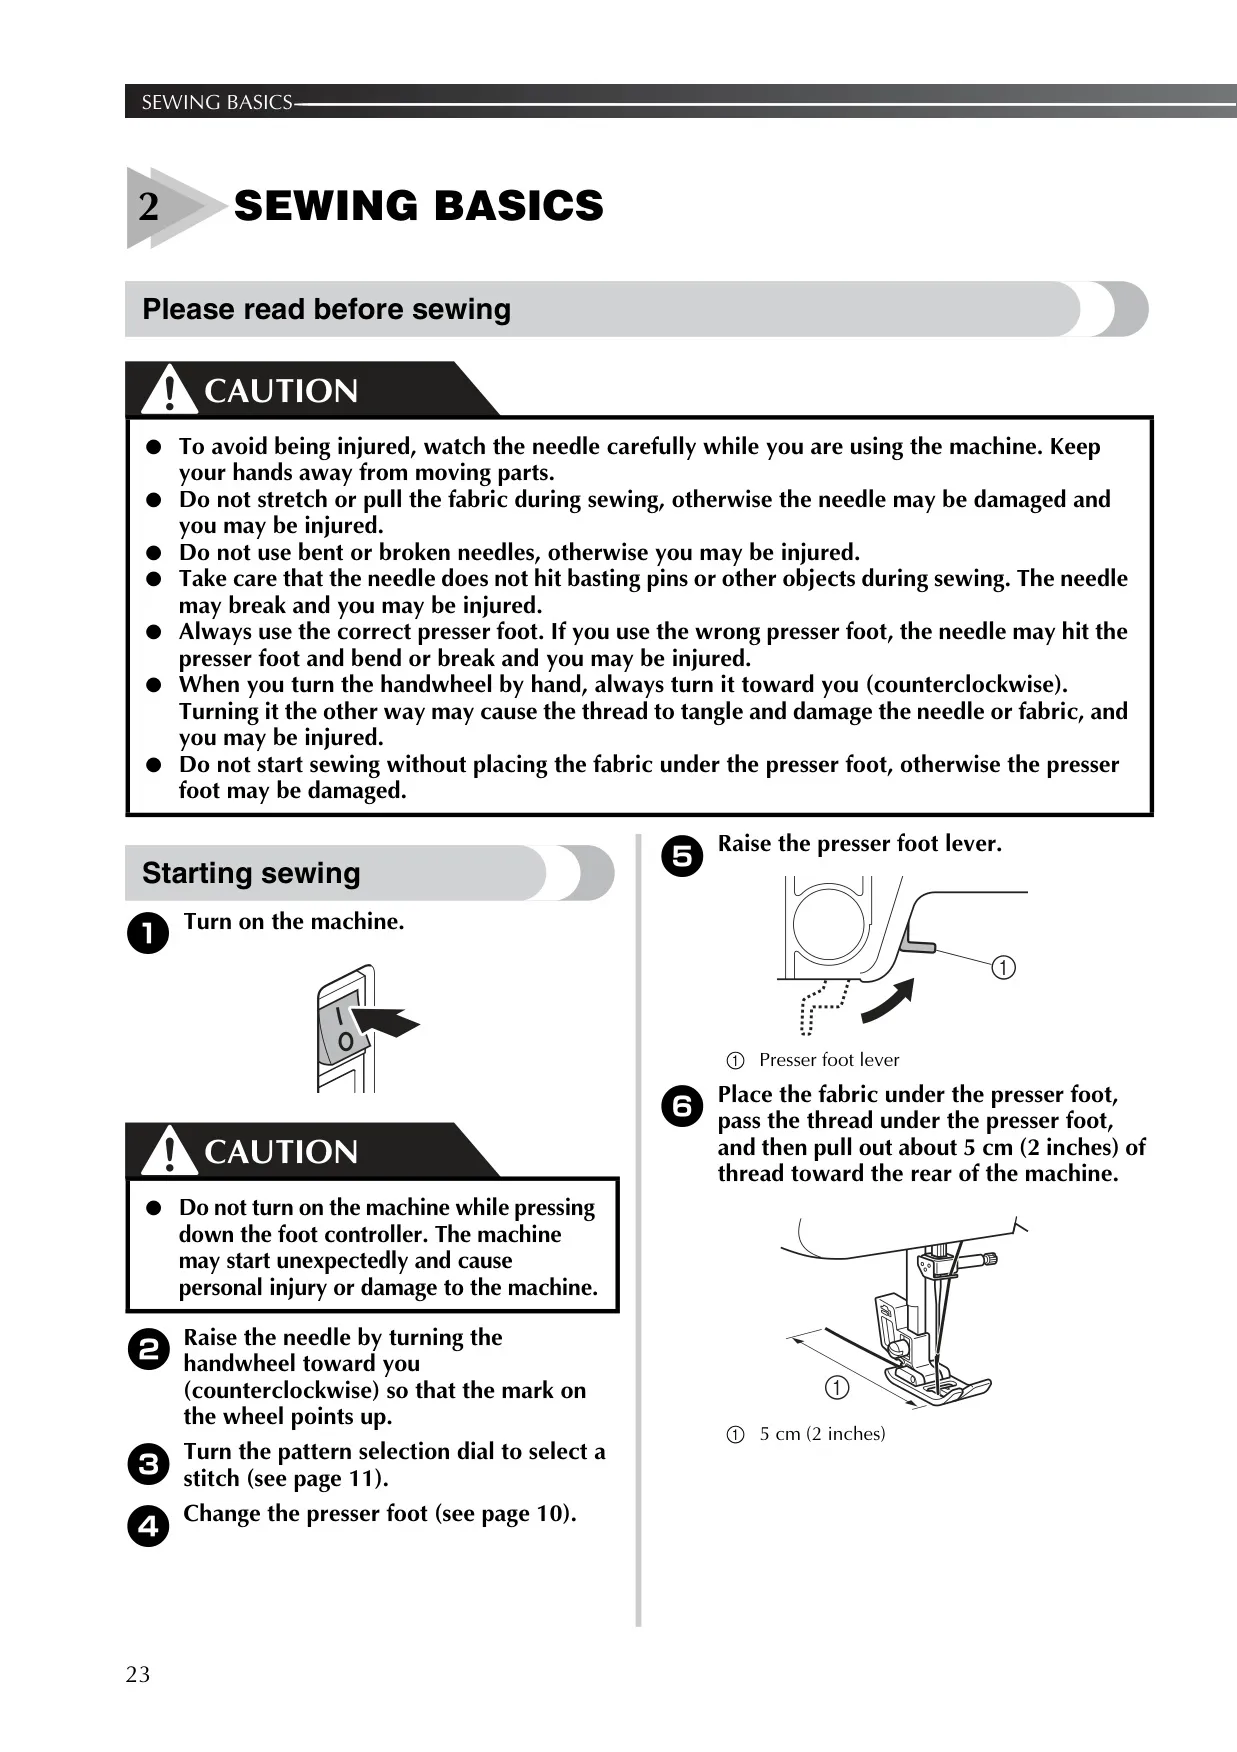
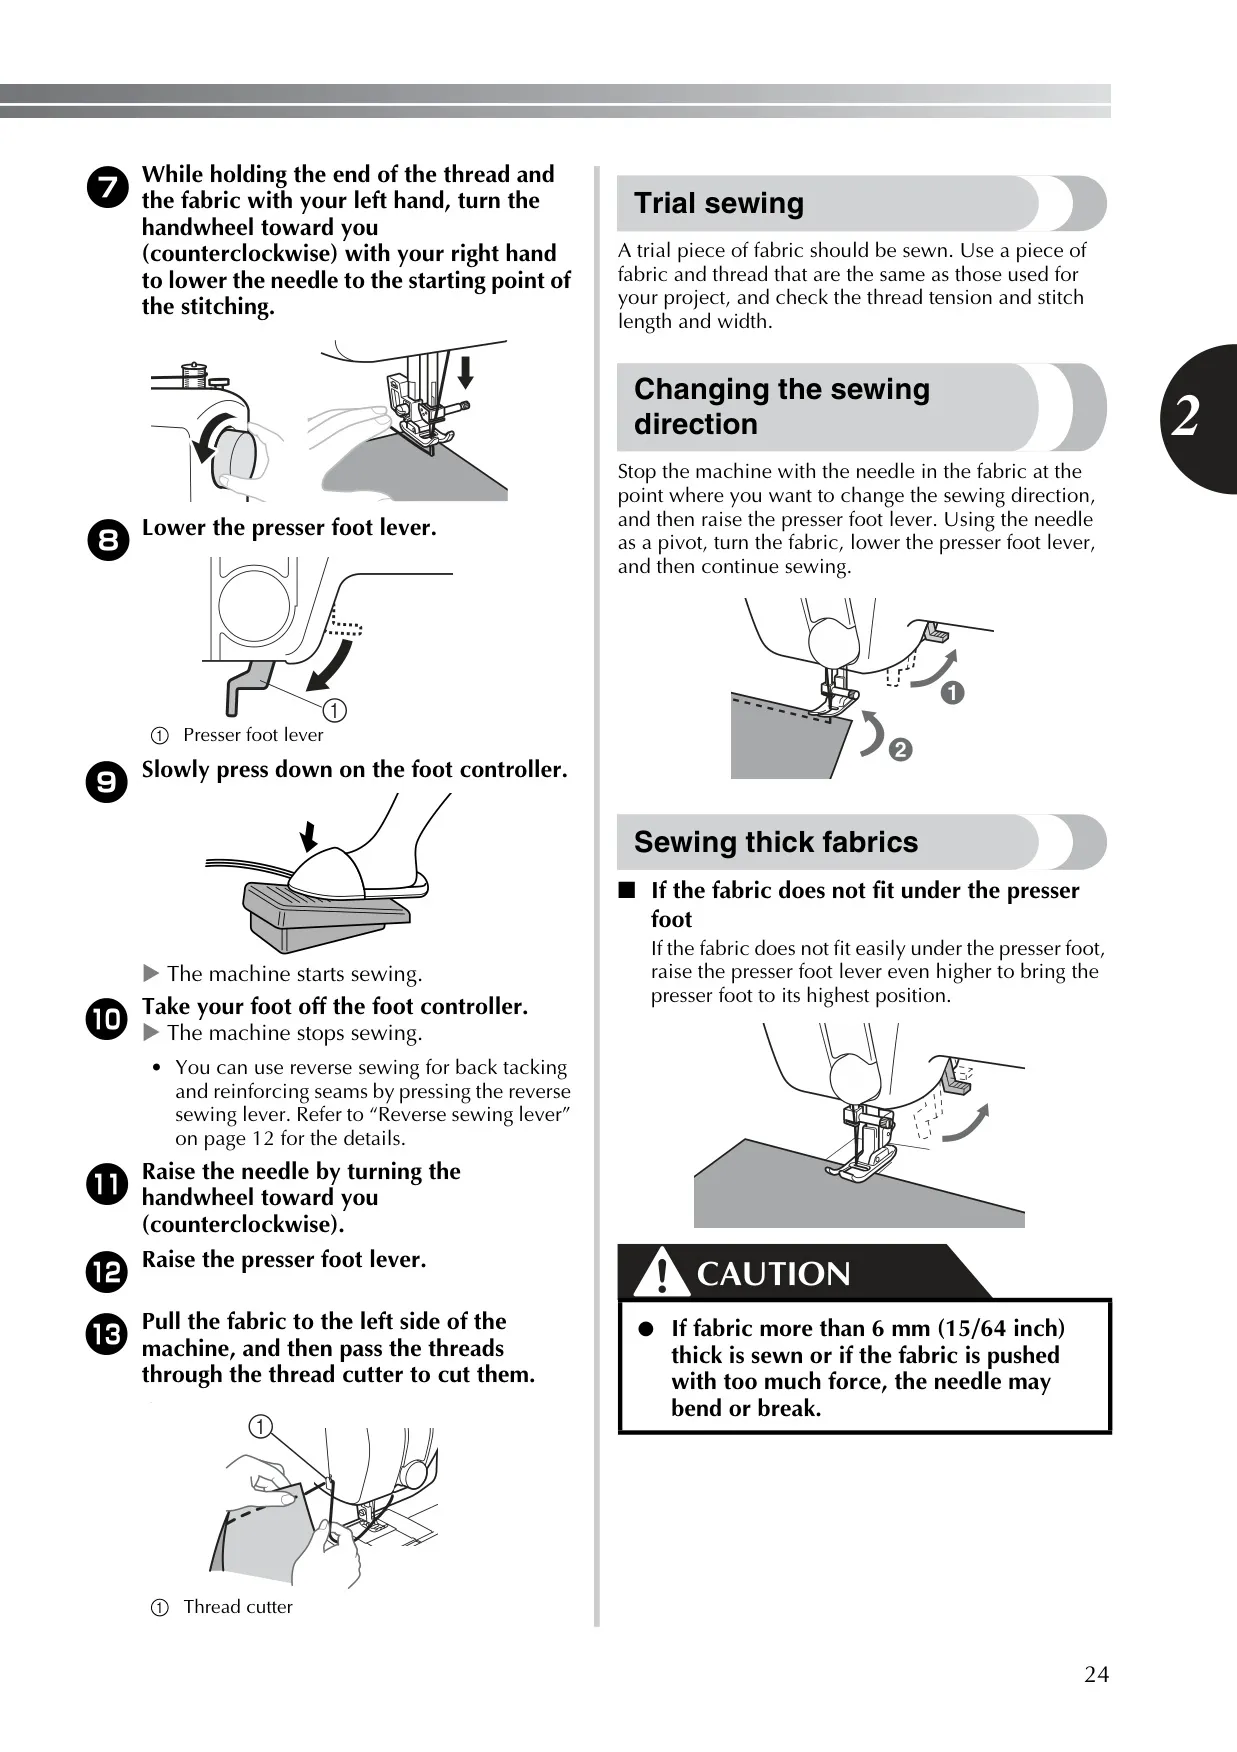
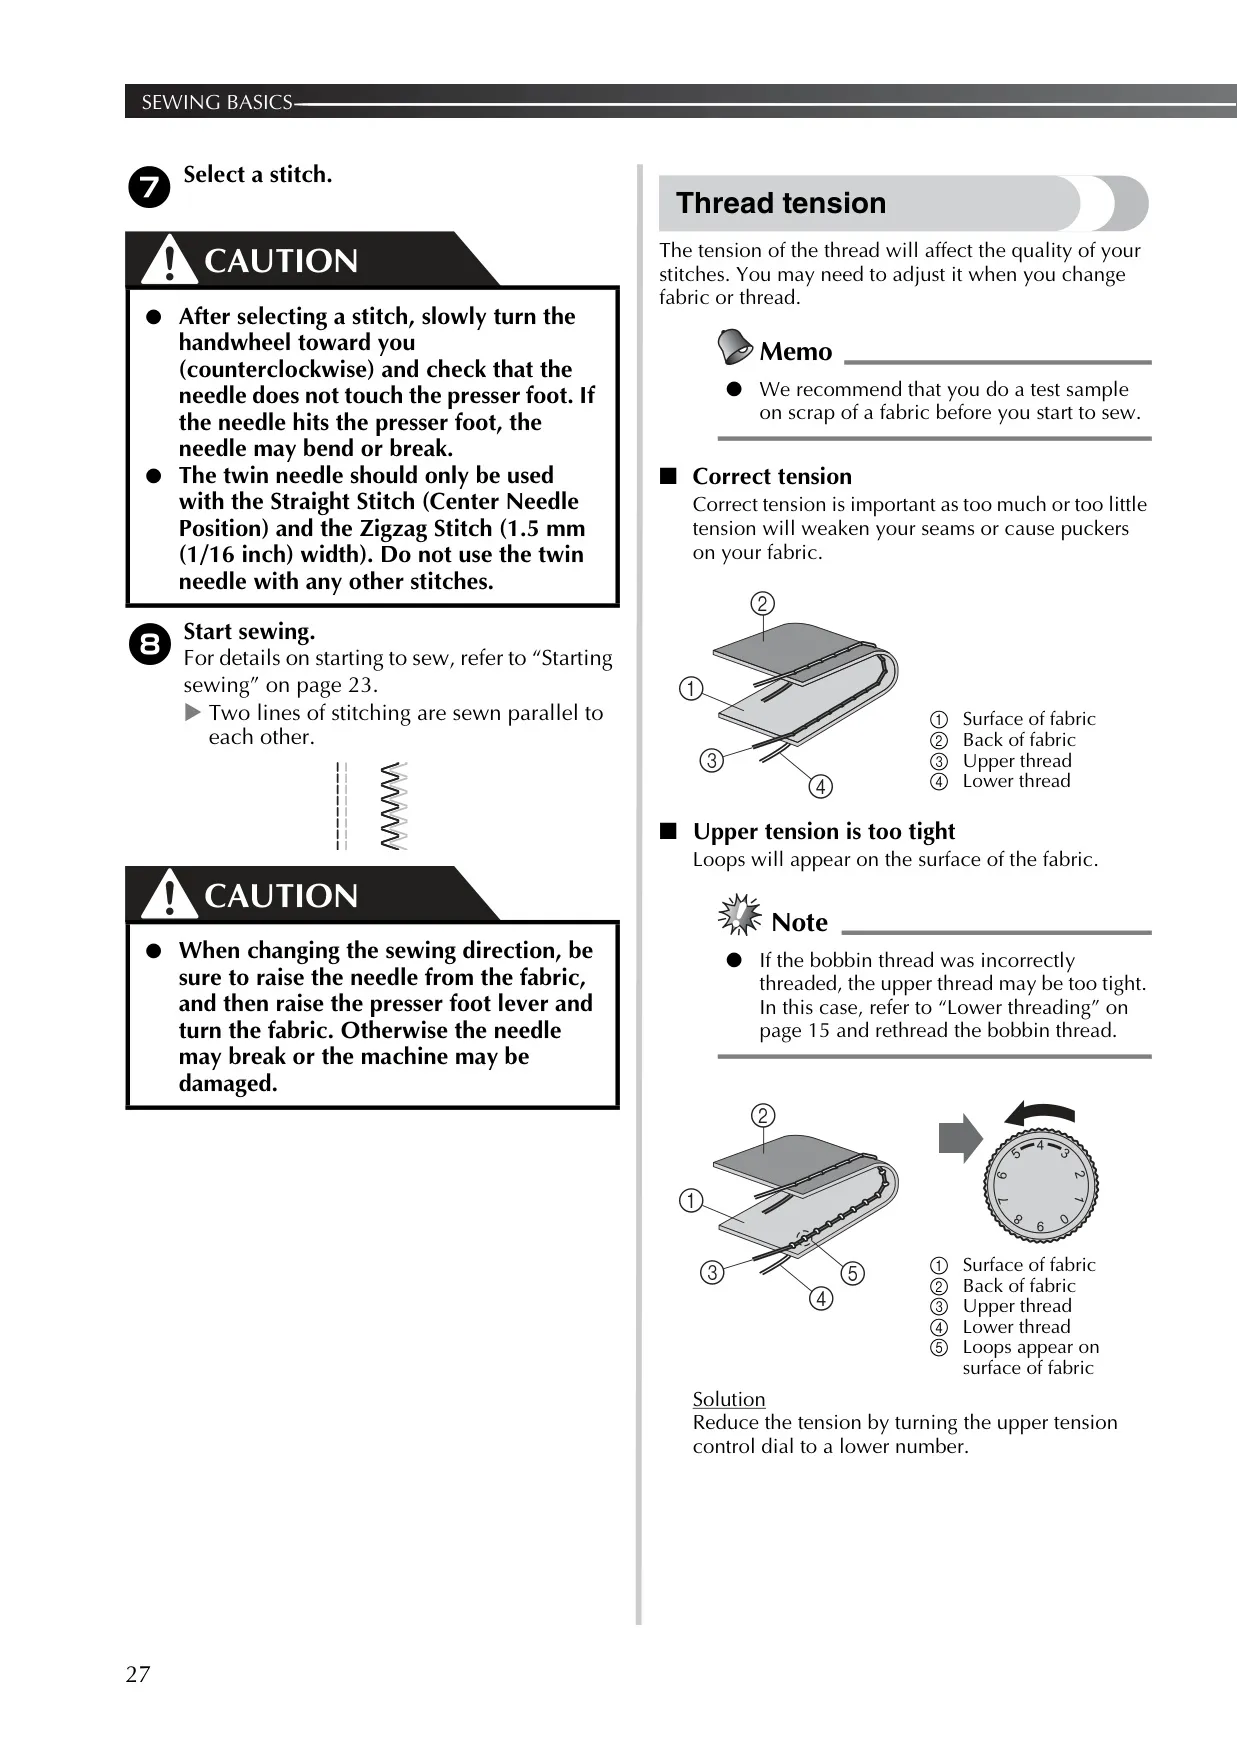
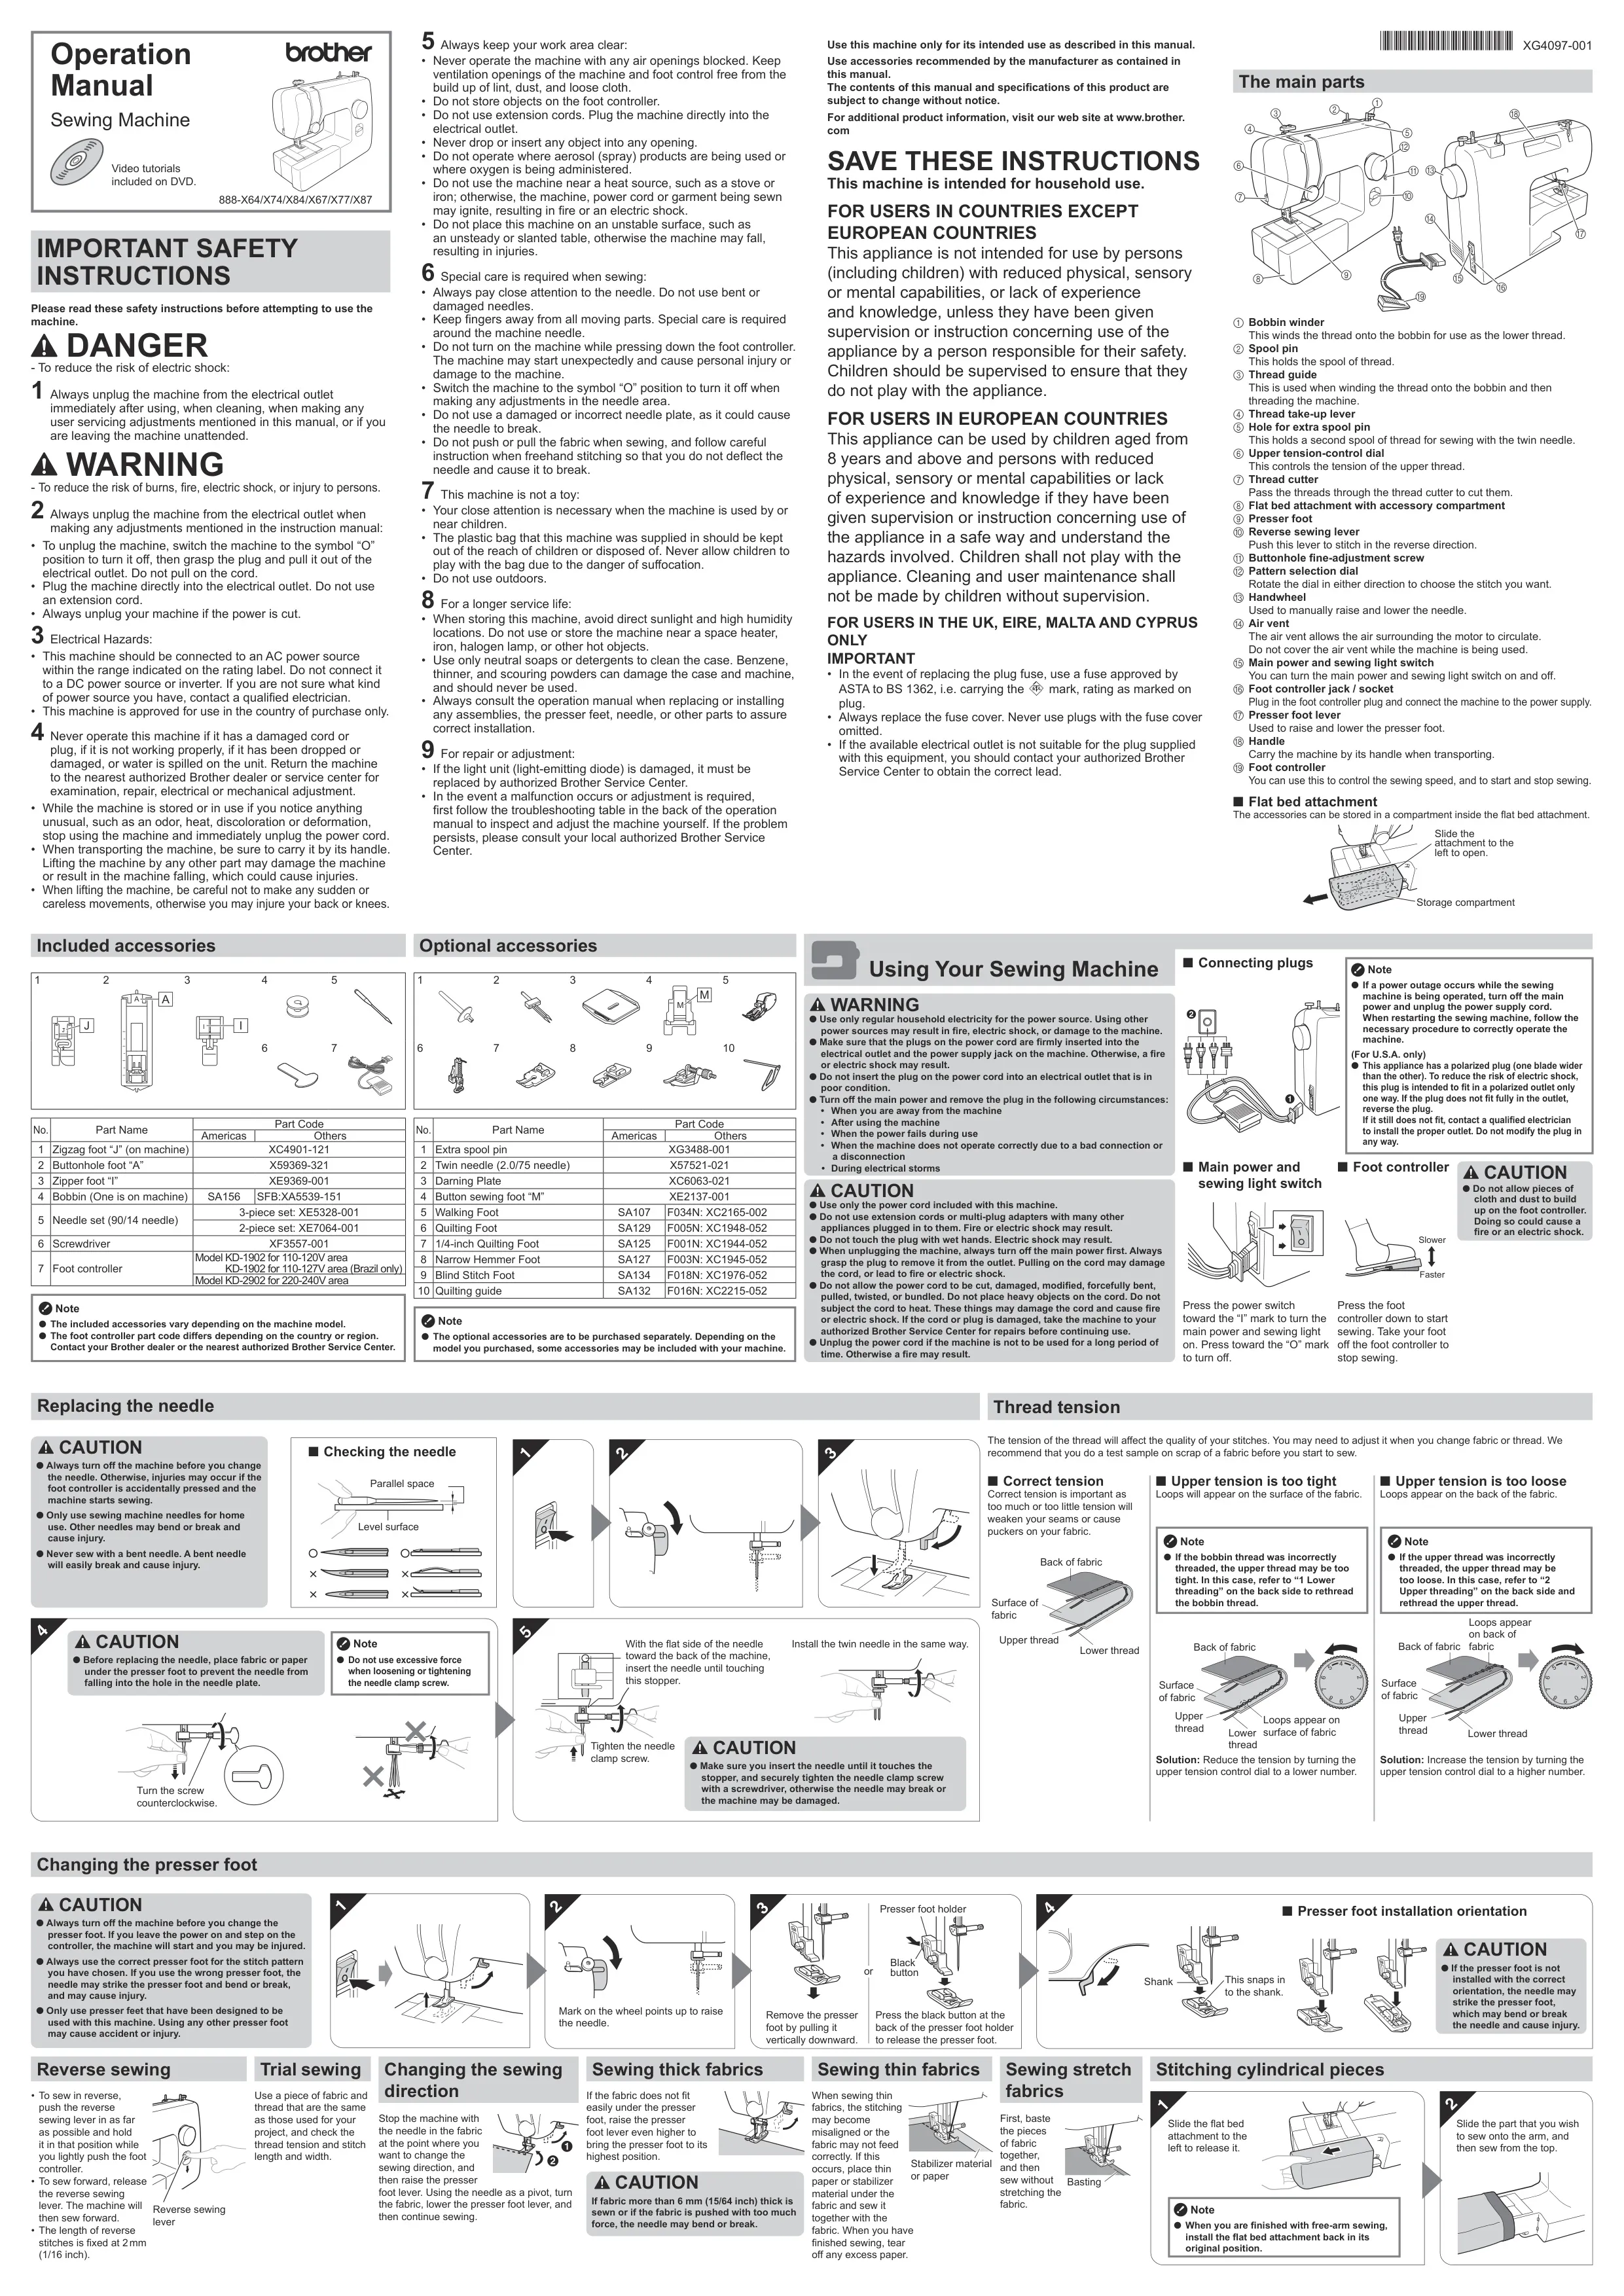
The Brother LS14S is a compact mechanical machine designed for straightforward home sewing. Everything is controlled with a single pattern selection dial, an upper tension-control dial, a reverse sewing lever and a variable-speed foot controller. Pressing the pedal lightly runs the machine slowly, and pressing harder speeds it up. Before turning the dial, raise the needle by turning the handwheel toward you until the mark on the wheel points up. If the needle is down, the needle, presser foot or fabric can be damaged.
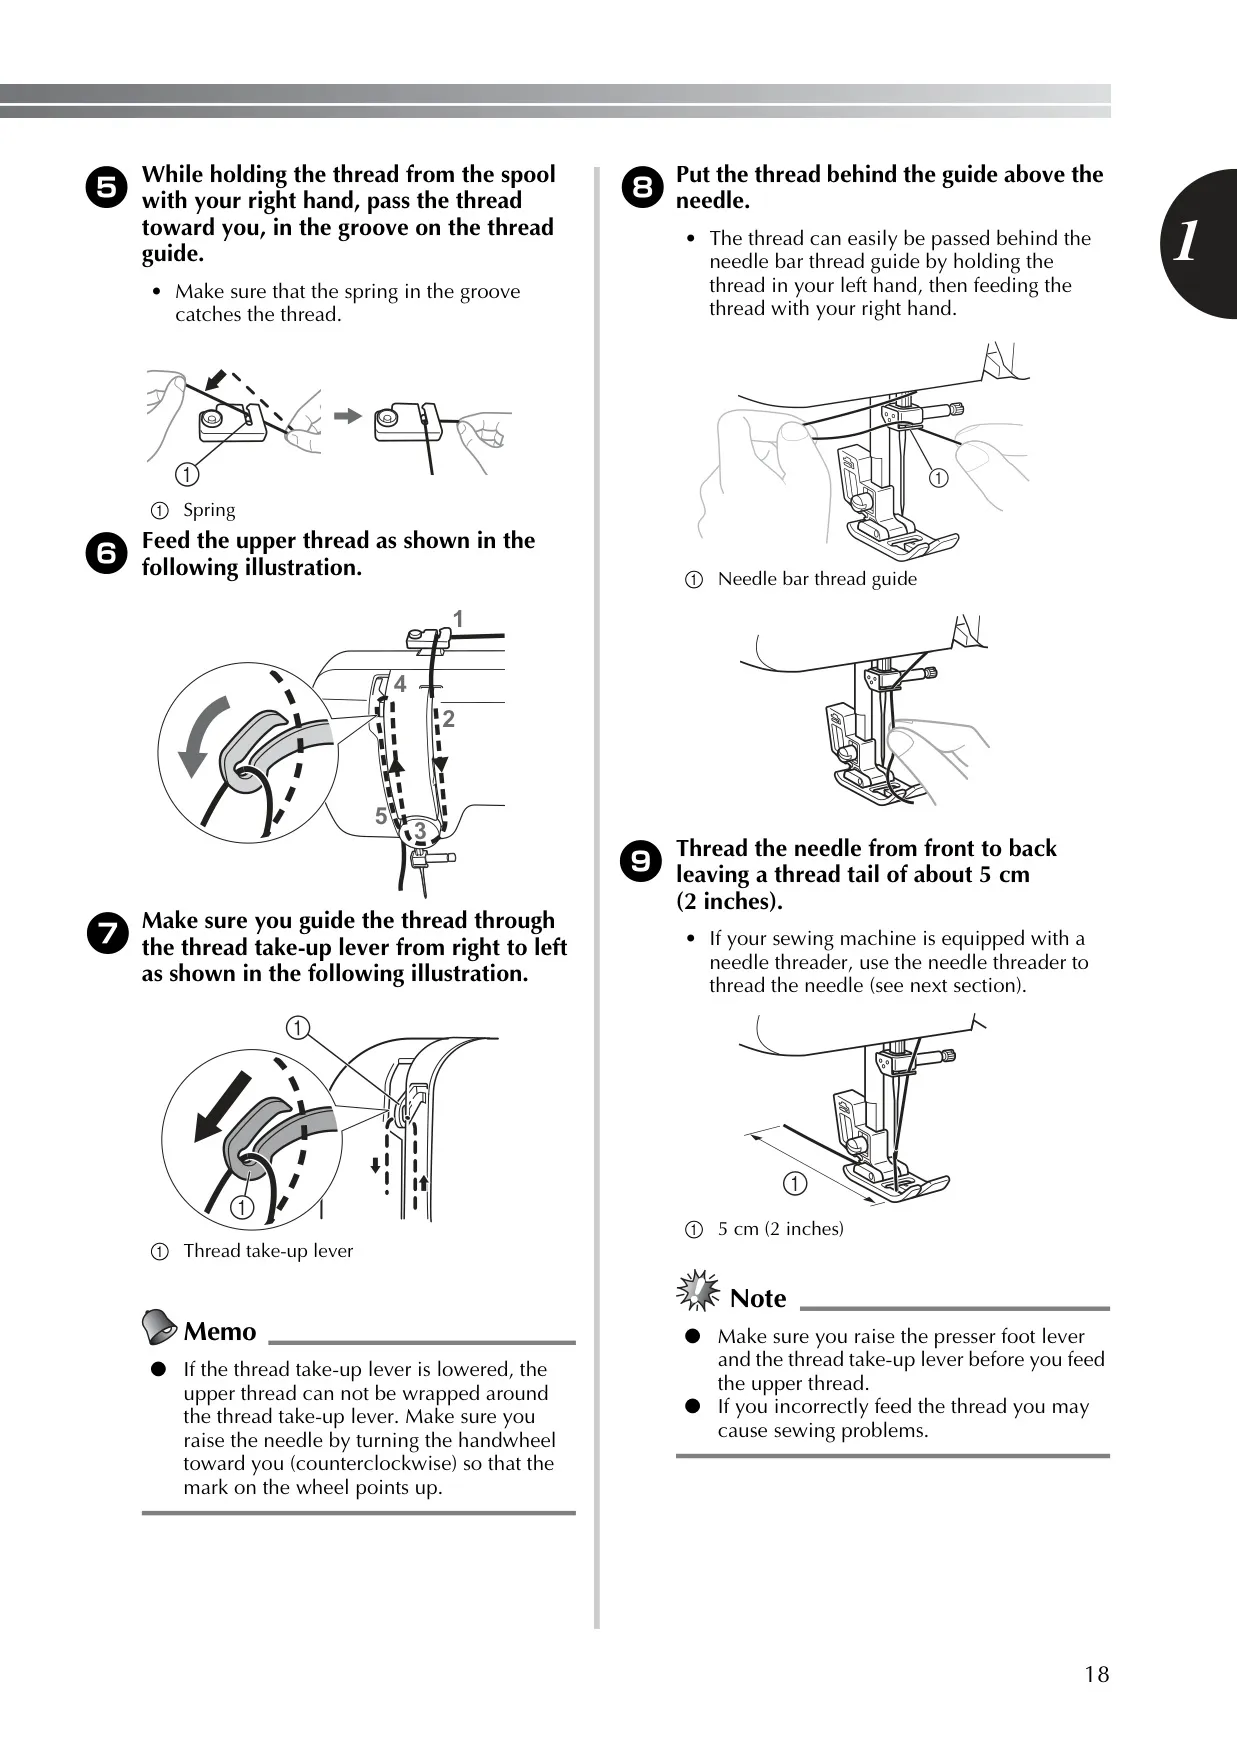
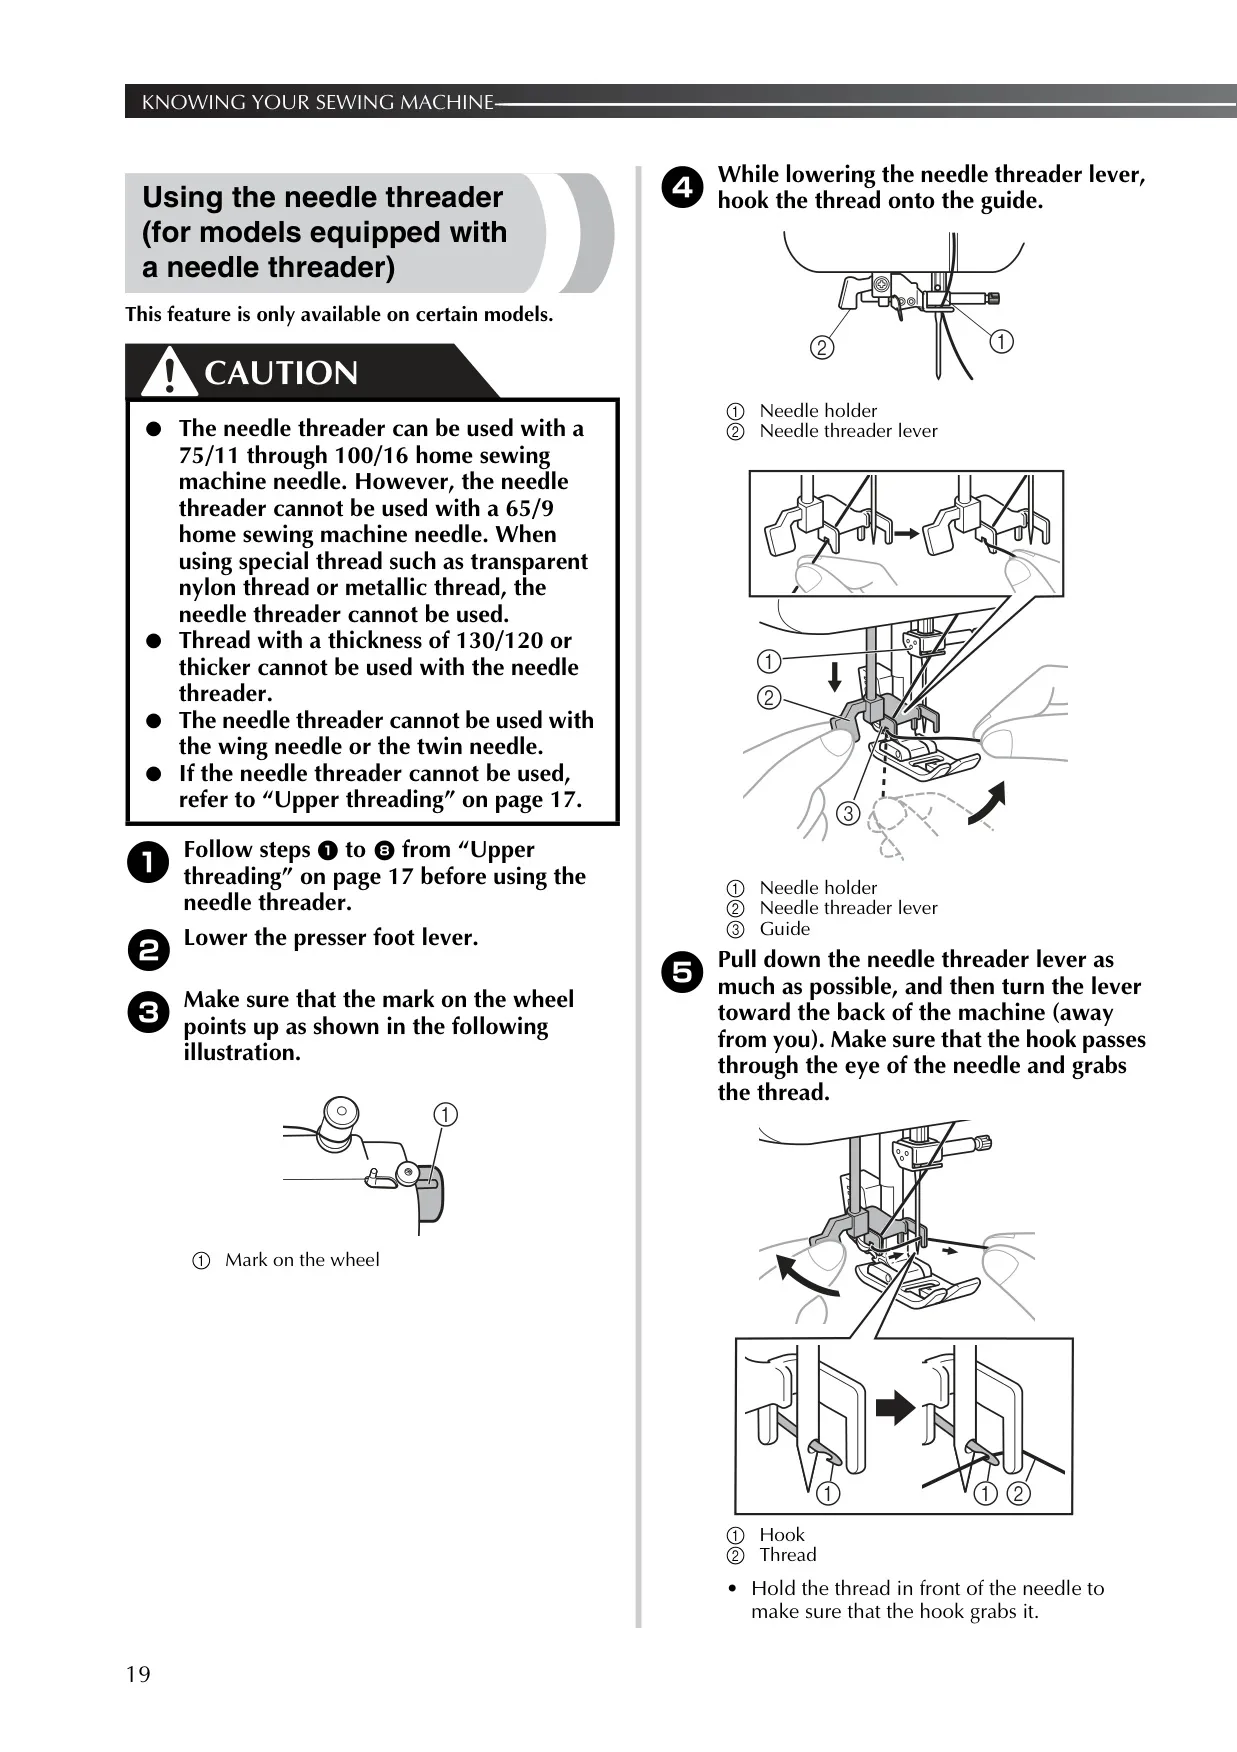
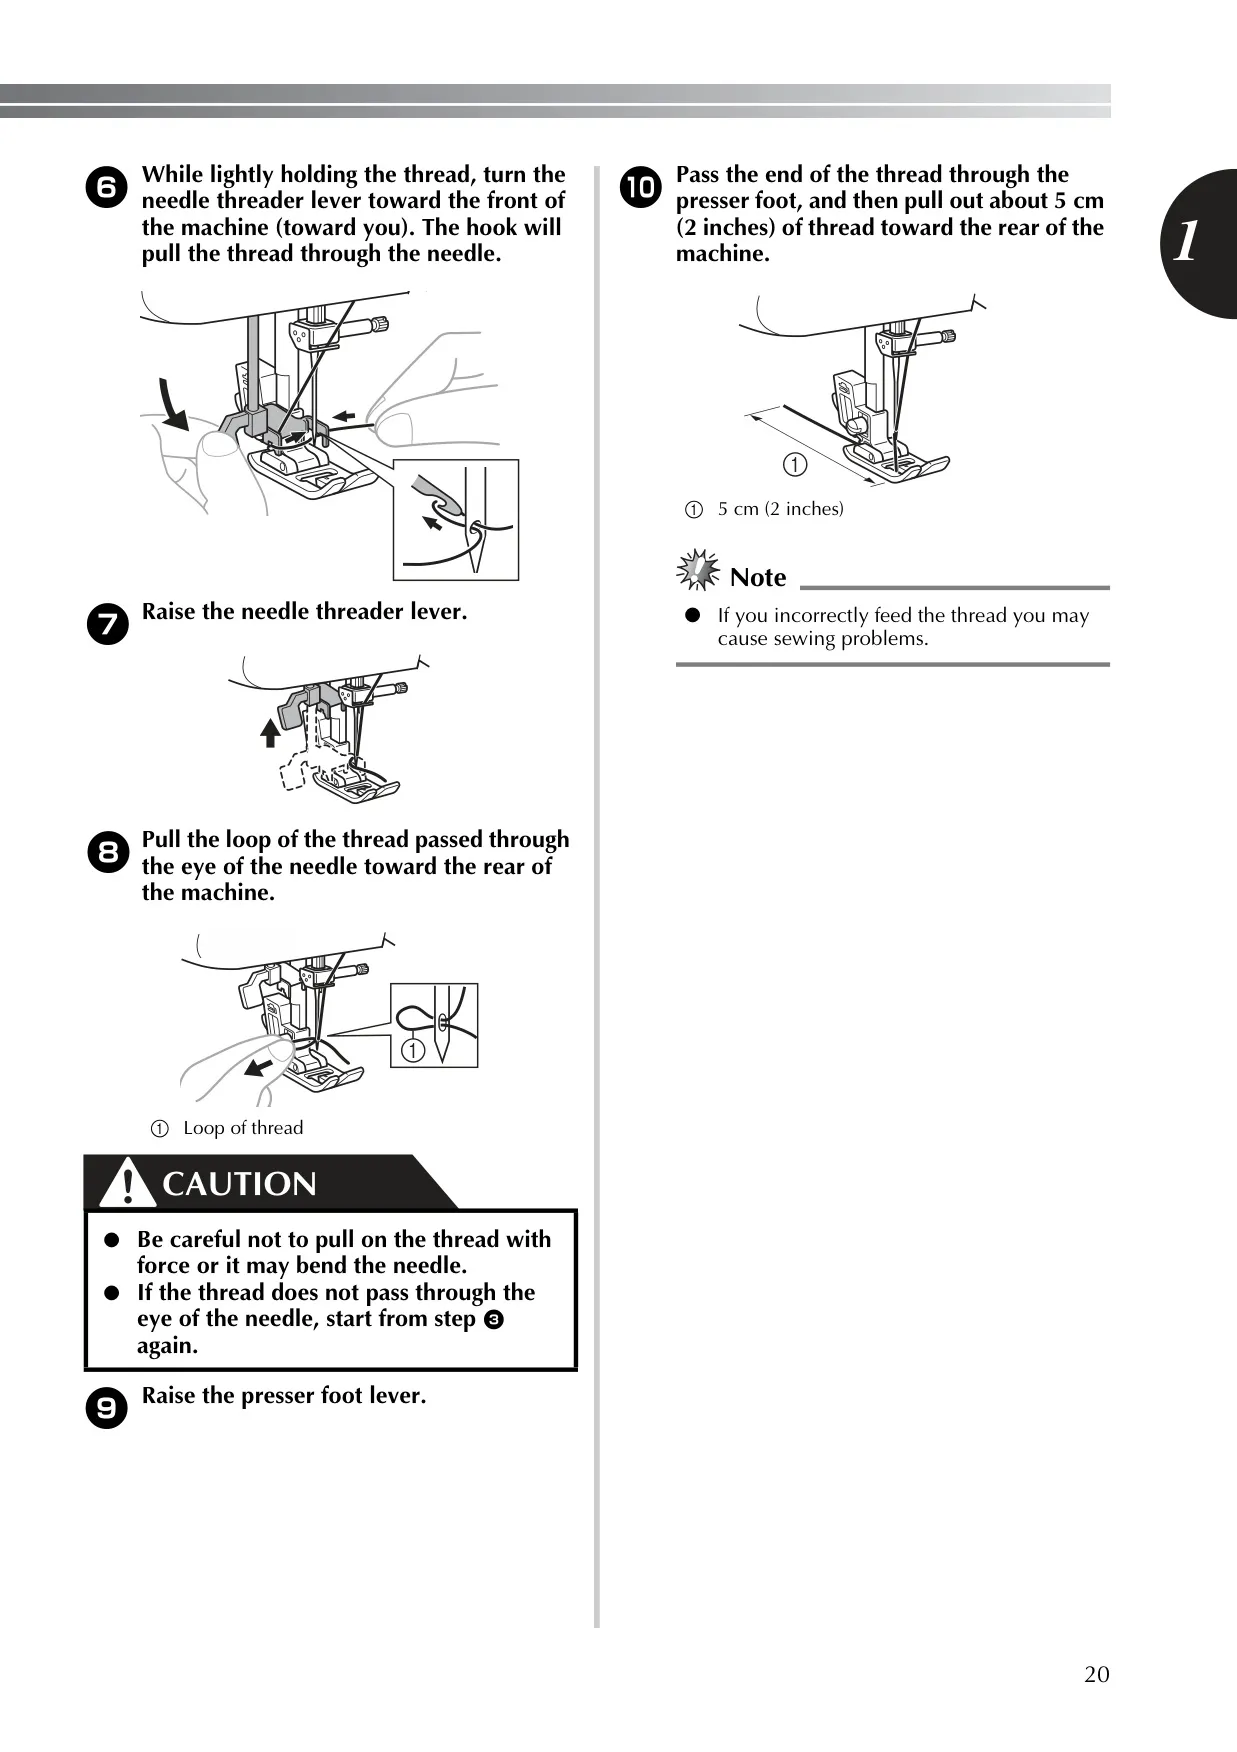
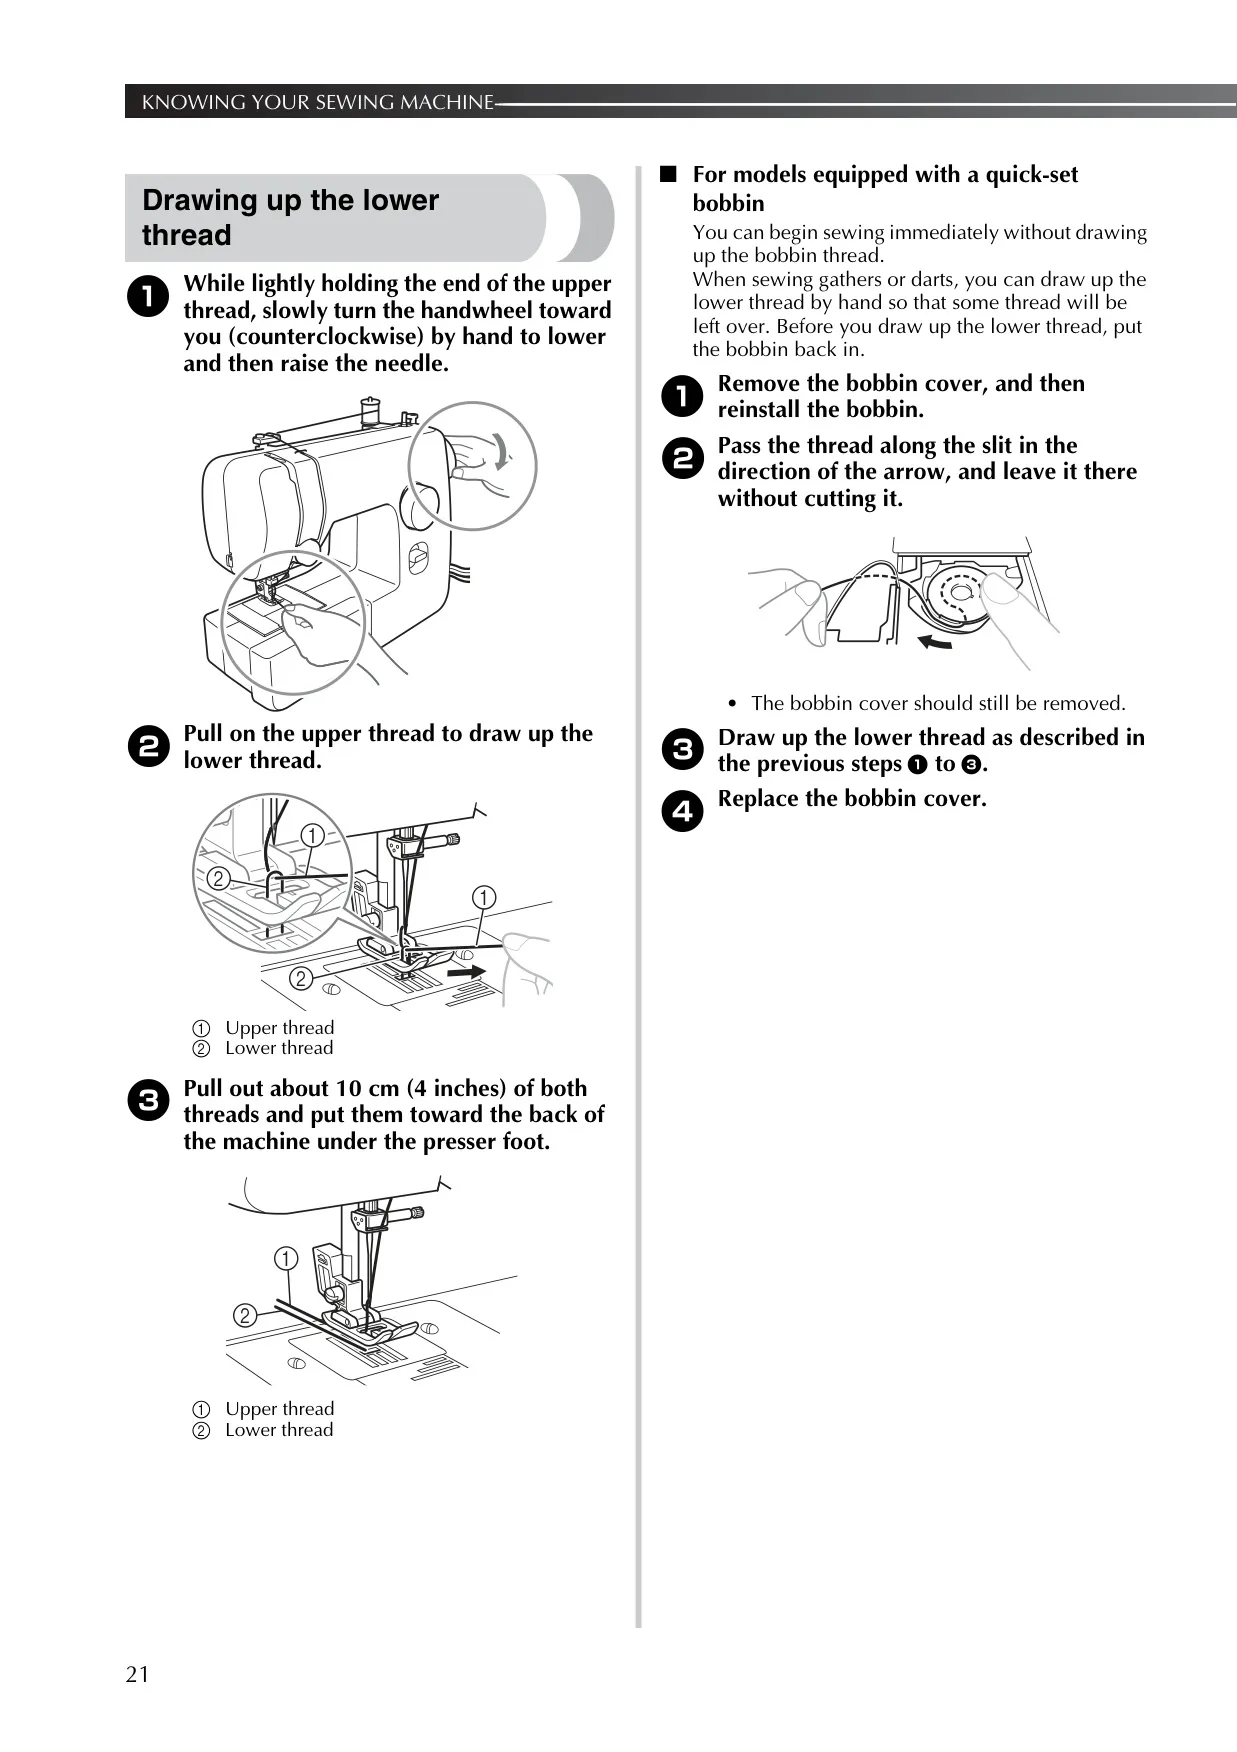
Threading follows a numbered path. The thread goes from the spool pin through the thread guide and its spring, then down and around the channel. It passes through the take-up lever from right to left and behind the needle bar thread guide, and the needle is threaded from front to back. Models with a needle threader use a hook that pulls a loop through the eye of the needle. Models with a quick-set bobbin have a slit with a built-in cutter, so you can start sewing without drawing up the bobbin thread.
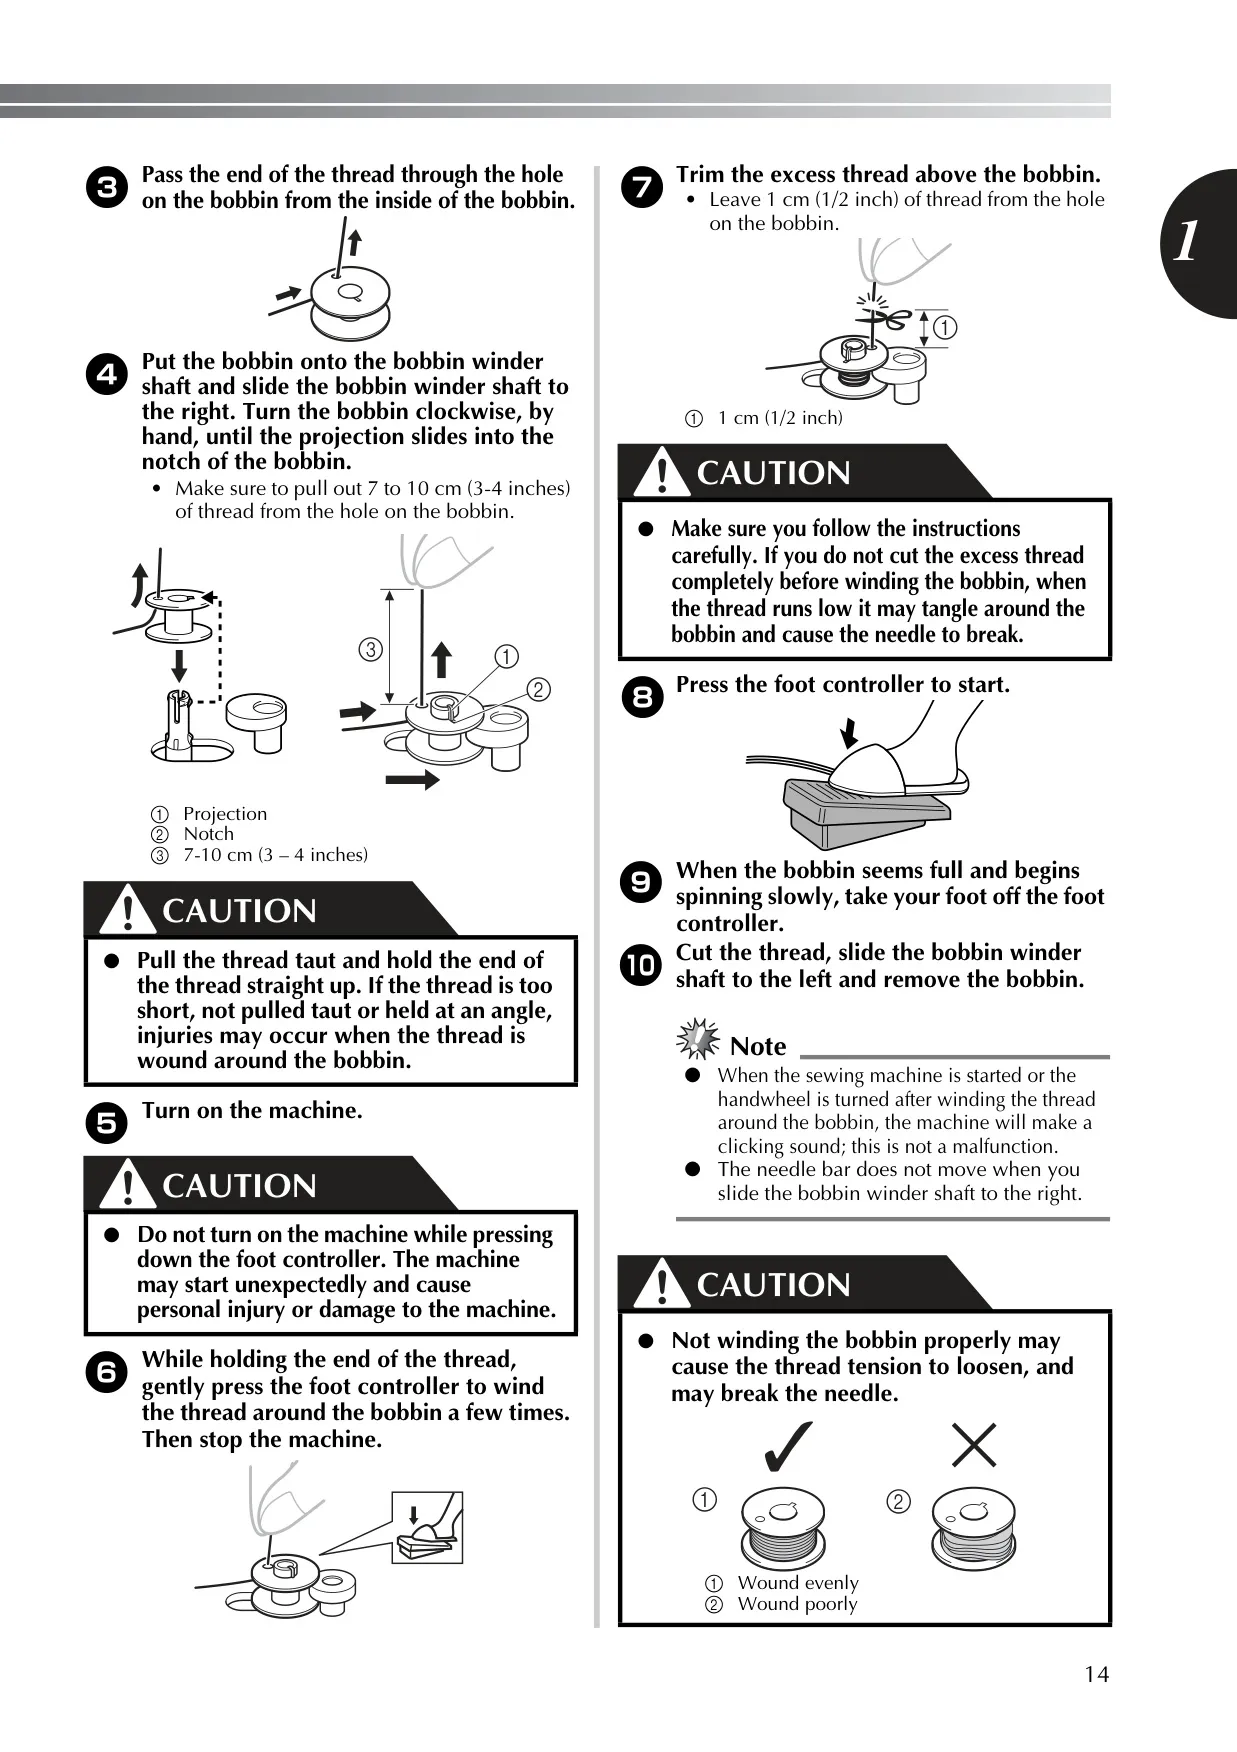
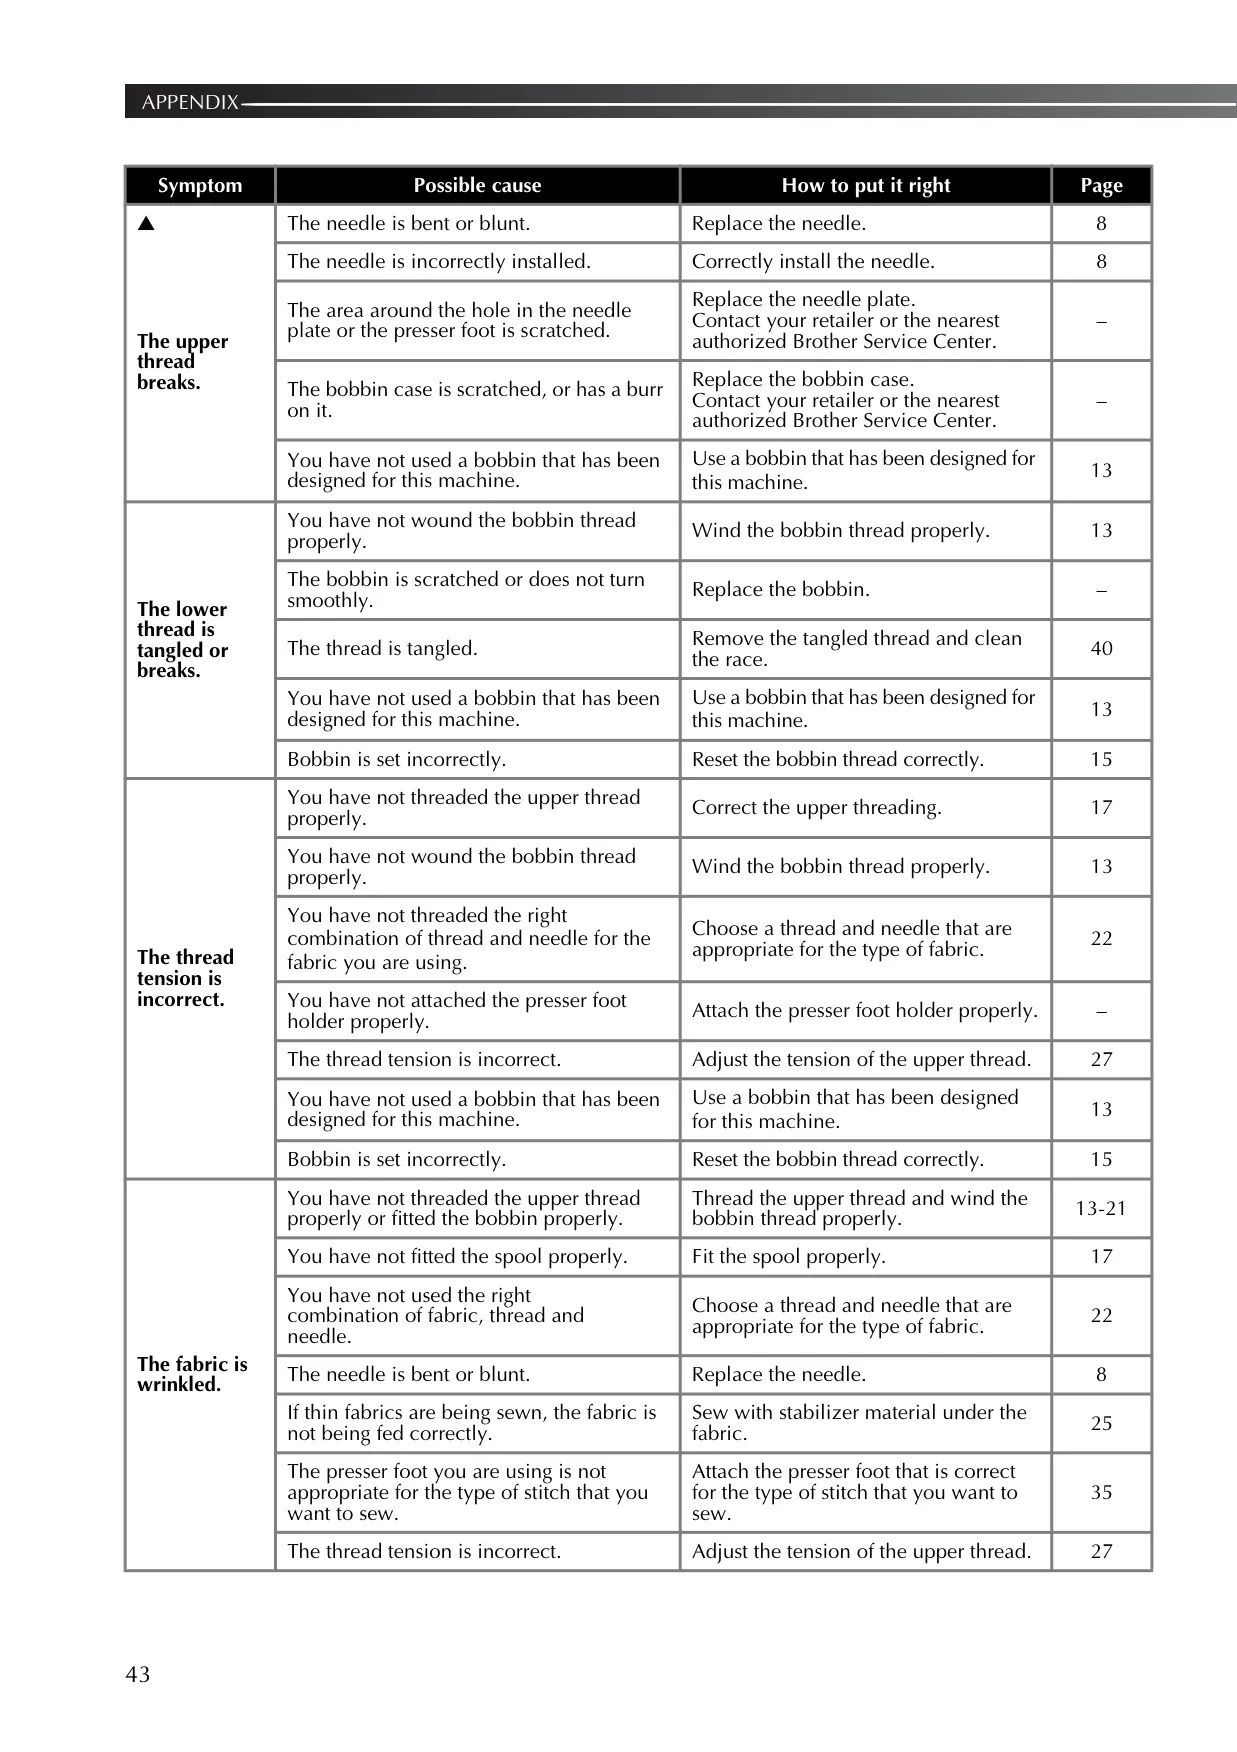
Bobbin winding uses the bobbin winder shaft at the top of the machine. When the shaft is pushed to the right, the needle bar stays still. Pass the thread around the pre-tension disk, leave a 7–10 cm tail, wind a few turns, trim the tail to 1 cm and continue. Stop when the bobbin starts spinning slowly. A clicking sound after winding is normal. If the shaft is left on the right, the machine will not sew, which is one of the first checks in the troubleshooting table.
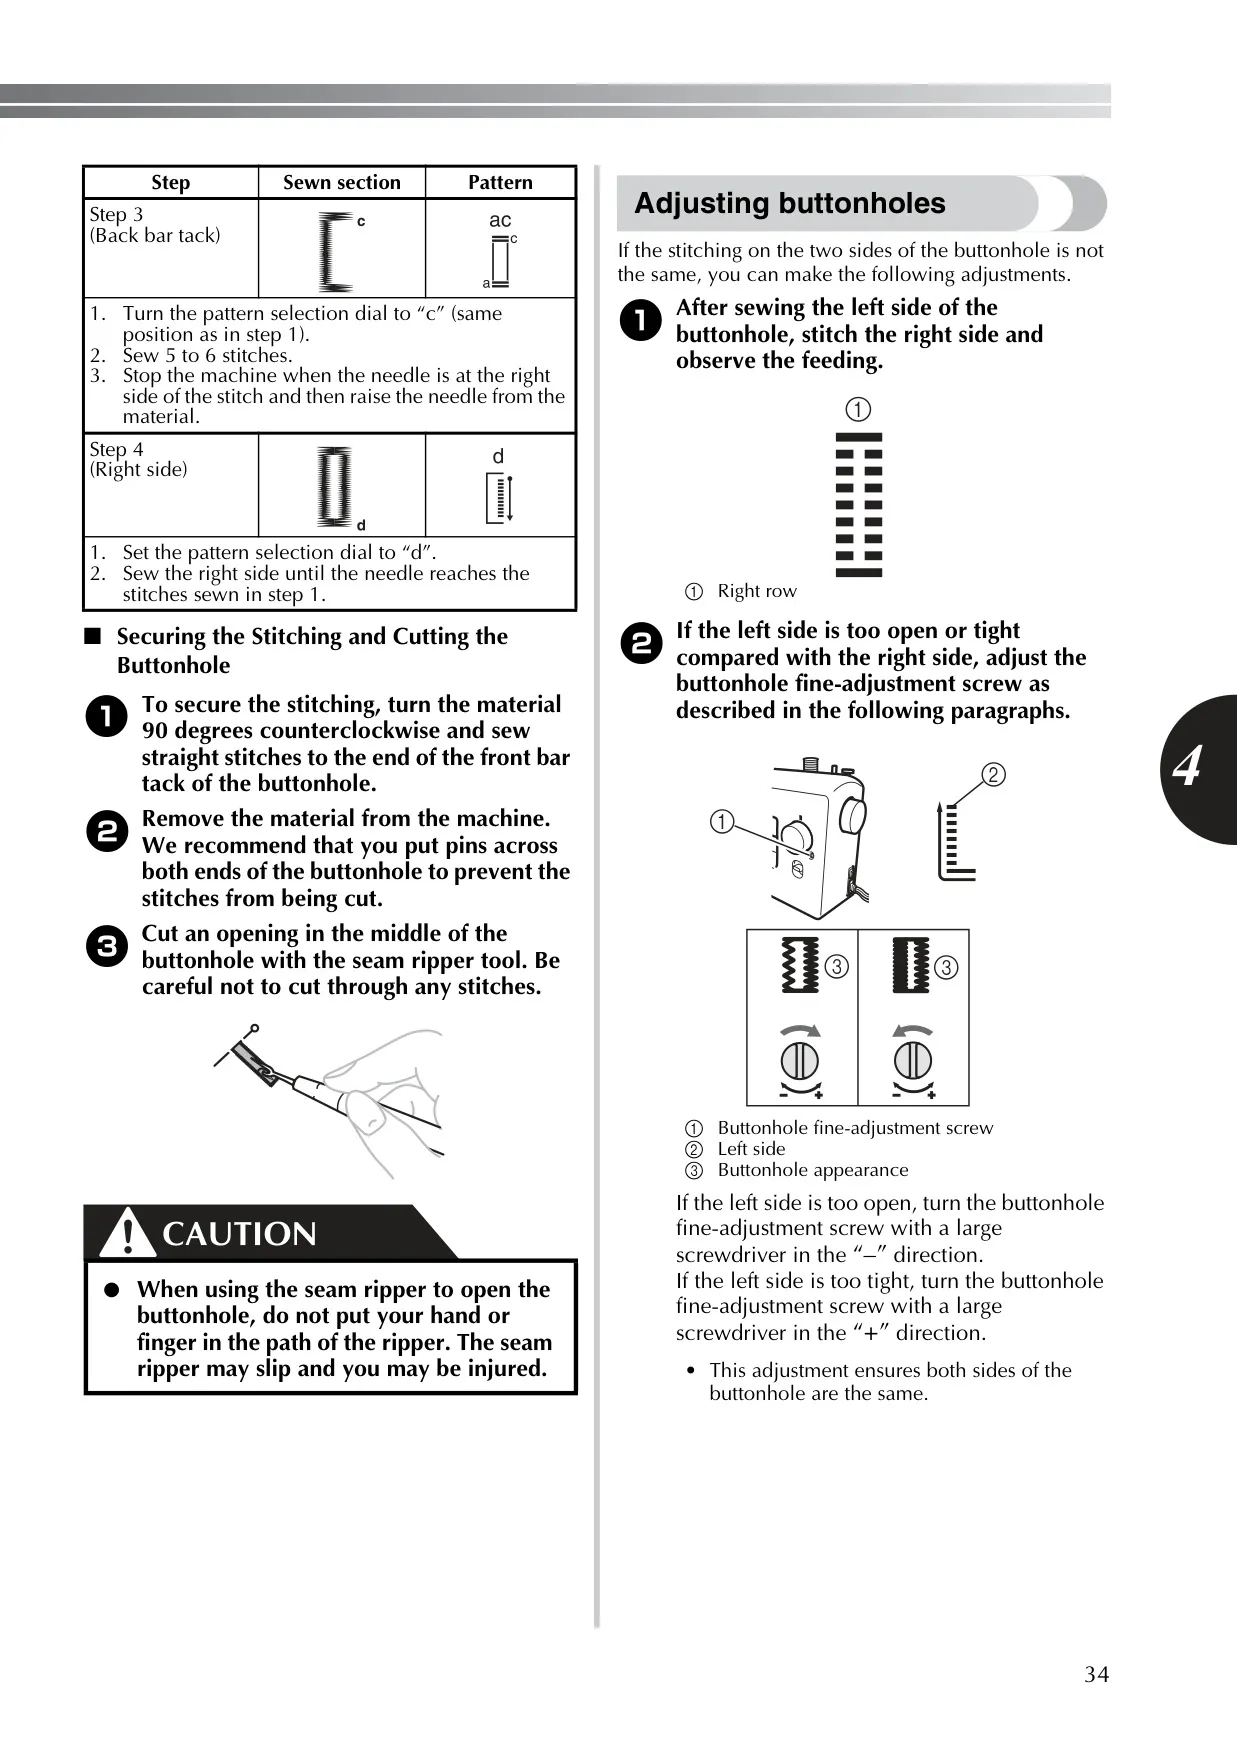
The 4-step buttonhole is sewn in four dial positions: "a" for the front bar tack, "b" for the left side, "c" for the back bar tack and "d" for the right side. If the two sides look different, the buttonhole fine-adjustment screw evens them out. Turn it toward "–" if the left side is too open and toward "+" if it is too tight. For a clean finish, place pins across both ends of the buttonhole before opening it with a seam ripper.
The included zipper foot "I" clips onto the shank from either its left or right pin, so you can sew on either side of the zipper using straight stitch 9. Gathering works by loosening the upper tension and pulling the bobbin threads. For appliqué, the zigzag patterns follow the edge of the design. Satin stitch 5 has three dial positions for a shorter, standard or longer stitch length. Stitch 13 is an elastic stitch for mending tears, attaching elastic and joining knit fabrics.
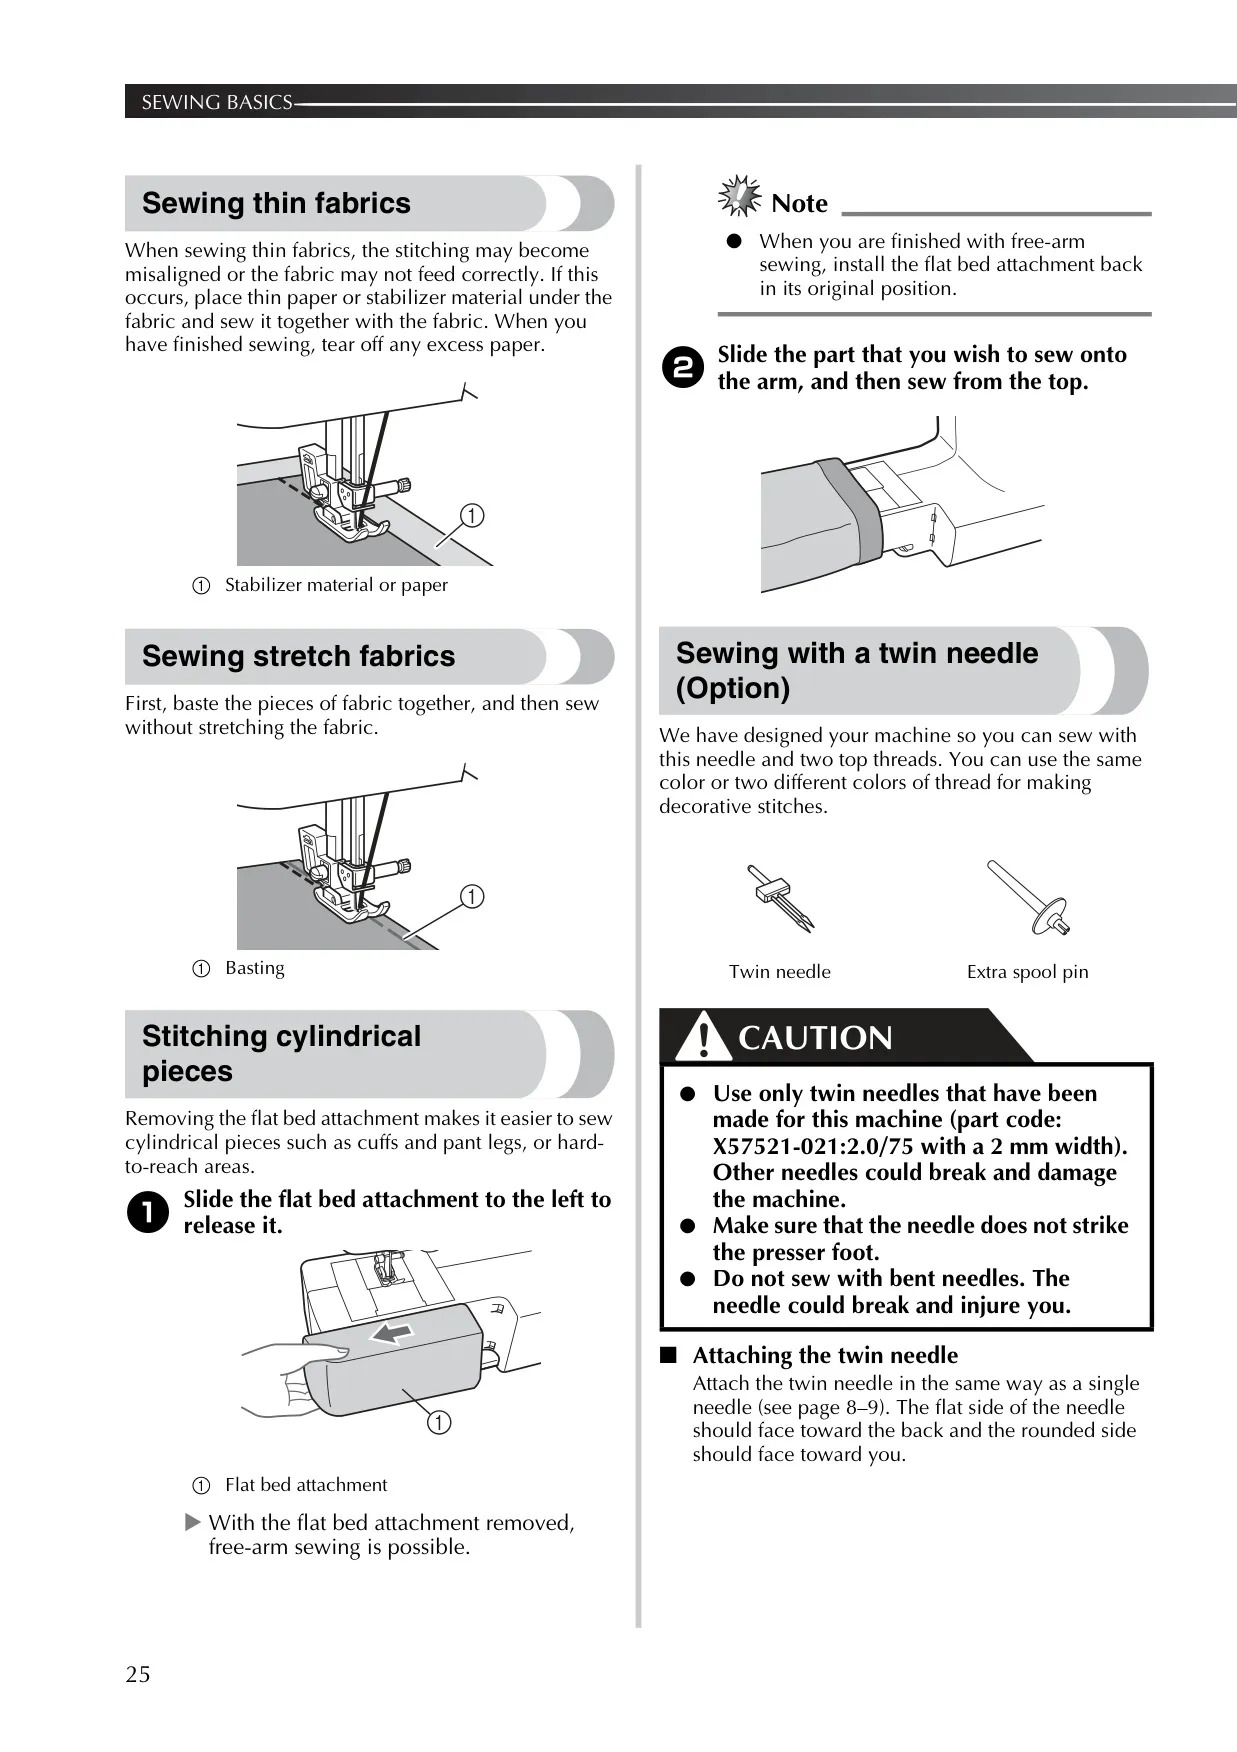
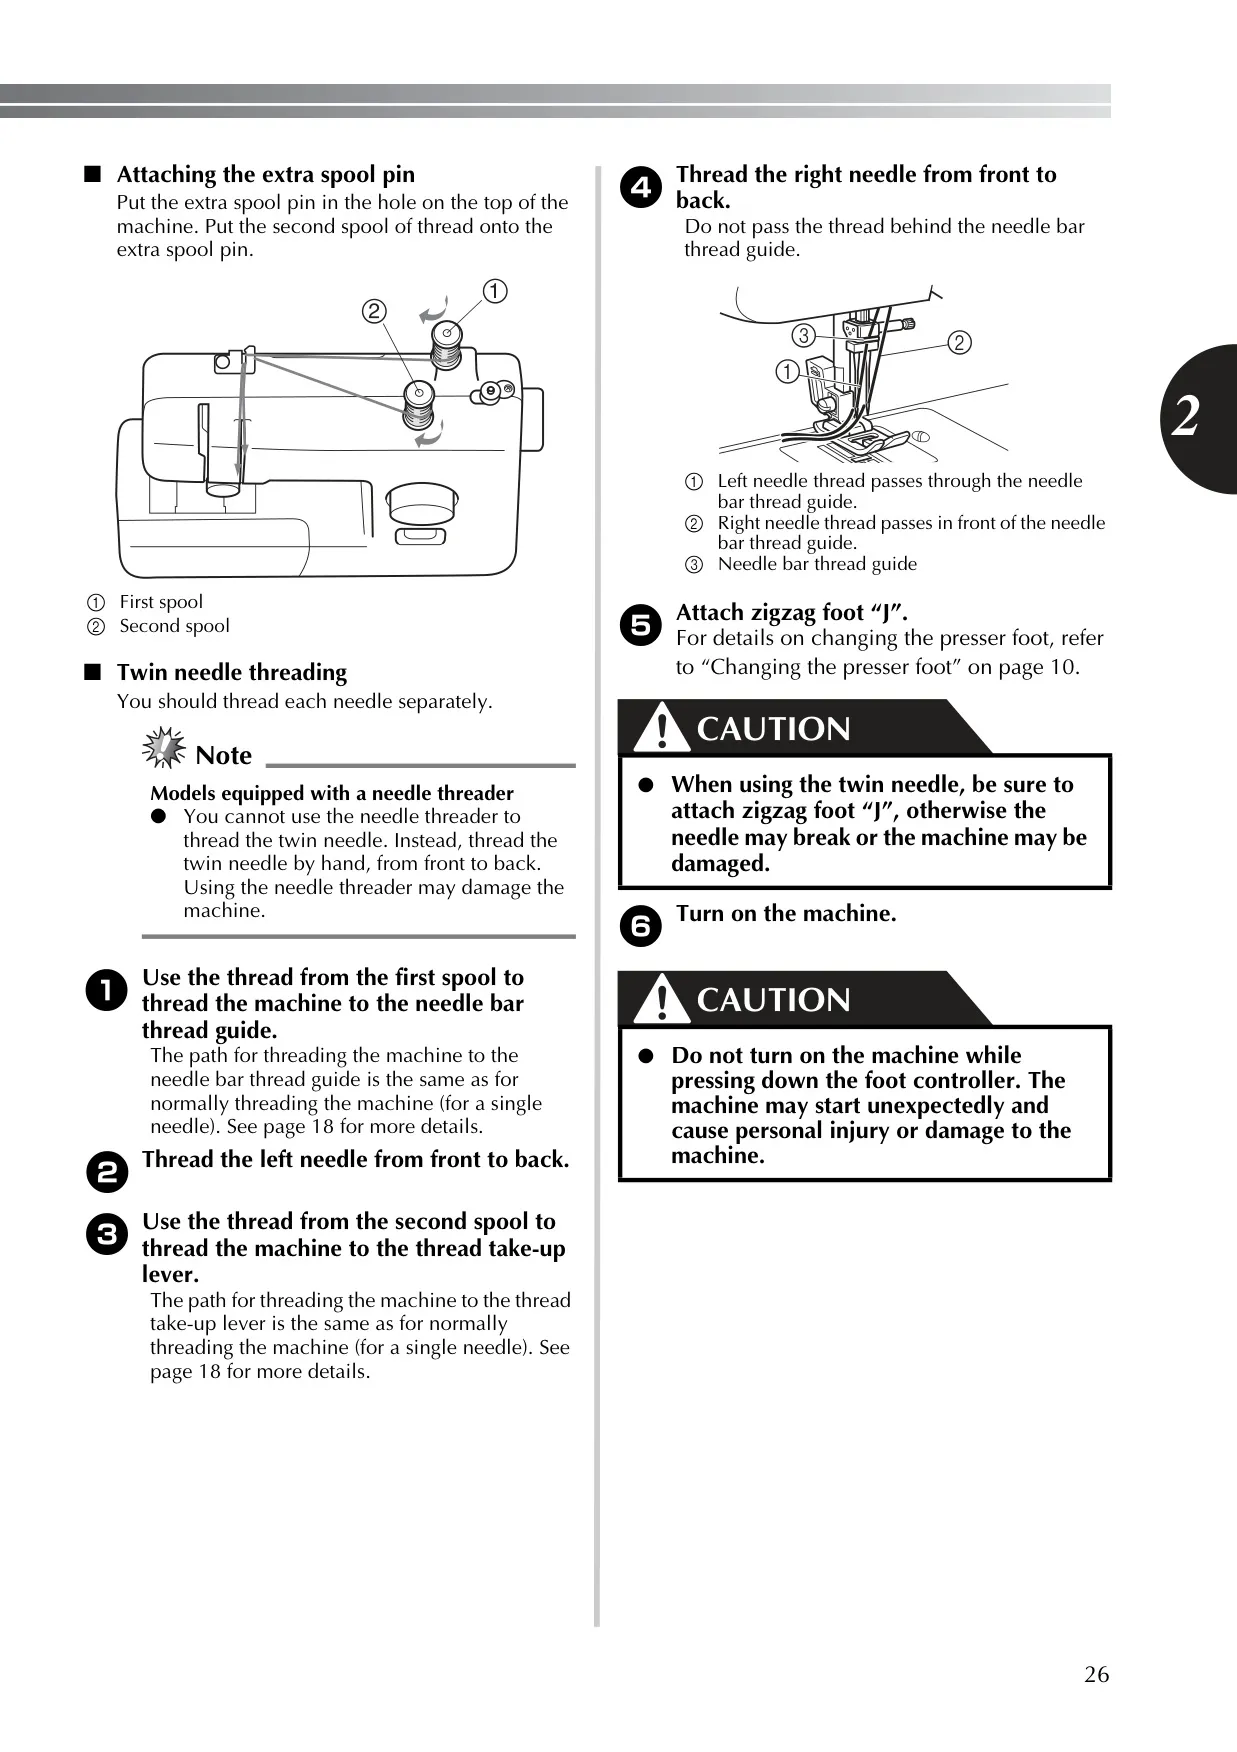
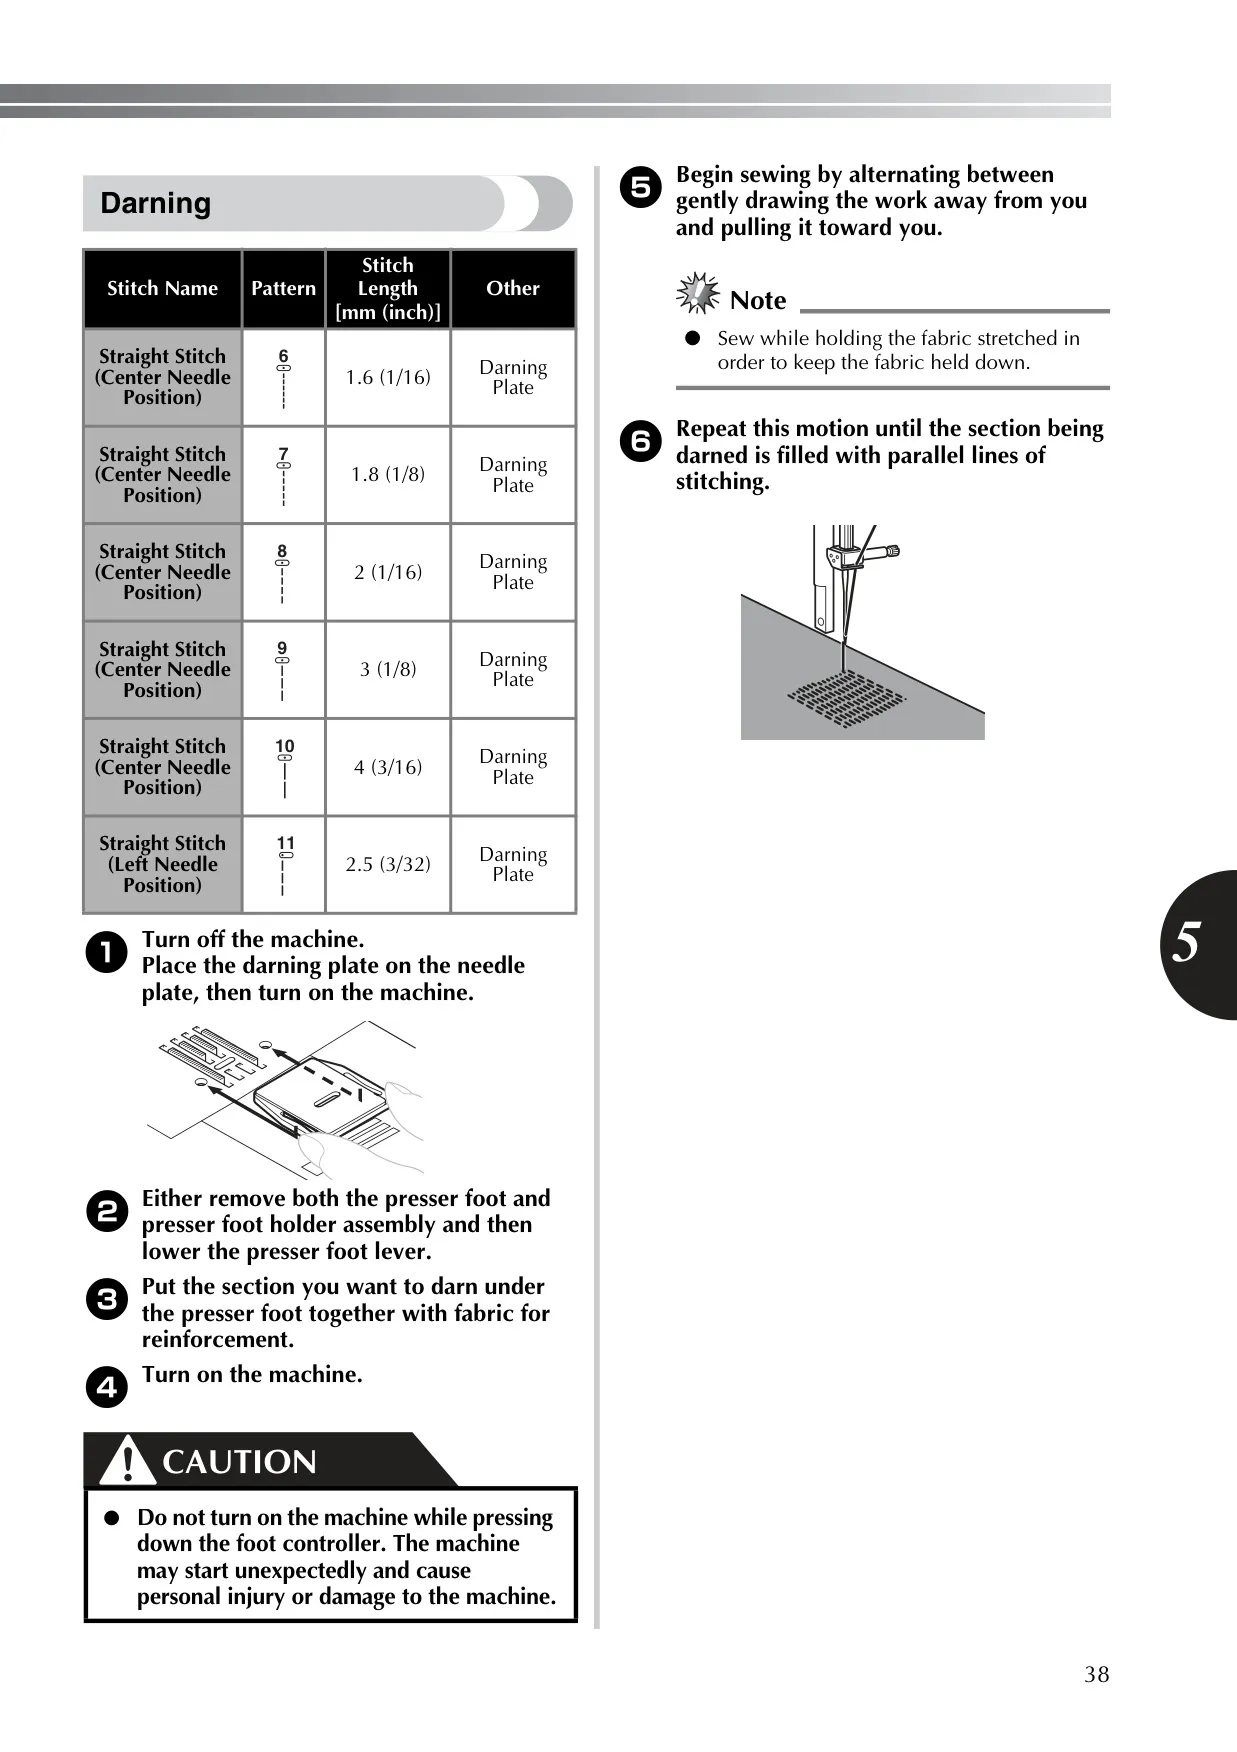
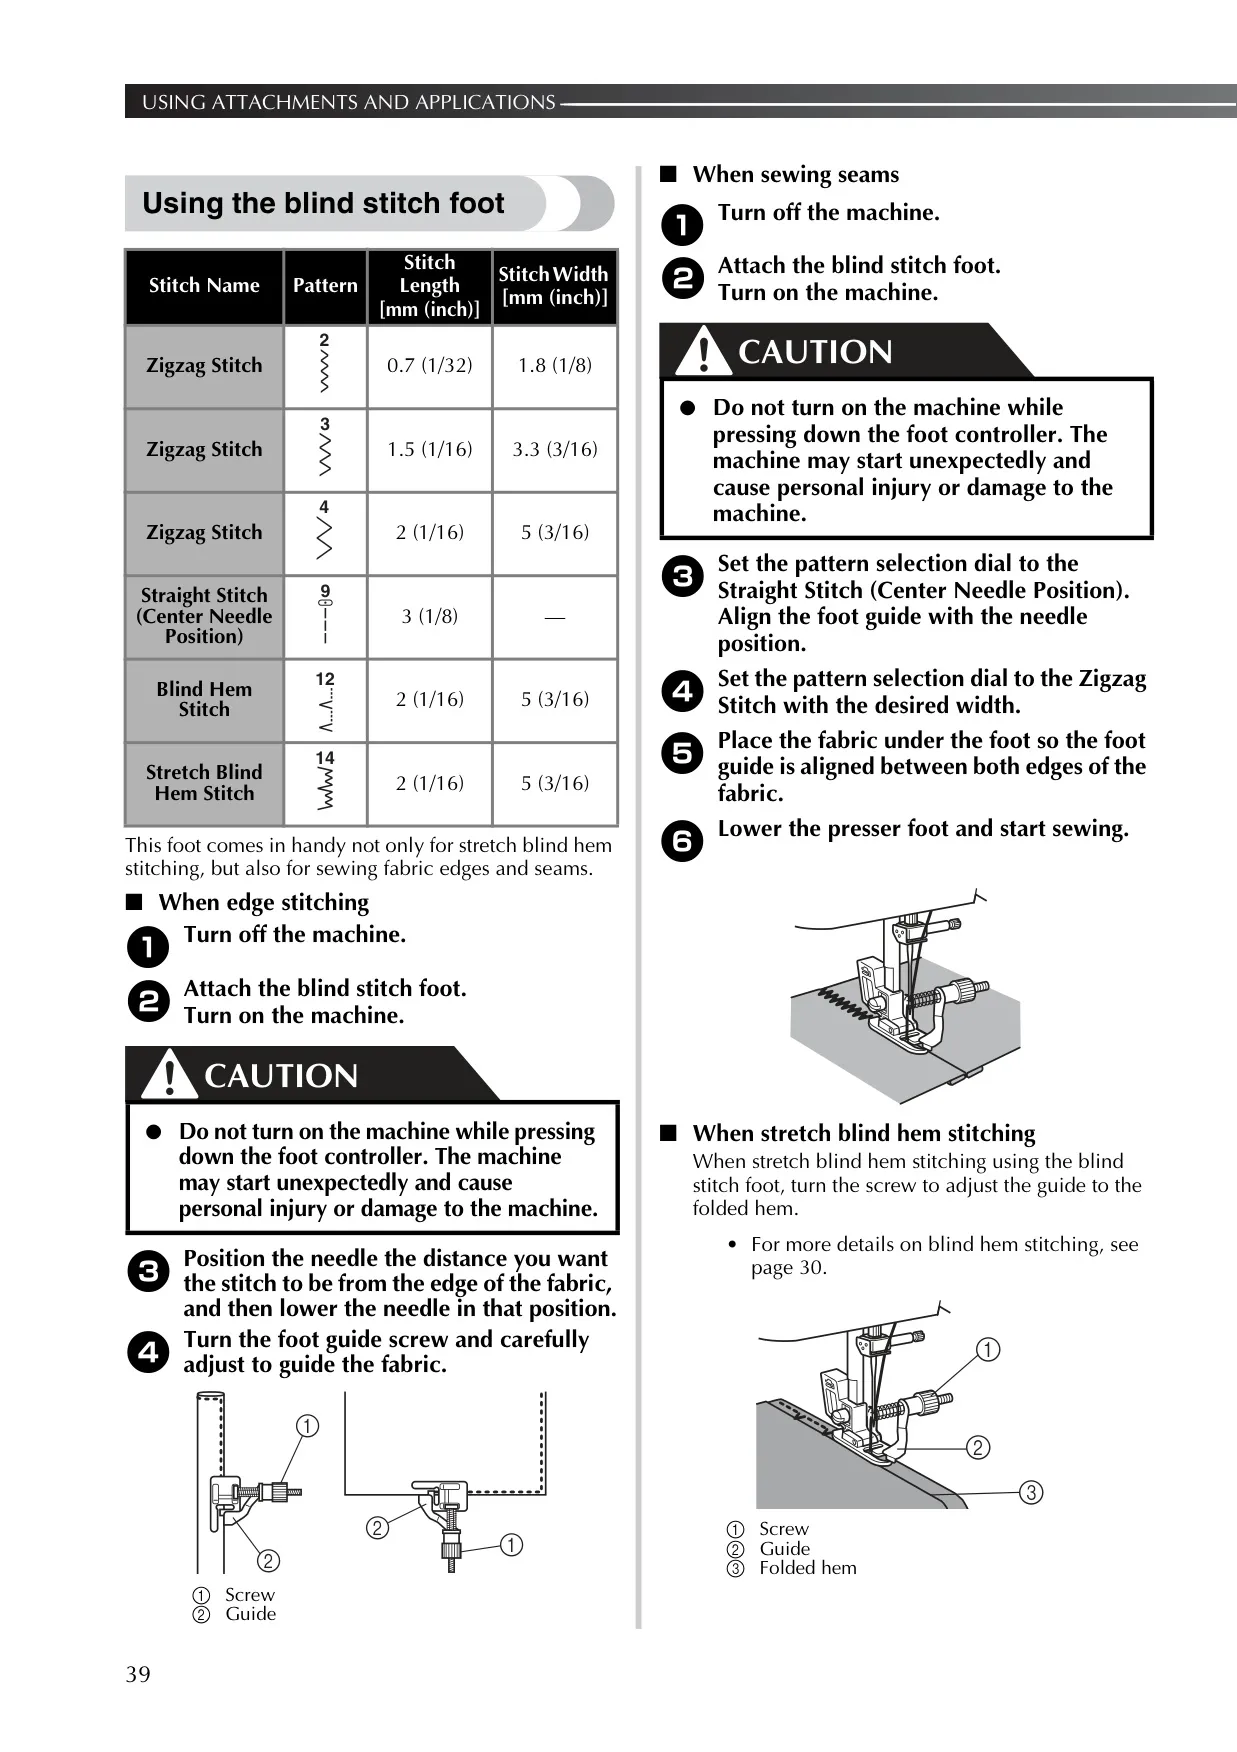
Sliding off the flat bed attachment turns the machine into a free-arm model for sewing cuffs, pant legs and blind hems on cylindrical pieces. The attachment also stores the accessories. With optional parts, you can sew buttons with foot "M" and the darning plate, darn freely without a presser foot, and use the blind stitch foot's adjustable guide for edge stitching. The twin needle sews two parallel rows with two thread colors, but only with zigzag foot "J" and the approved stitches.
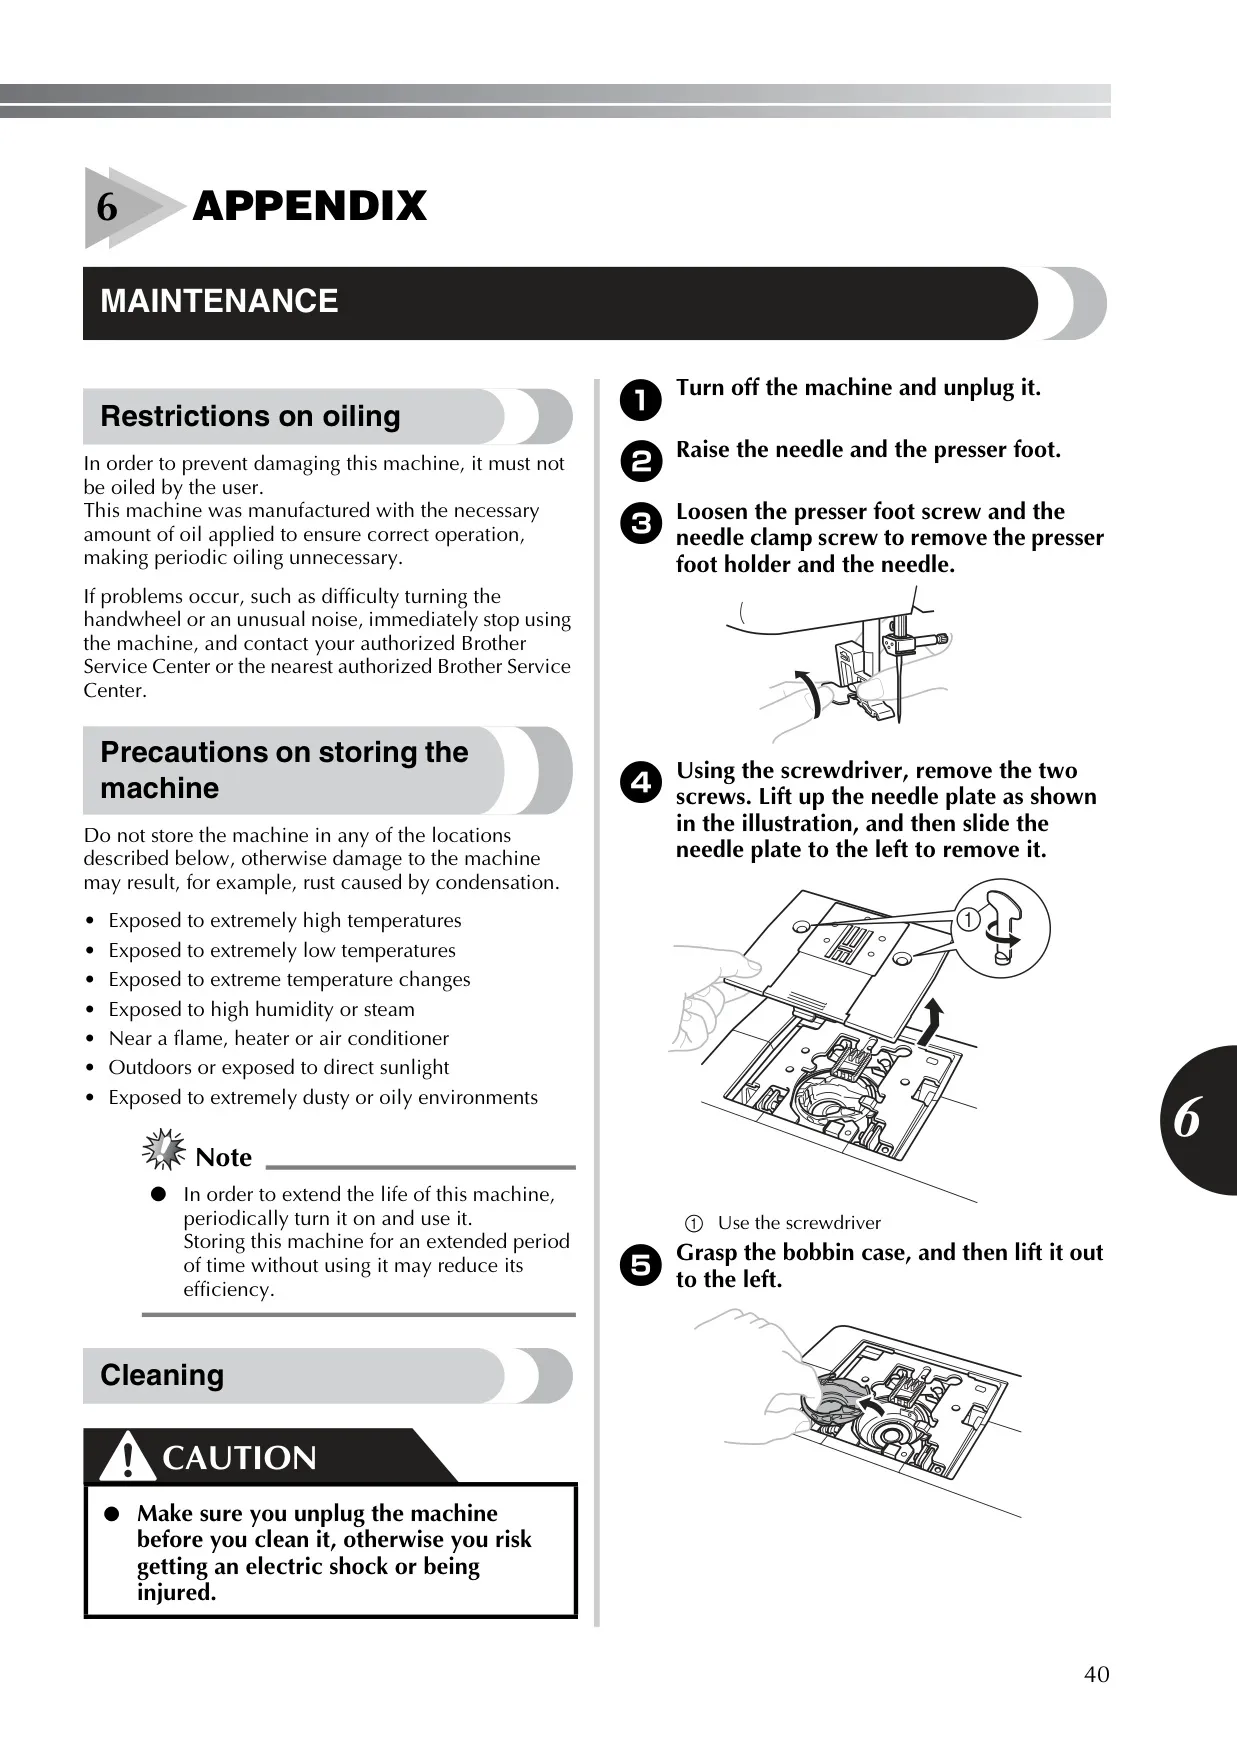
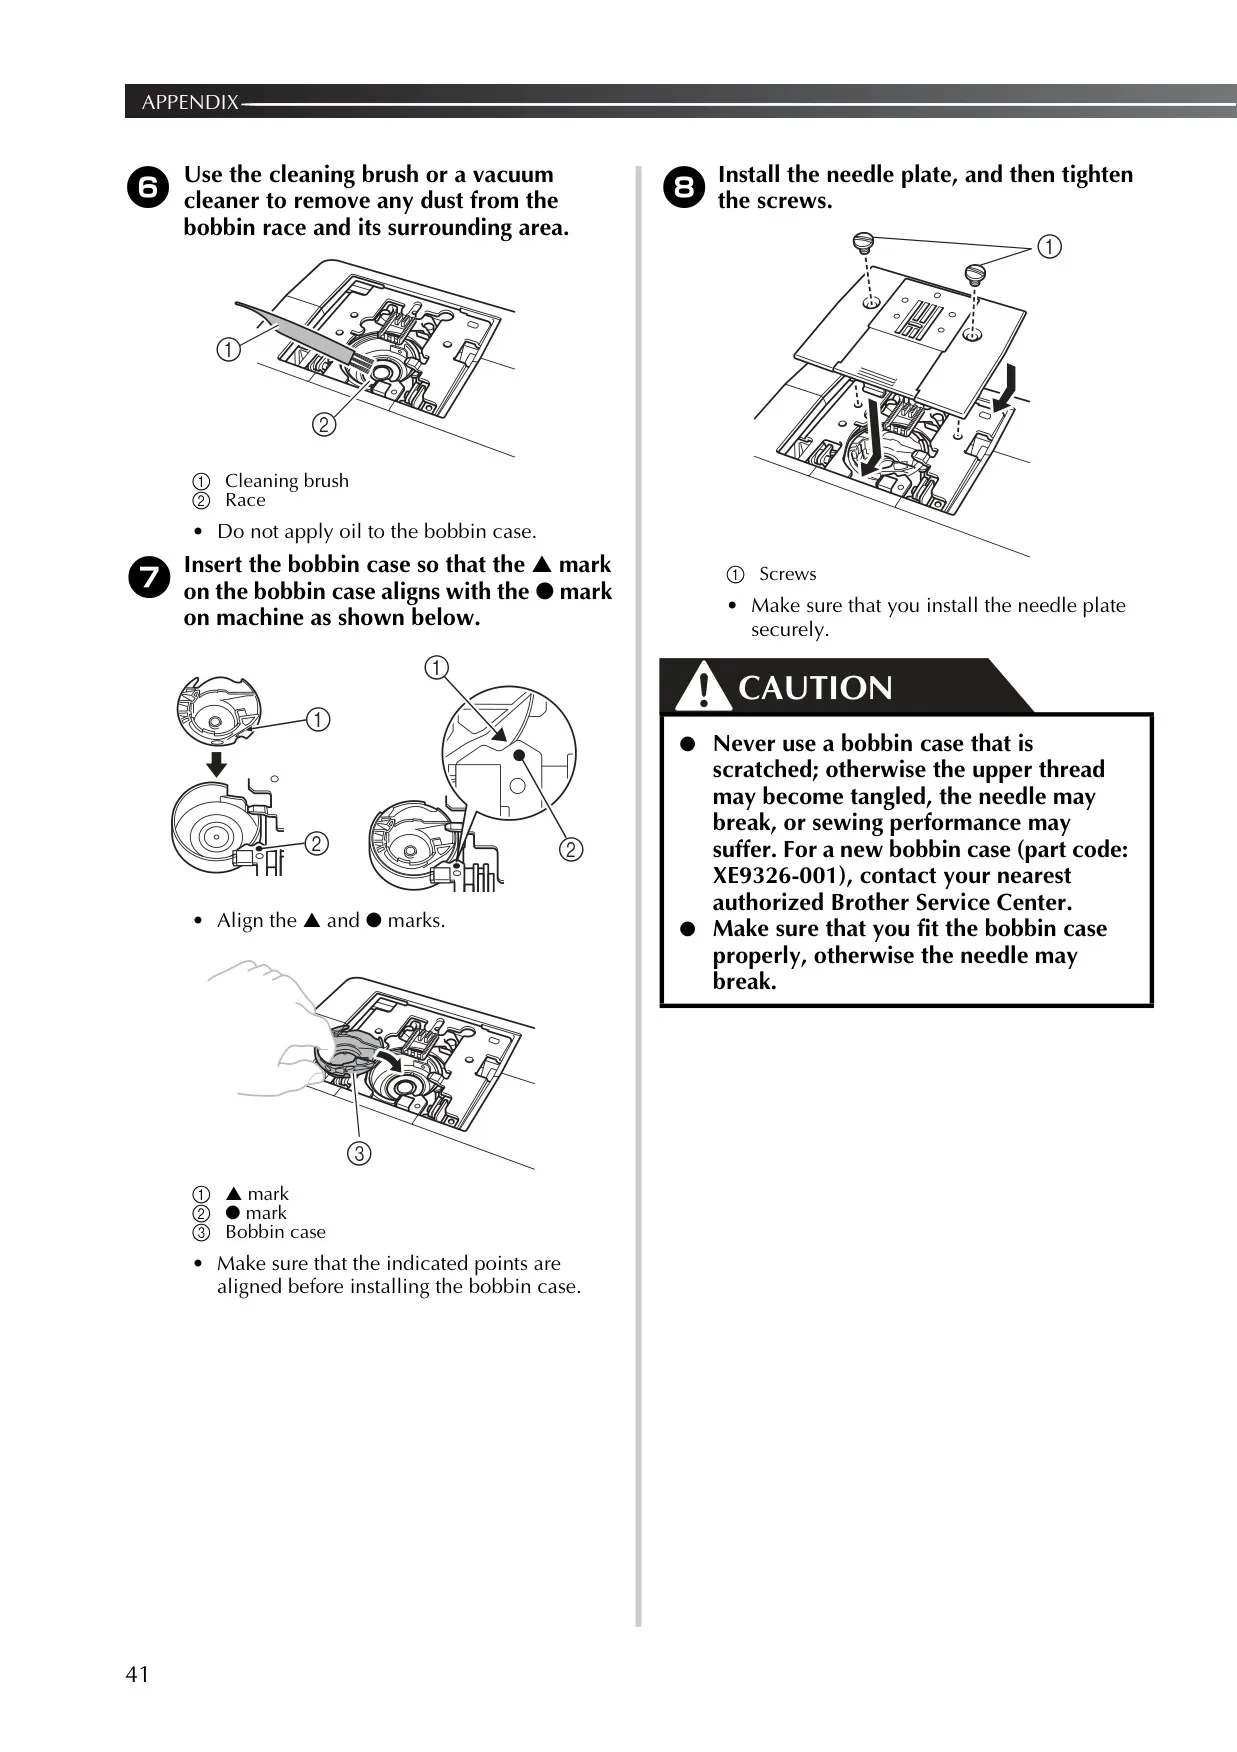
Maintenance is simple. The machine is oiled at the factory and should never be oiled by the user. To clean it, remove the needle plate and bobbin case, then brush or vacuum the race. When you reinstall the case, line up its ▲ mark with the ● mark on the machine. Store the machine away from heat, humidity, dust and direct sunlight, and run it from time to time to keep it working well. The included DVD shows each procedure step by step.
Frequently Asked Questions (FAQs)
Can't find the answer you need? Here are some frequently asked questions about the Brother LS14S Sewing Machine, and we answer them below.