
Morphy Richards 48220 Fastbake Breadmaker Instruction Manual

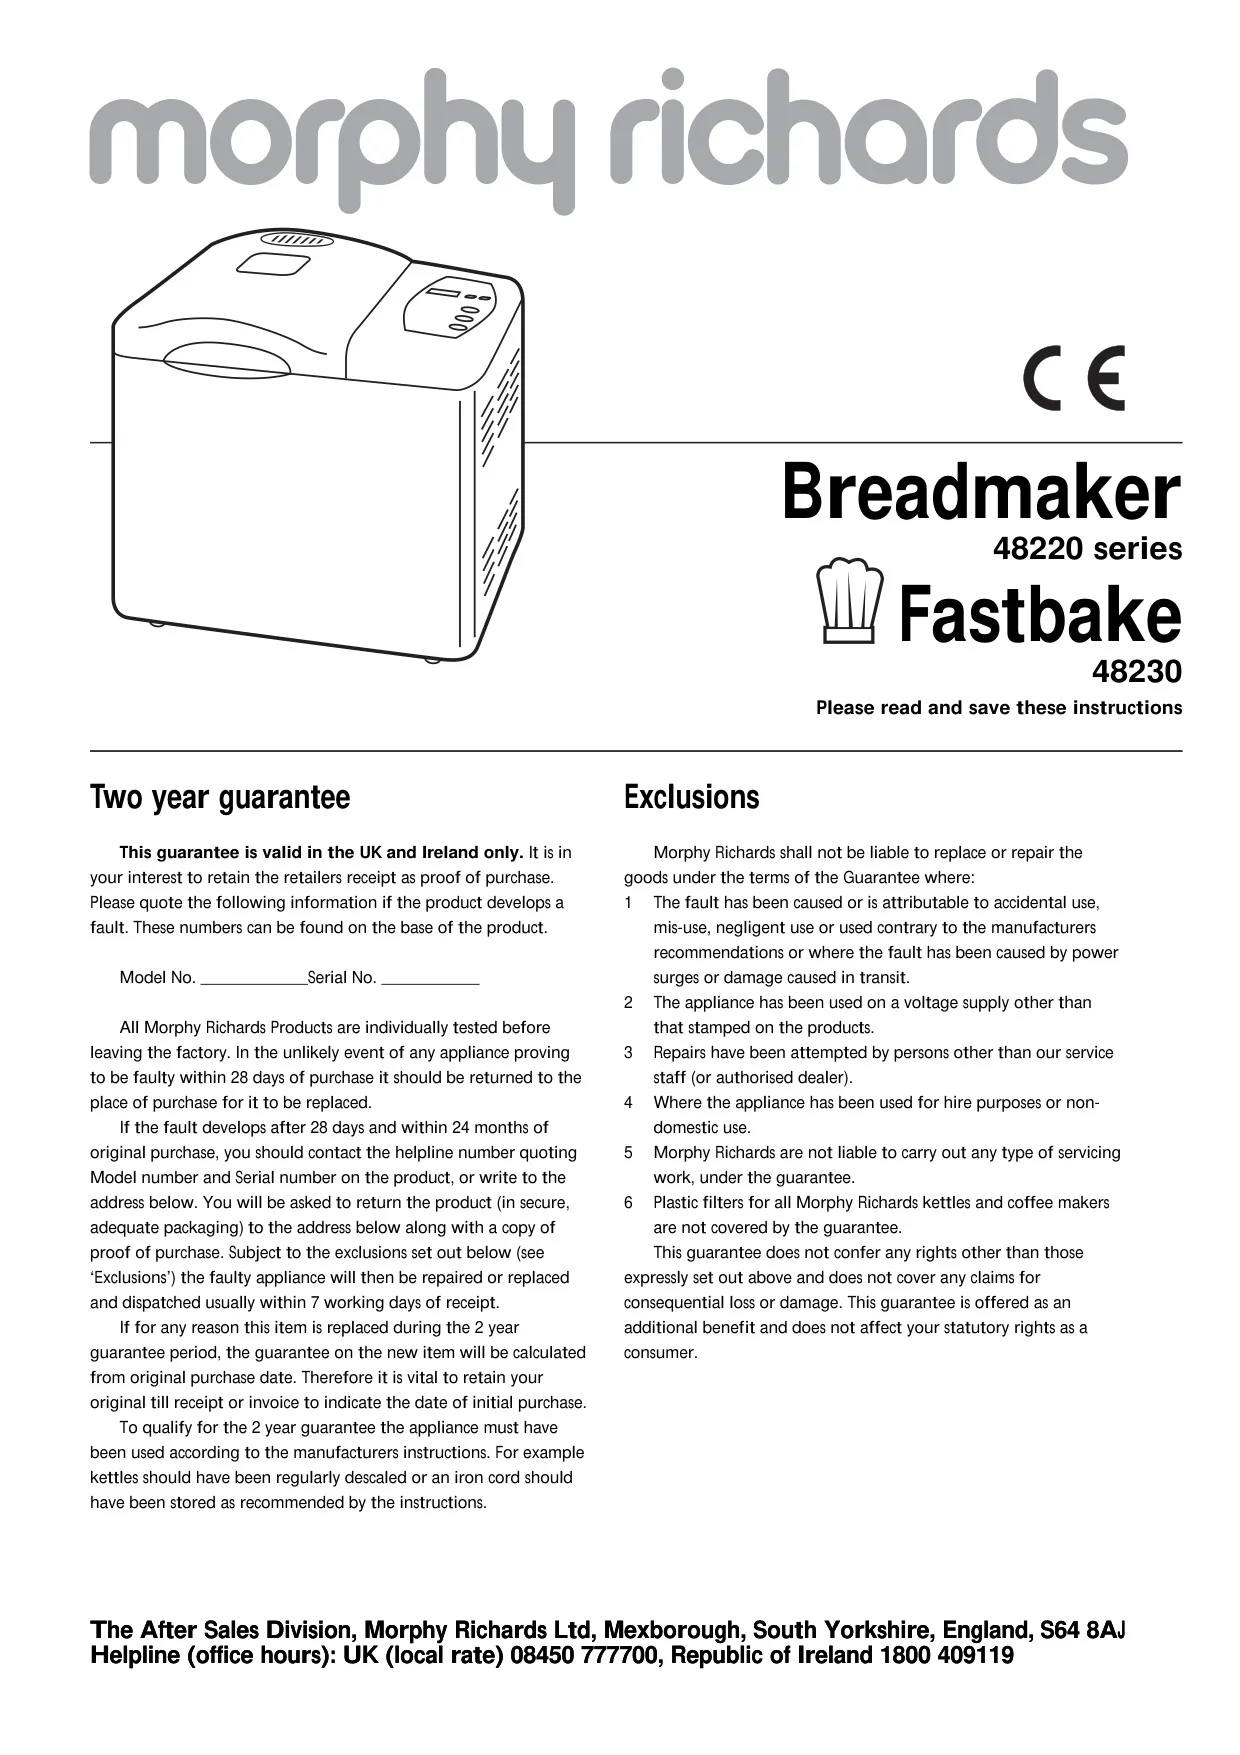
Morphy Richards 48220 Fastbake Breadmaker
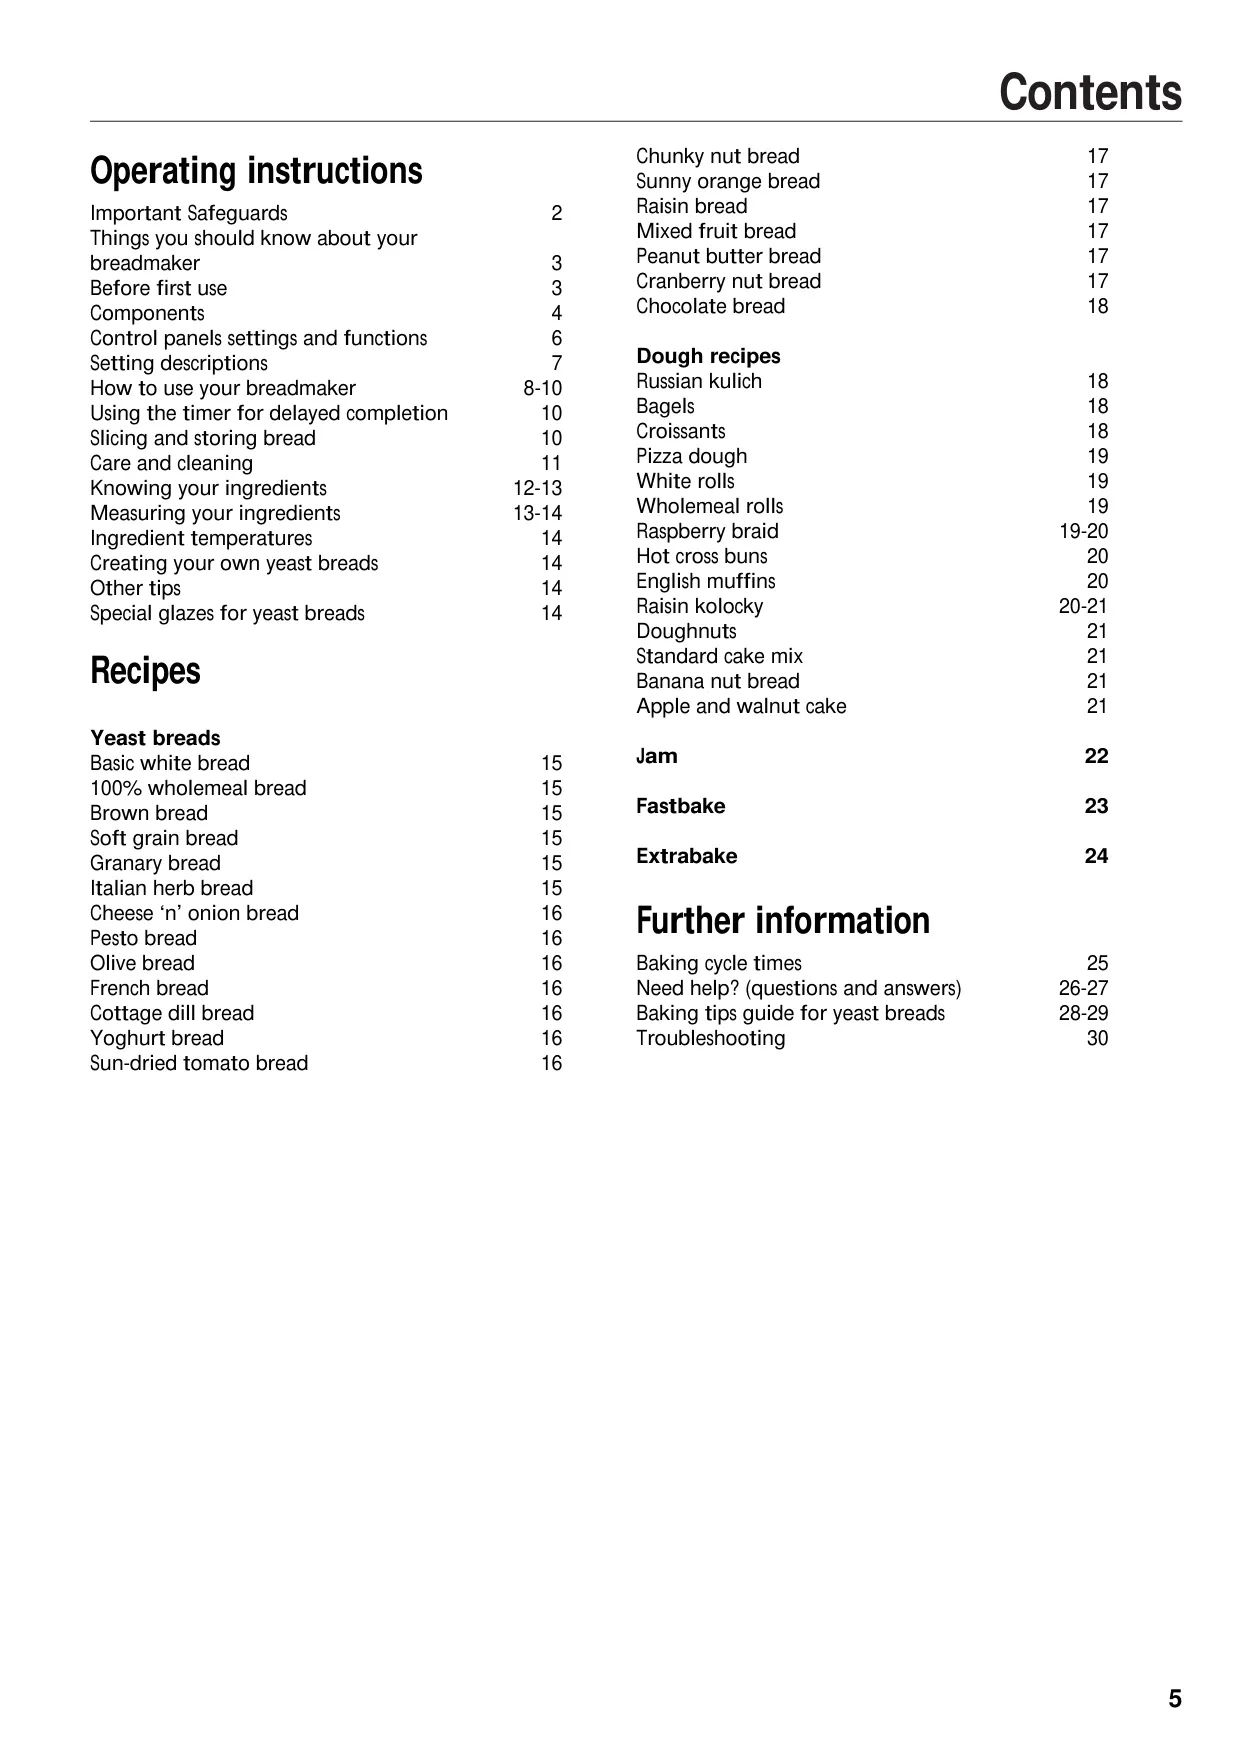

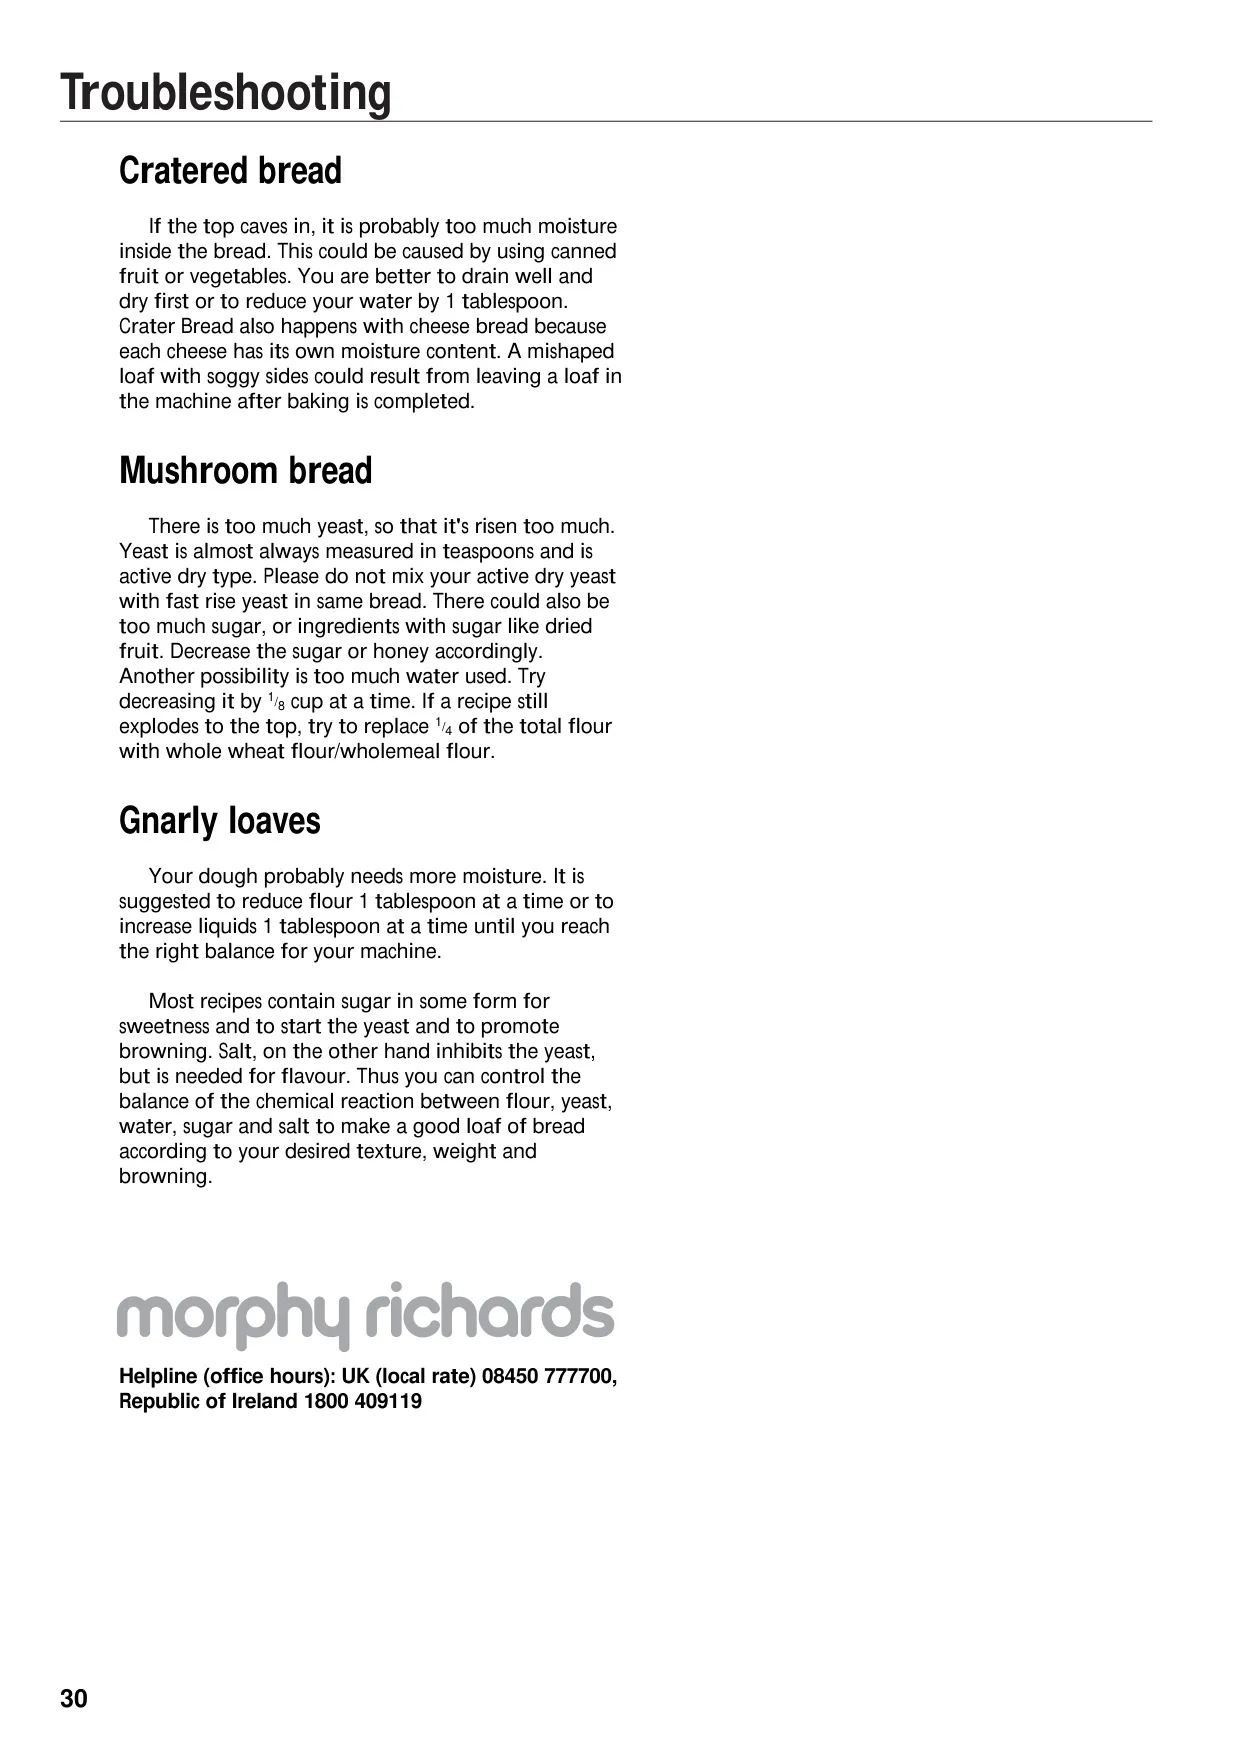



Morphy Richards 48220 Instructions
Here we offer the Morphy Richards 48220 Fastbake Breadmaker manual completely free and in English. We have cataloged this manual in the Breadmakers section on Manualverse, and it has been rated by 1 users with an average rating of 5. If you have any specific questions about Morphy Richards 48220 Fastbake Breadmaker, we suggest checking the Frequently Asked Questions (FAQs) section of this manual.
Product Images
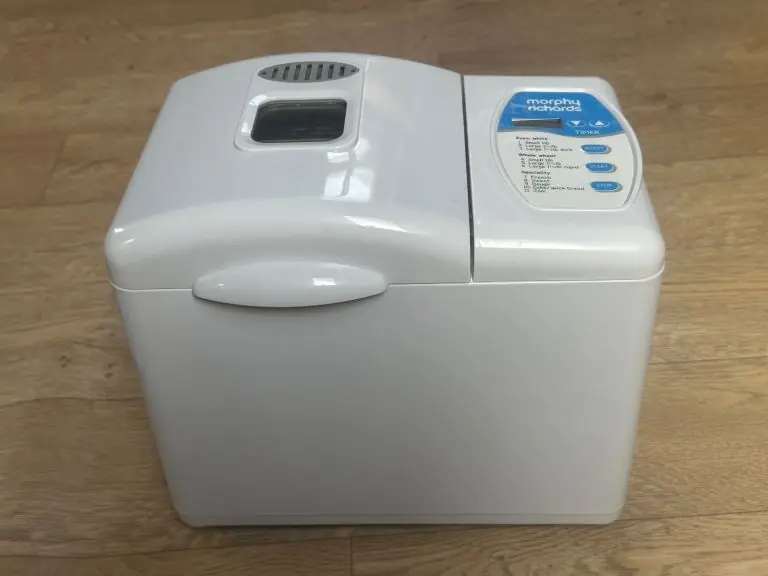
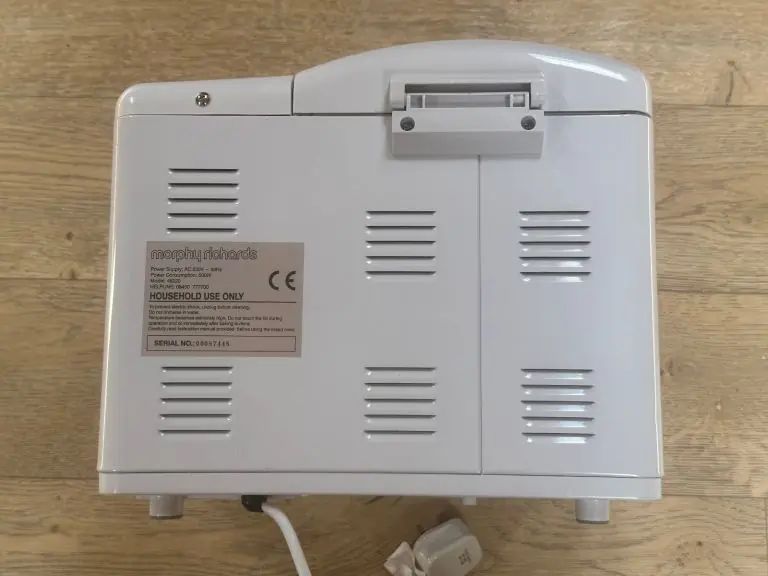
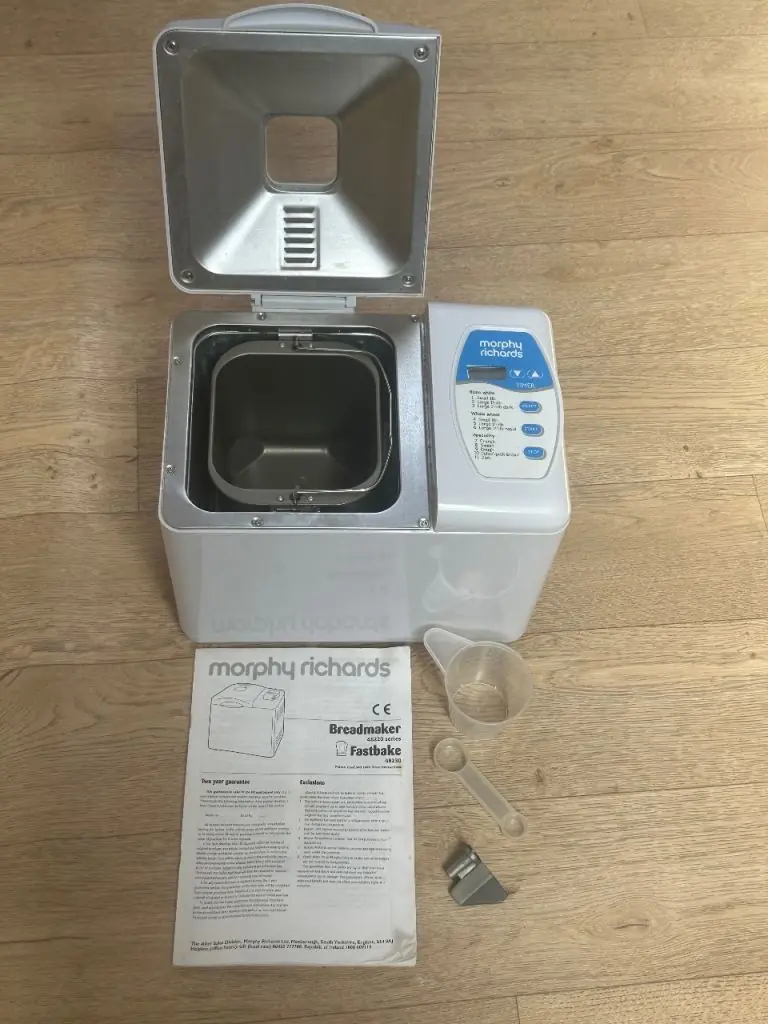
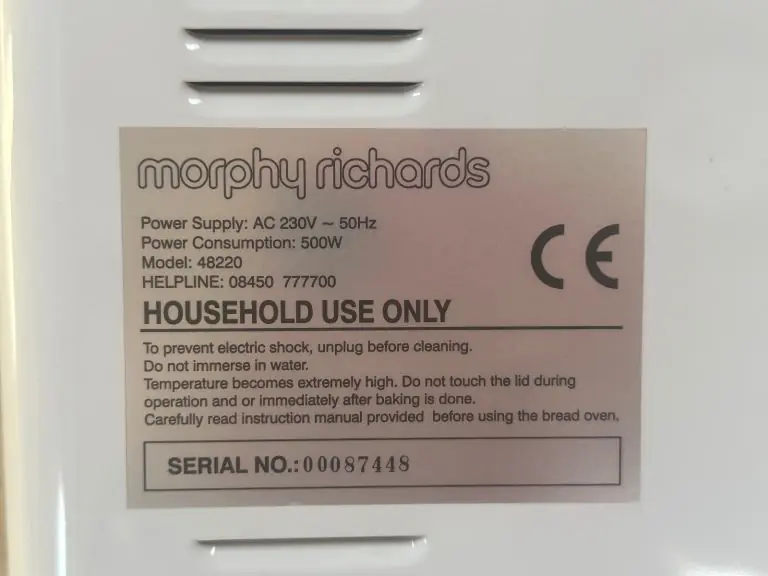
Morphy Richards 48220 Fastbake Breadmaker Specifications
| Feature | Specification |
|---|---|
| Model Series | 48220 Fastbake (also covers 48230 series for Fastbake program) |
| Loaf Sizes | Small (approx. 450g / 1lb), Large (approx. 675g / 1½lb) |
| Number of Settings | 12 main settings (including Fastbake) + Extrabake (Setting 0) |
| Power Consumption | 670 watts (during baking cycle) |
| Guarantee | 2 Years (UK and Ireland only) |
| Display | Digital display window |
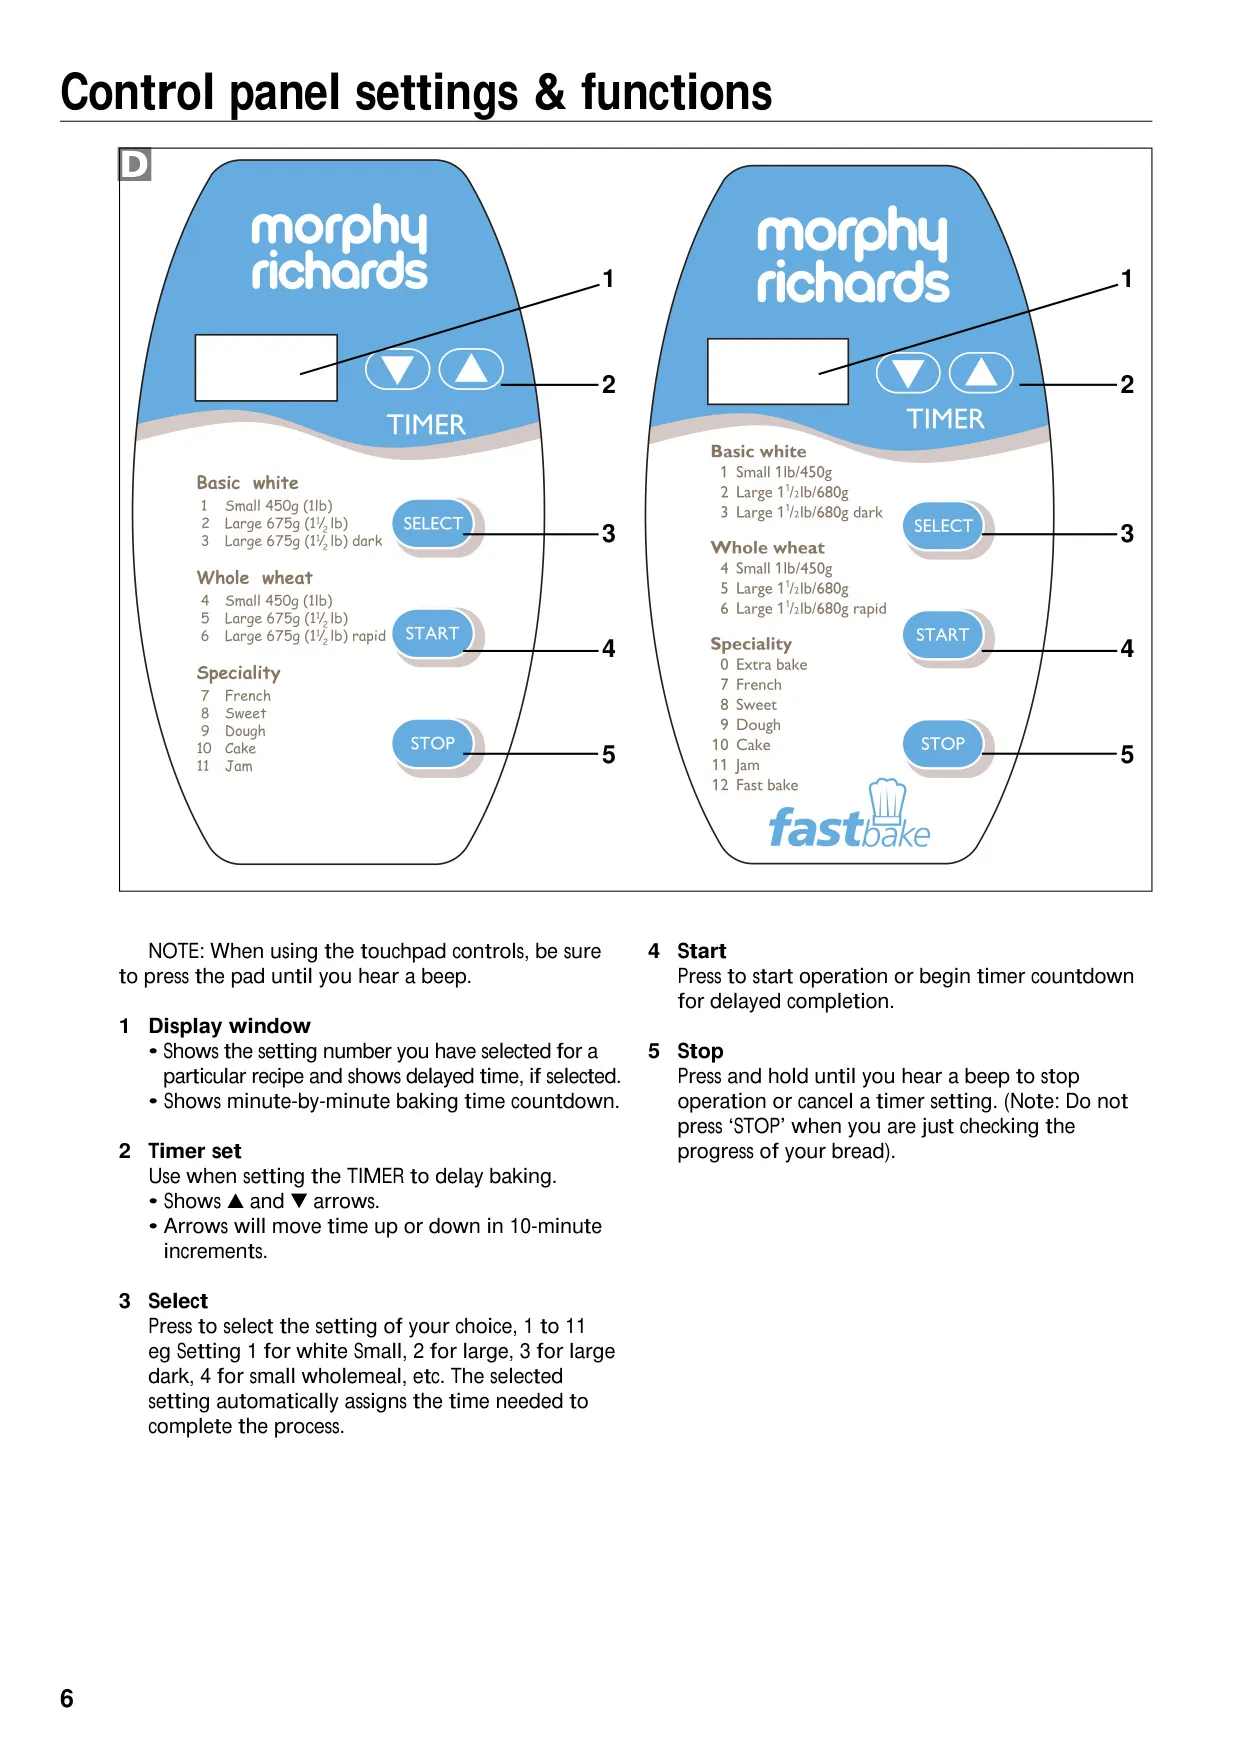
| Controls | Touchpad: Select, Timer Set (▲ / ▼ in 10-minute increments), Start, Stop |
| 'Keep Warm' Function | Up to 1 hour after baking completion (except for Jam/Dough settings) |
| 'Added-Ingredient' Function | Audible tone 32 minutes into Basic Breads (2-3) and Sweet (8) cycles |
| Electrical Requirements | A.C. (Alternating Current), appliance must be earthed, 13 amp BS1362 fuse |
Morphy Richards 48220 Breadmaker Details
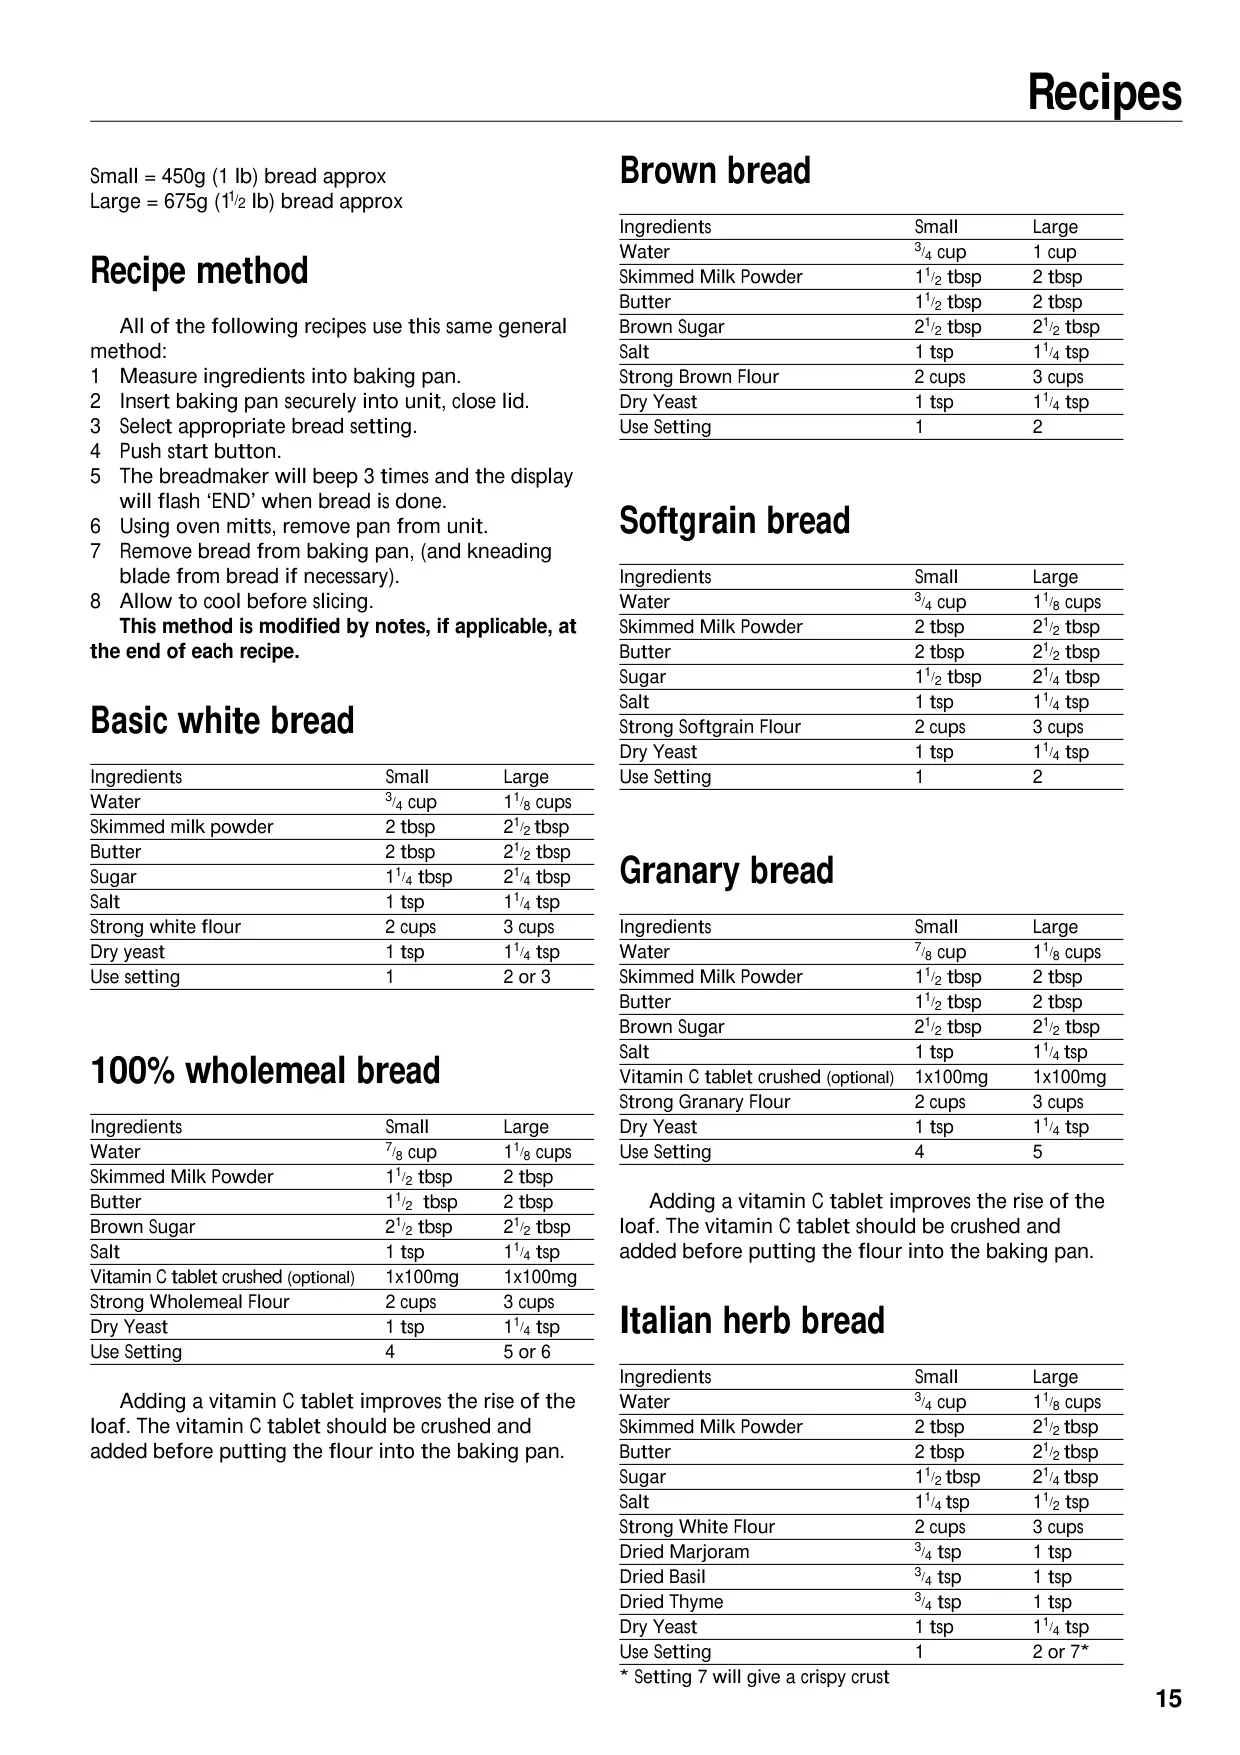
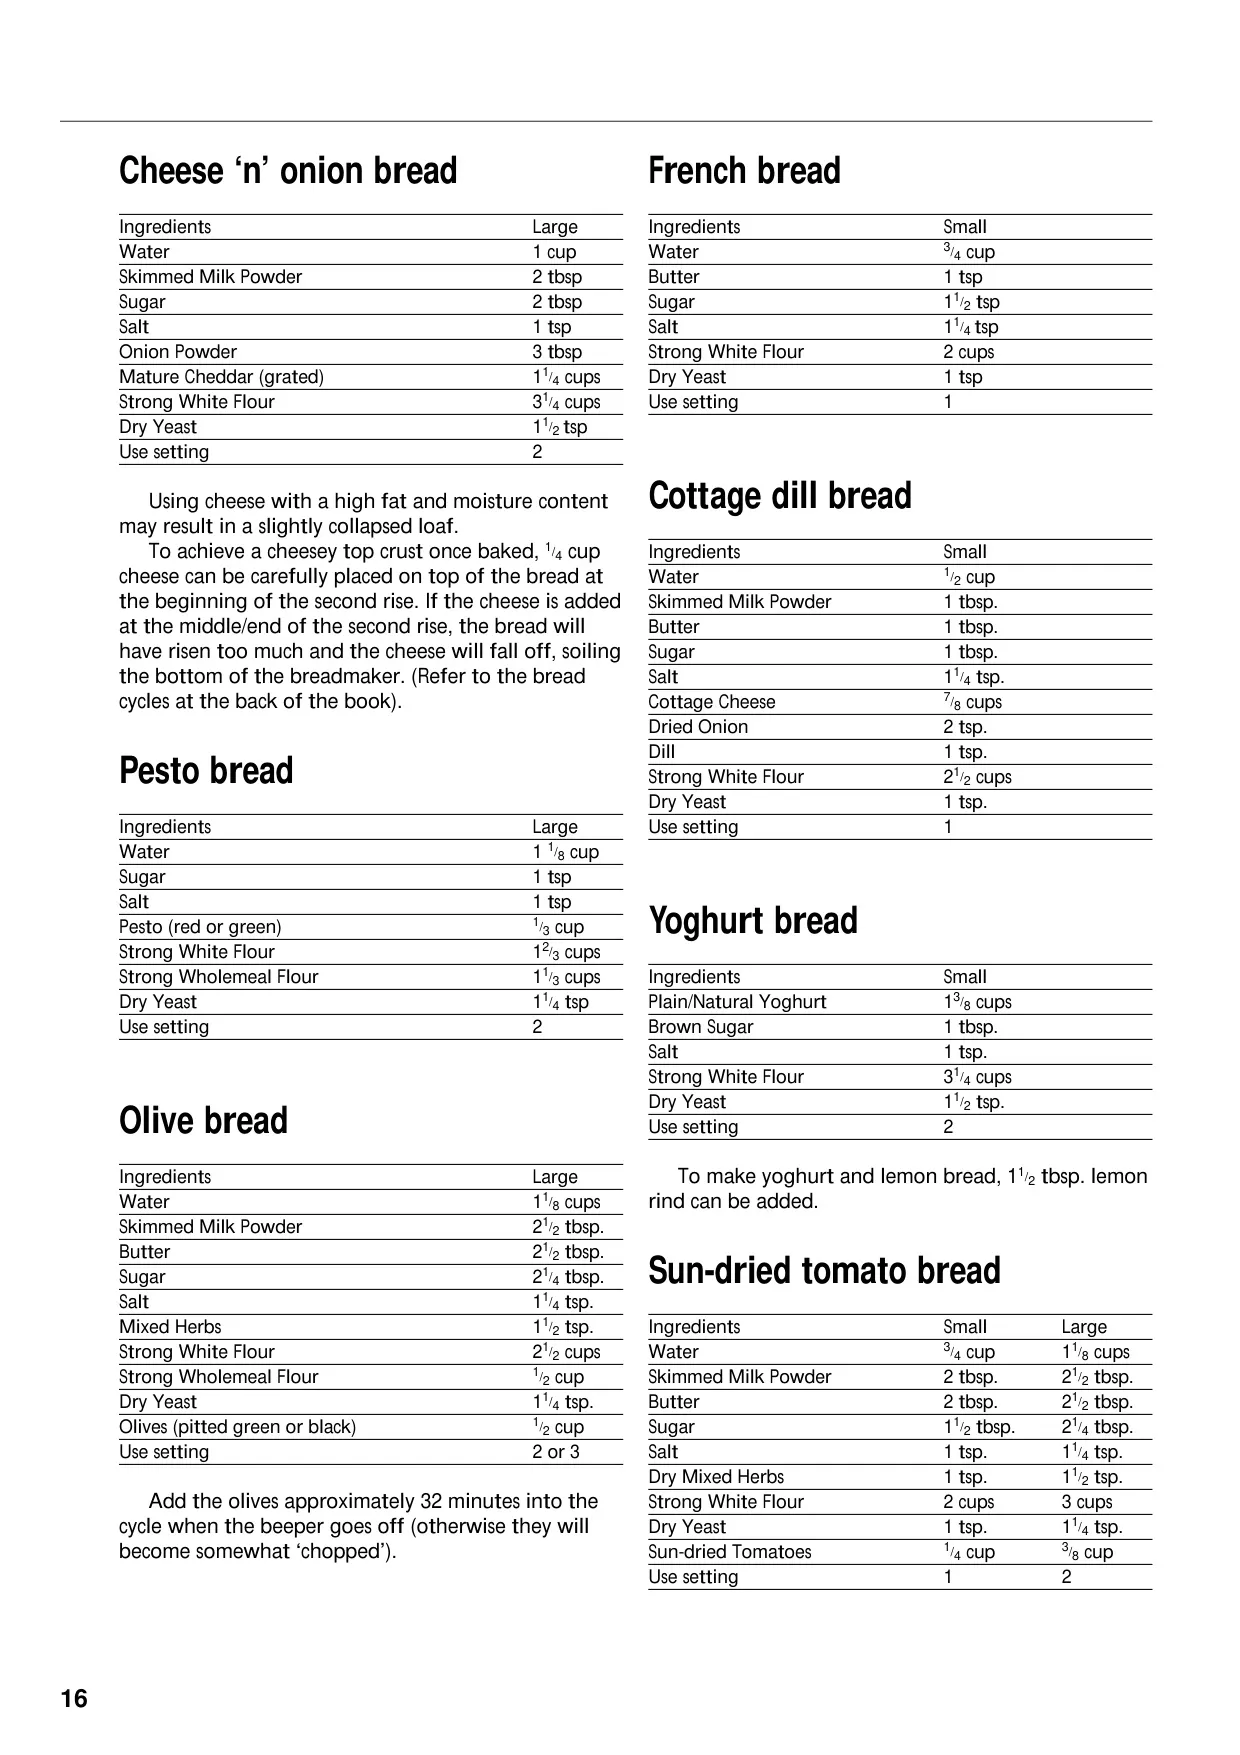
The Morphy Richards 48220 Fastbake Breadmaker is designed for ease of use, delivering fresh homemade bread with minimal effort. Its intelligent design incorporates a sophisticated computer memory that automates the entire bread-making process, from mixing and kneading to proofing and baking. Users simply follow recipes, load ingredients, and select a setting to enjoy a variety of baked goods.
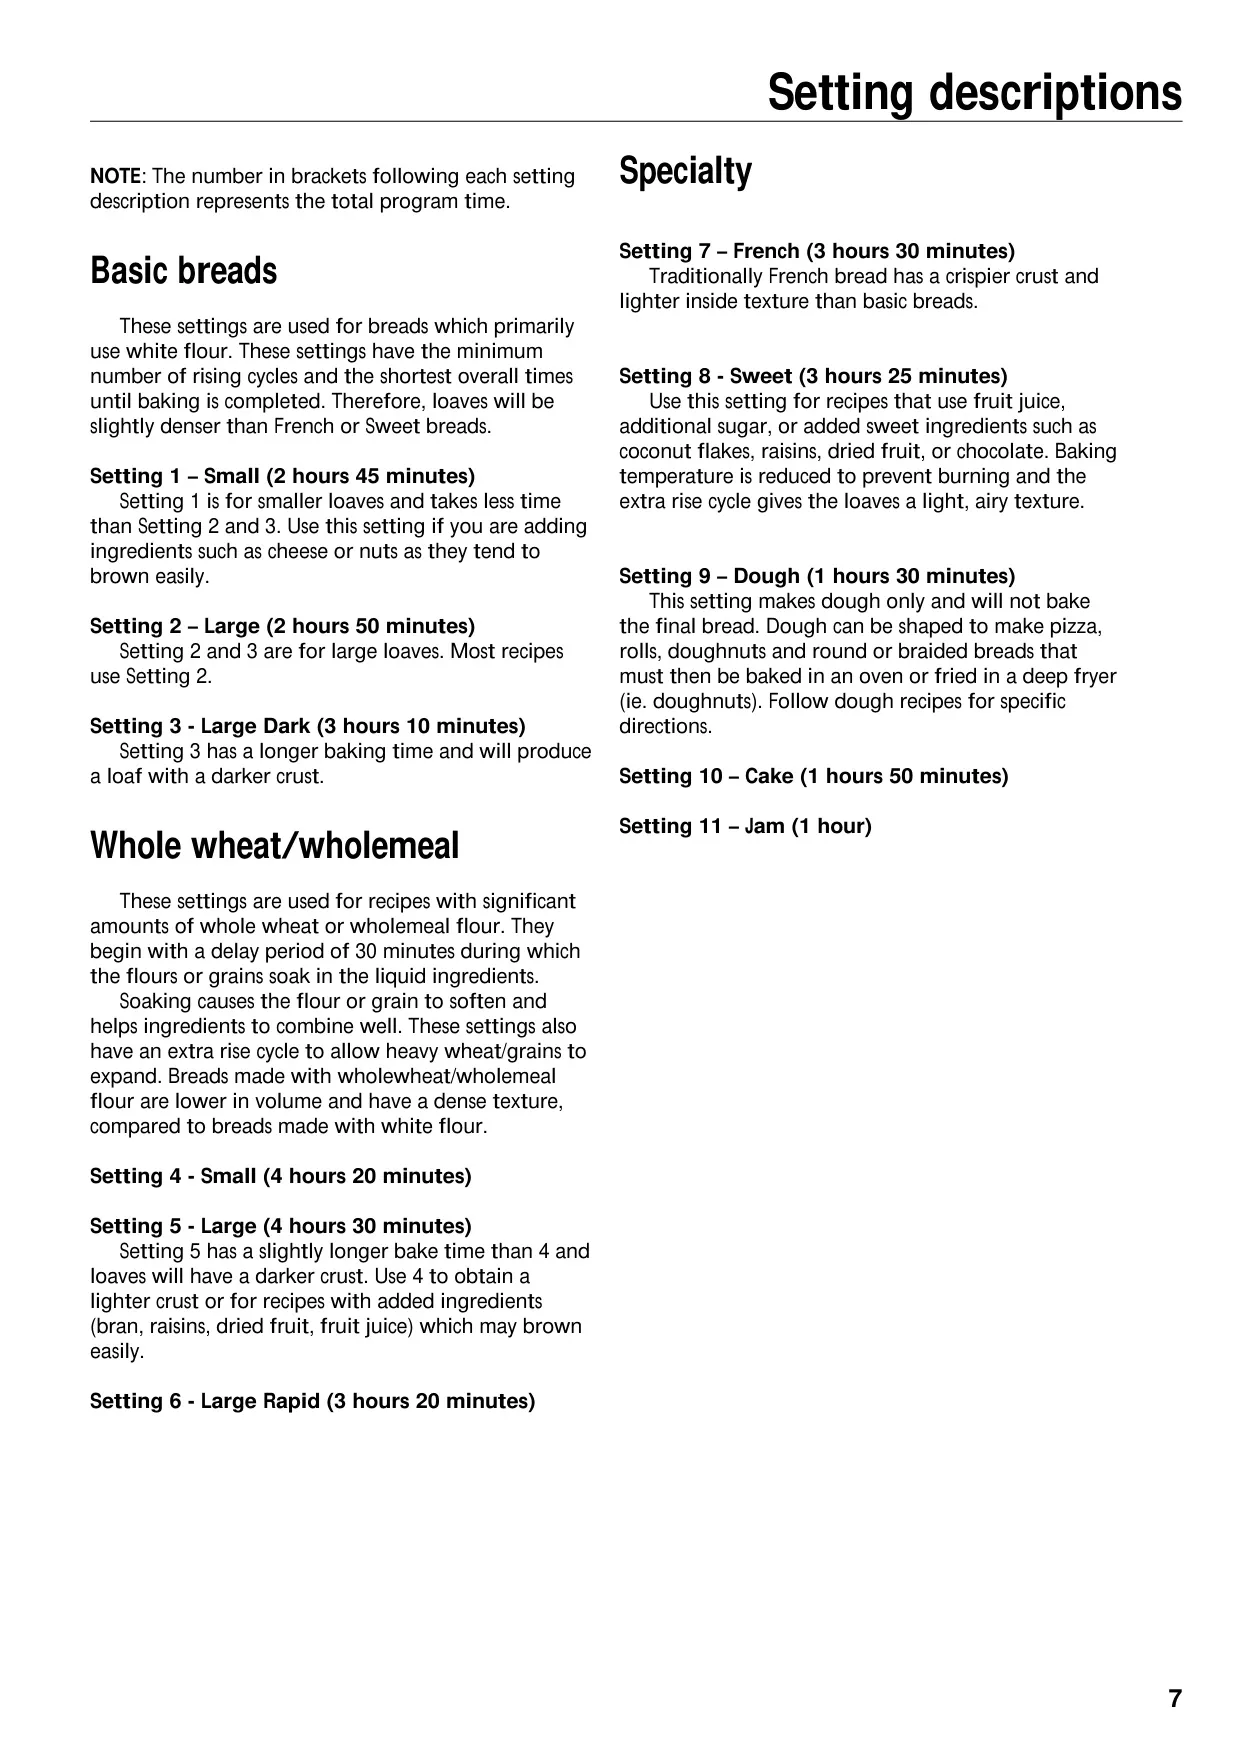
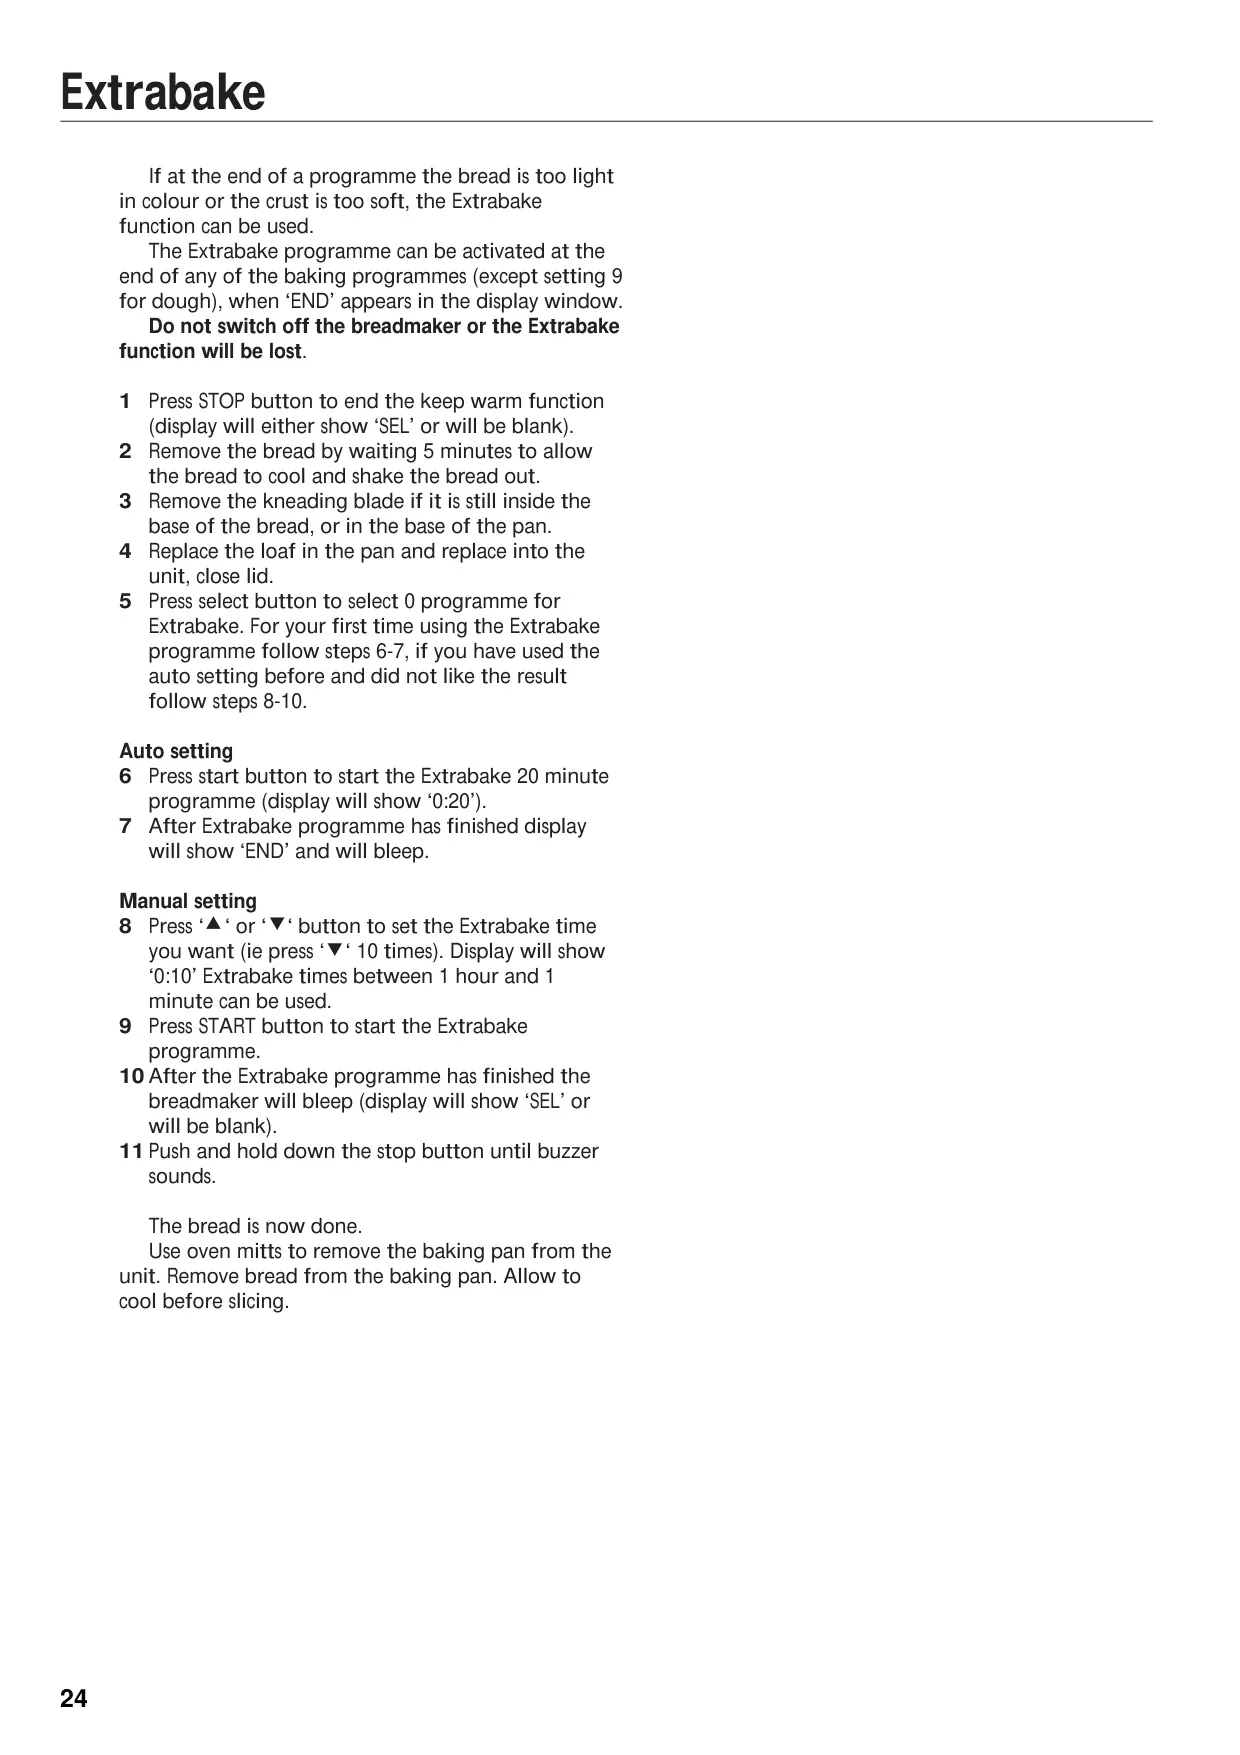
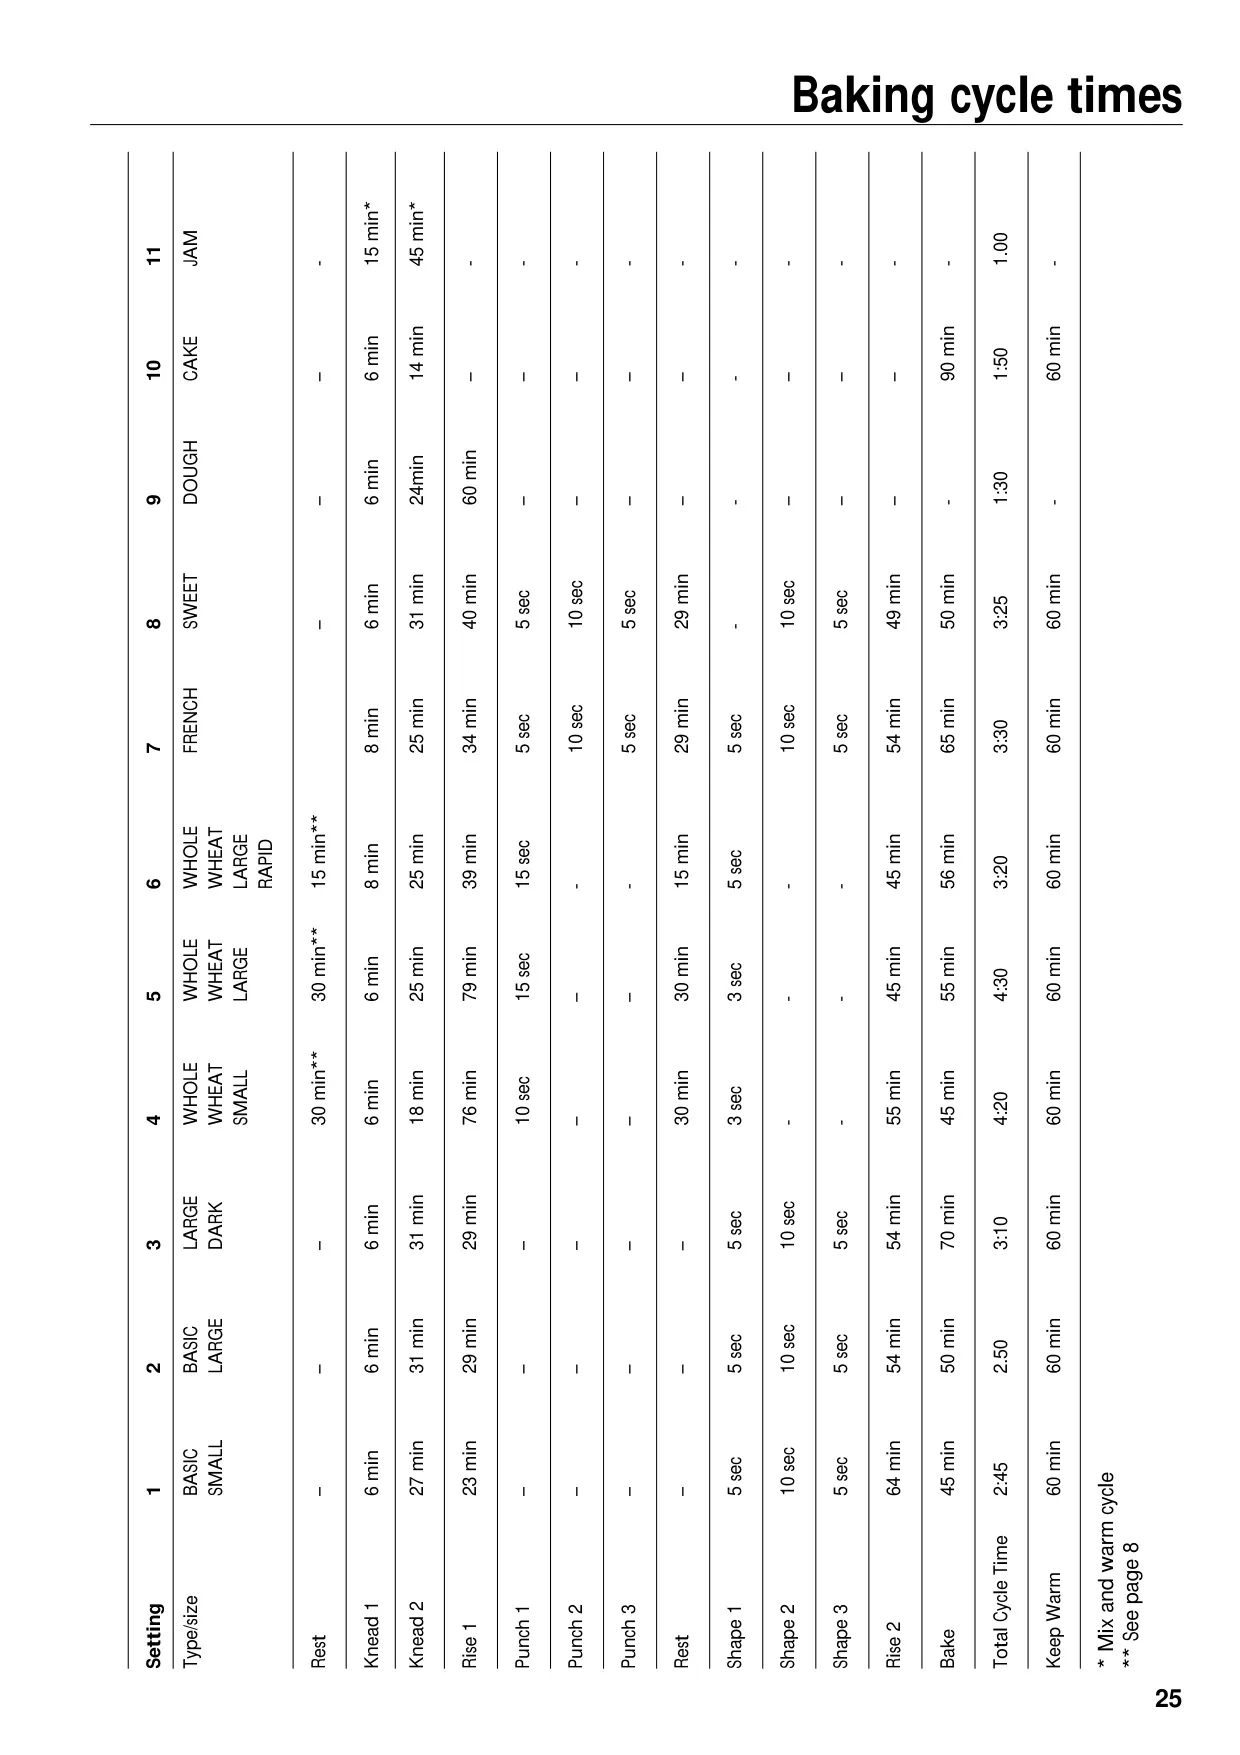
This breadmaker offers eleven primary settings catering to diverse baking needs, alongside a dedicated Fastbake program for quicker white loaves and an Extrabake option to perfect crusts. Settings include Basic Breads (Small, Large, Large Dark), Whole Wheat/Wholemeal (Small, Large, Large Rapid), and Specialty options like French and Sweet breads.
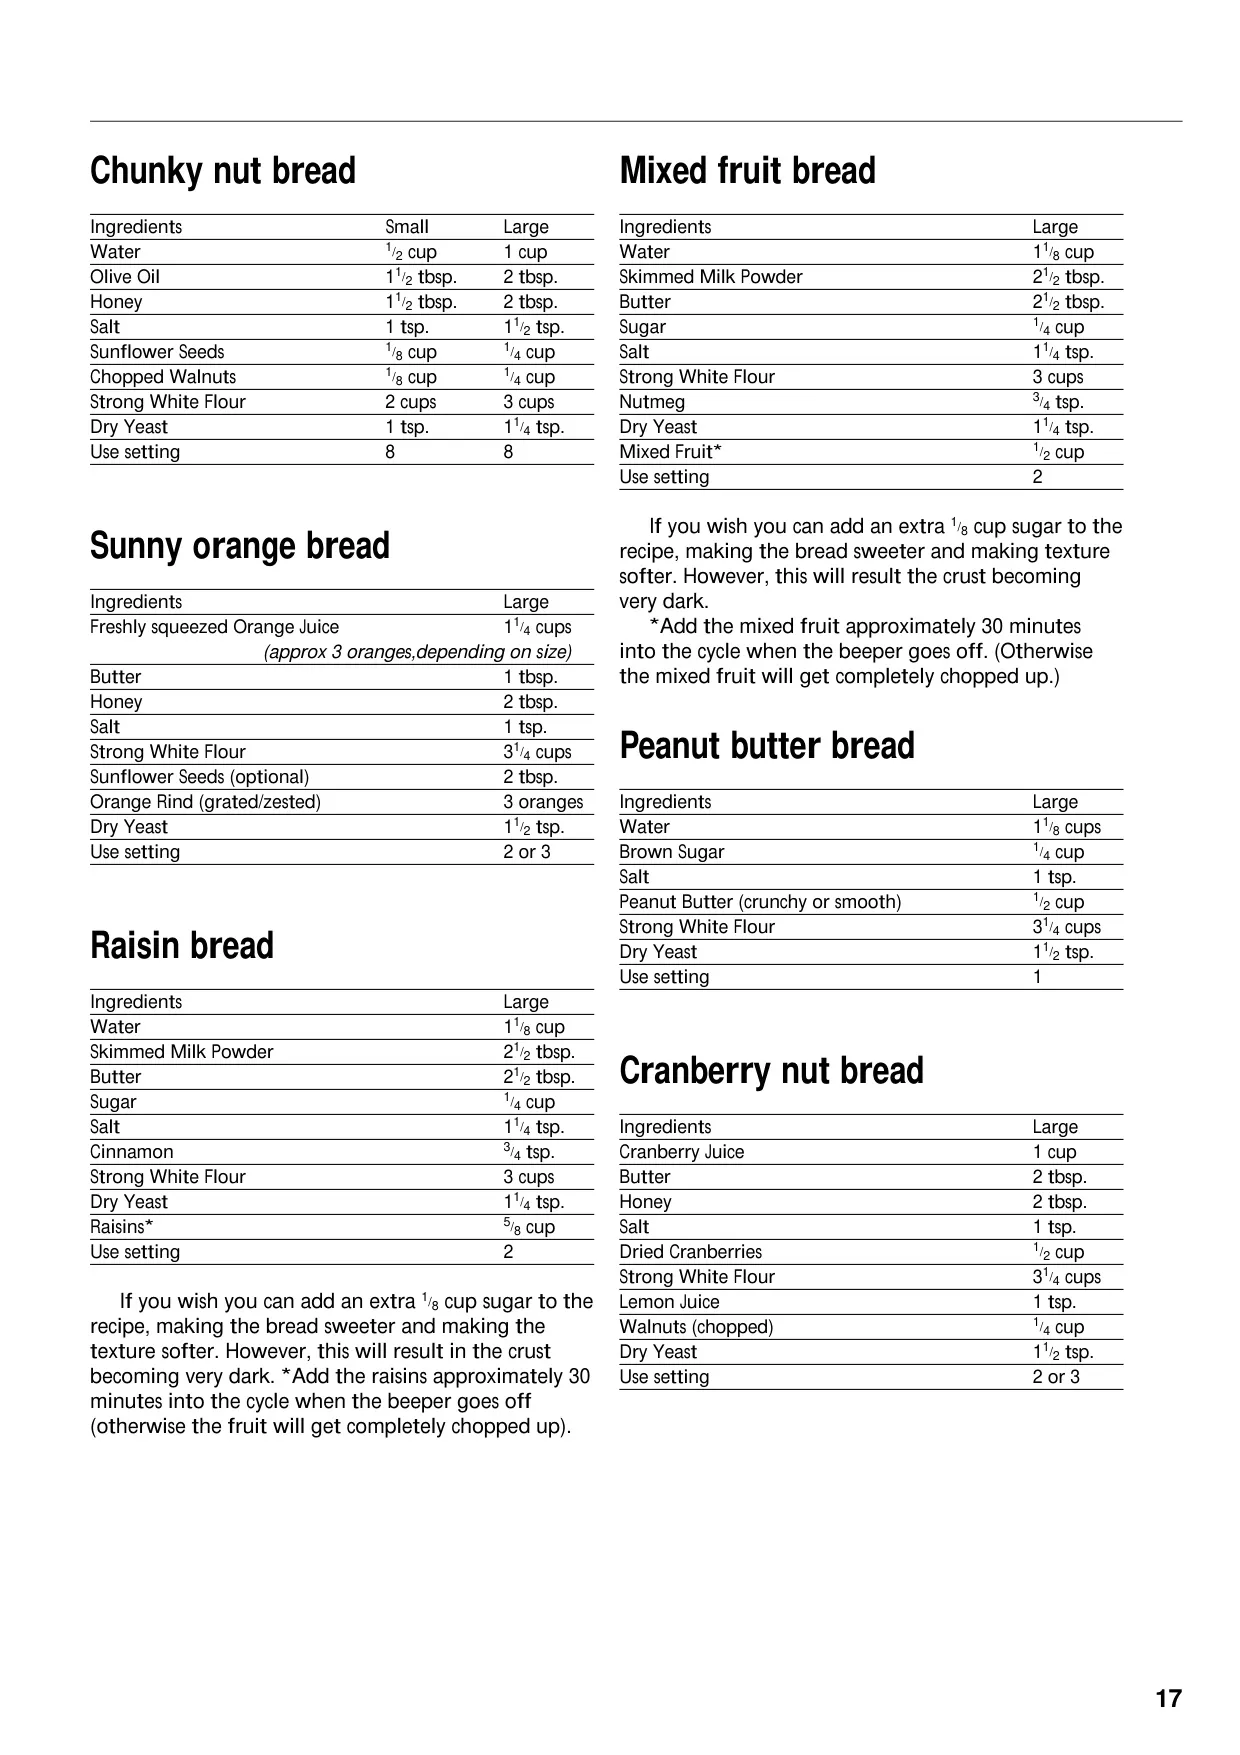
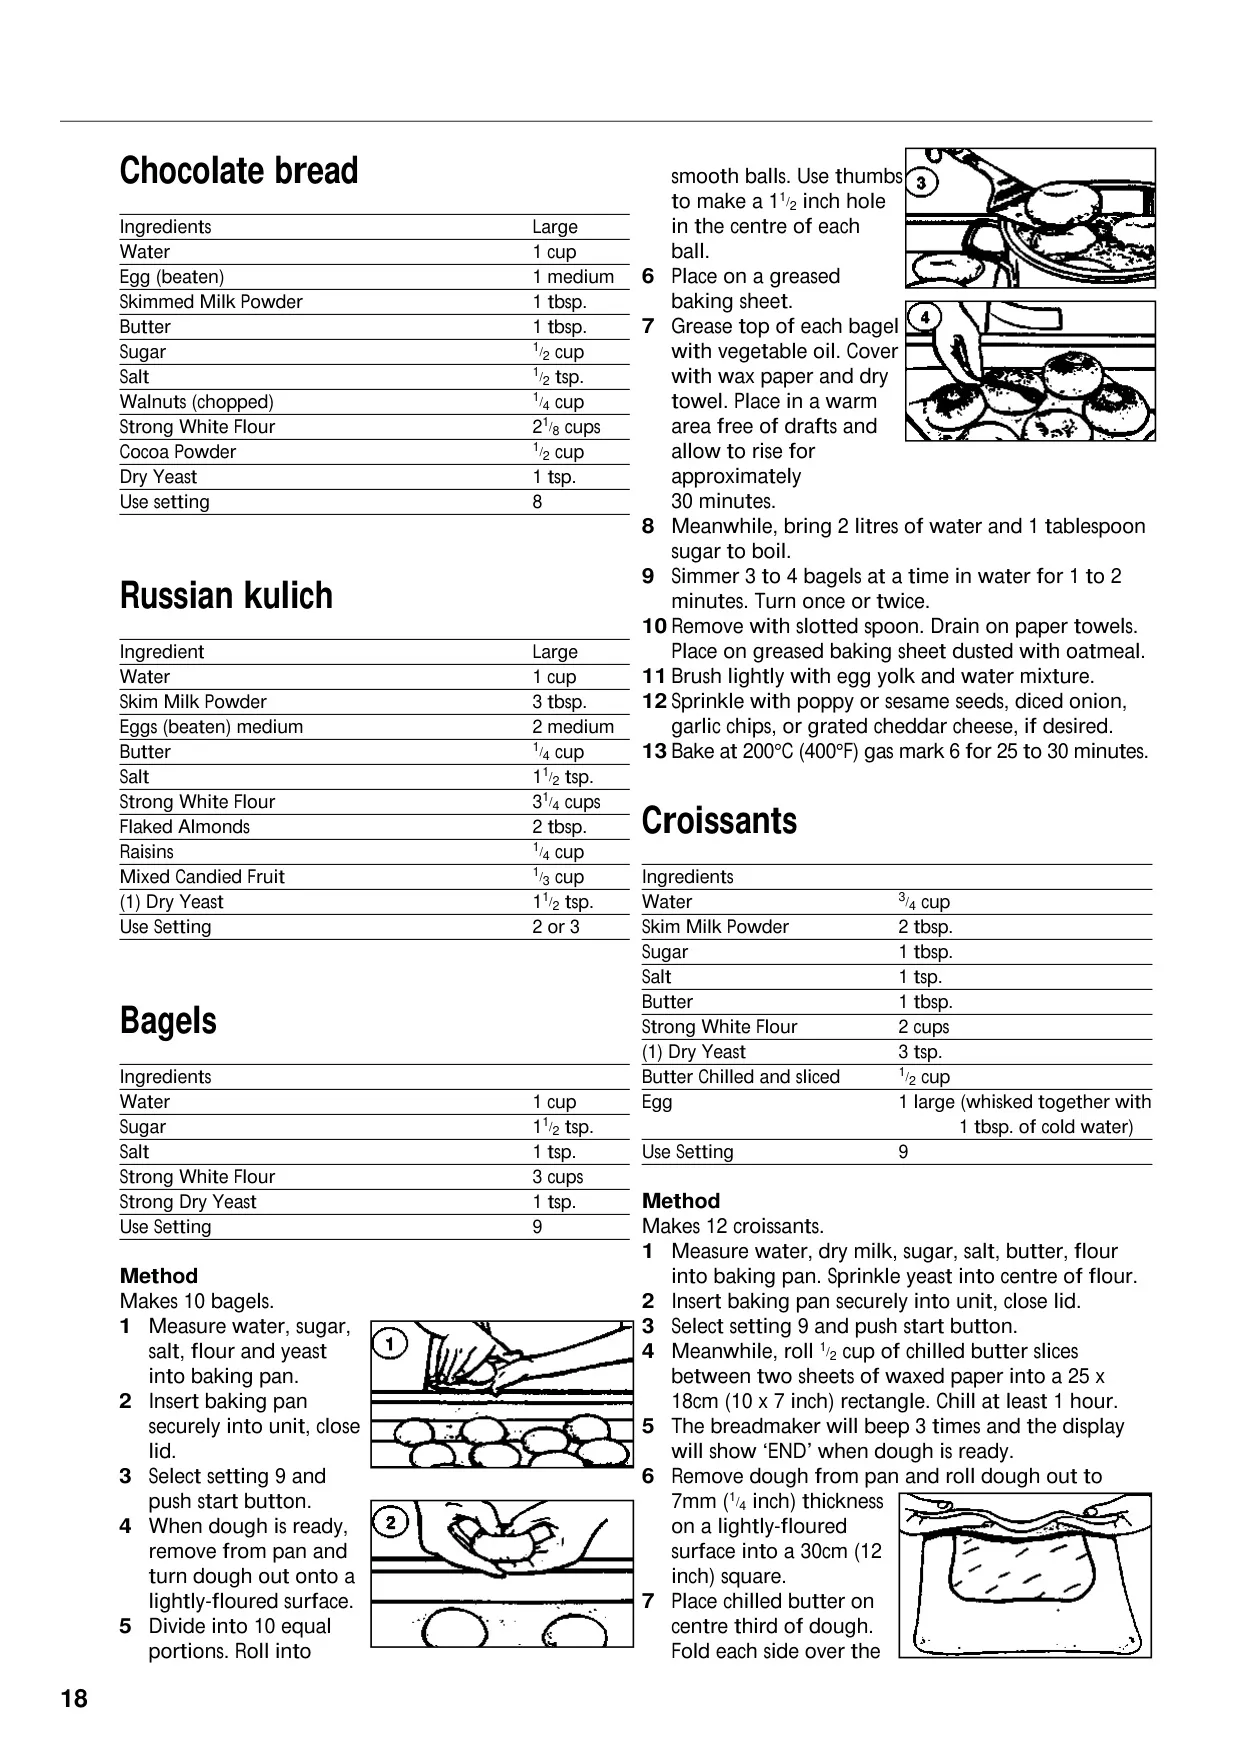
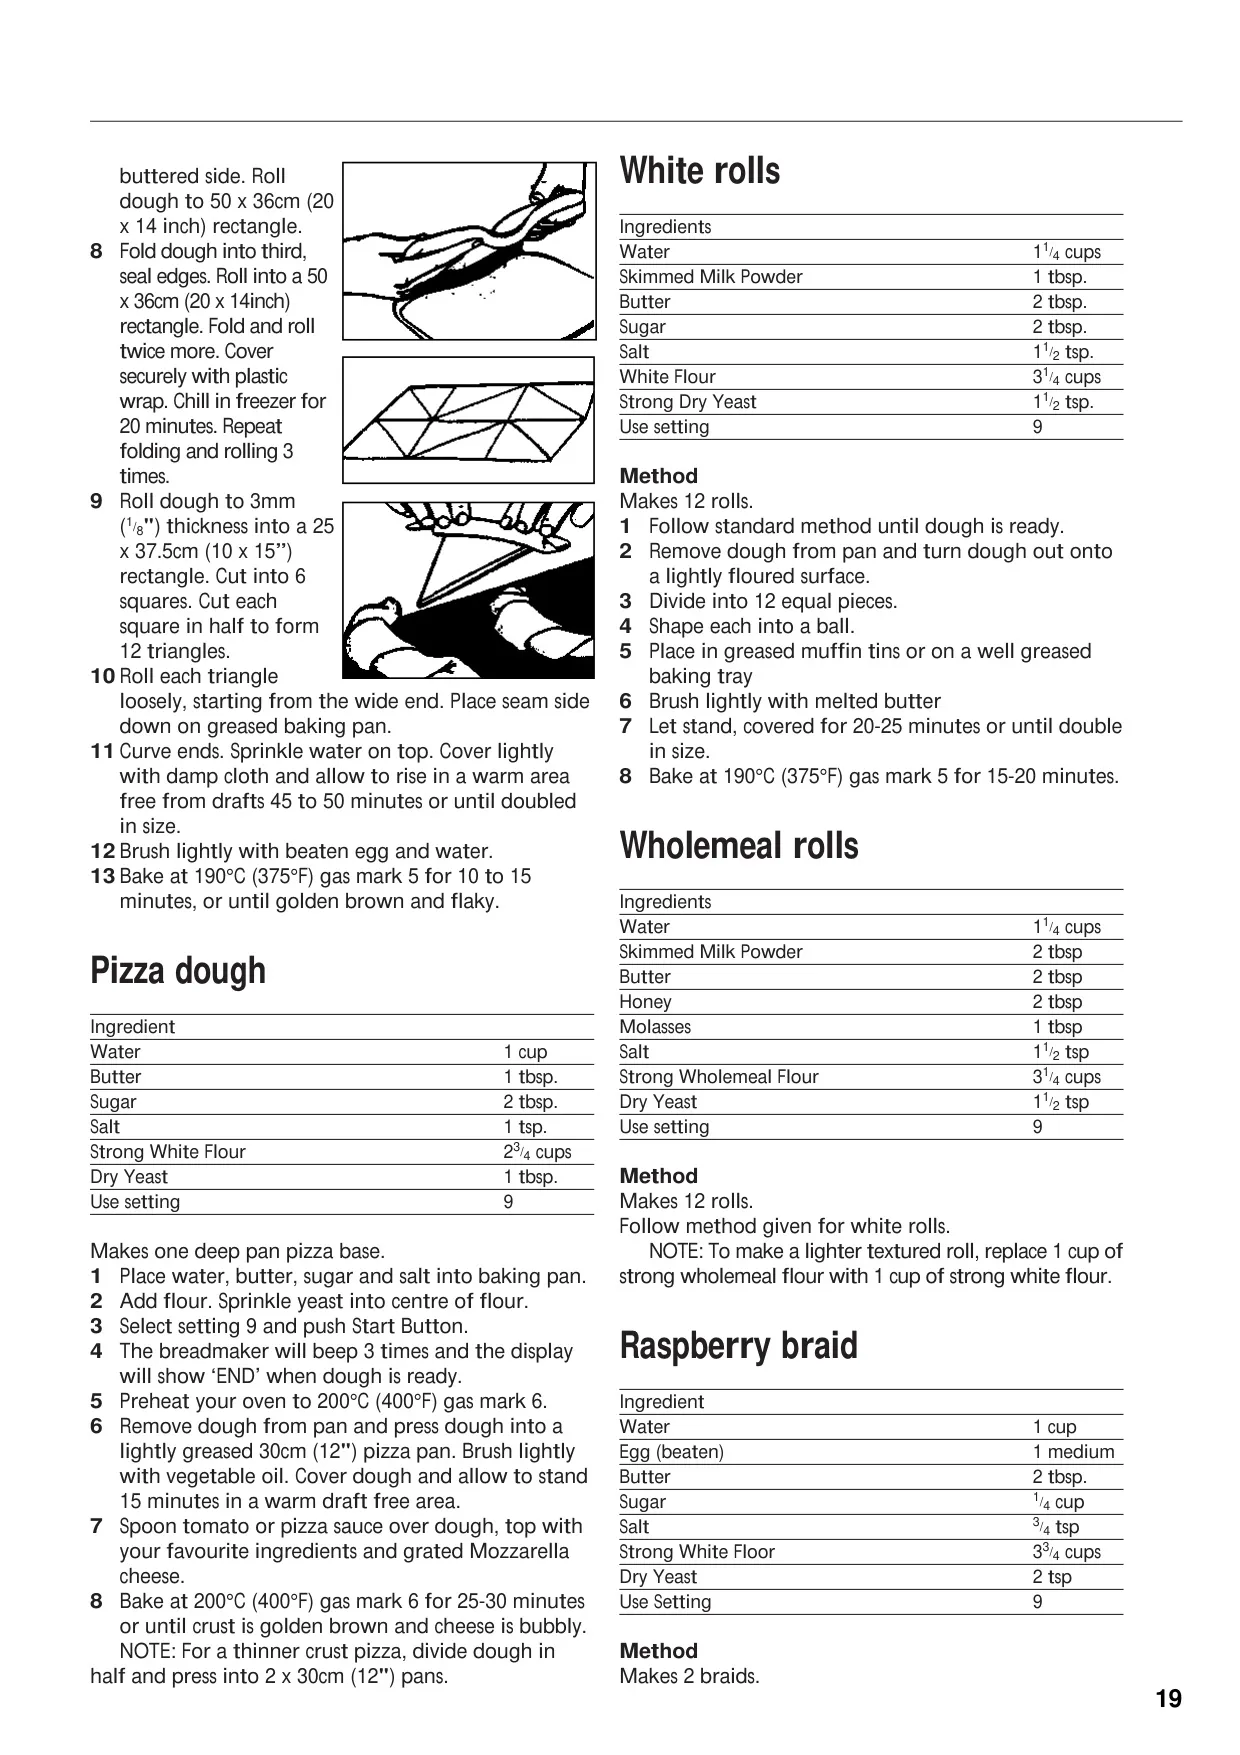
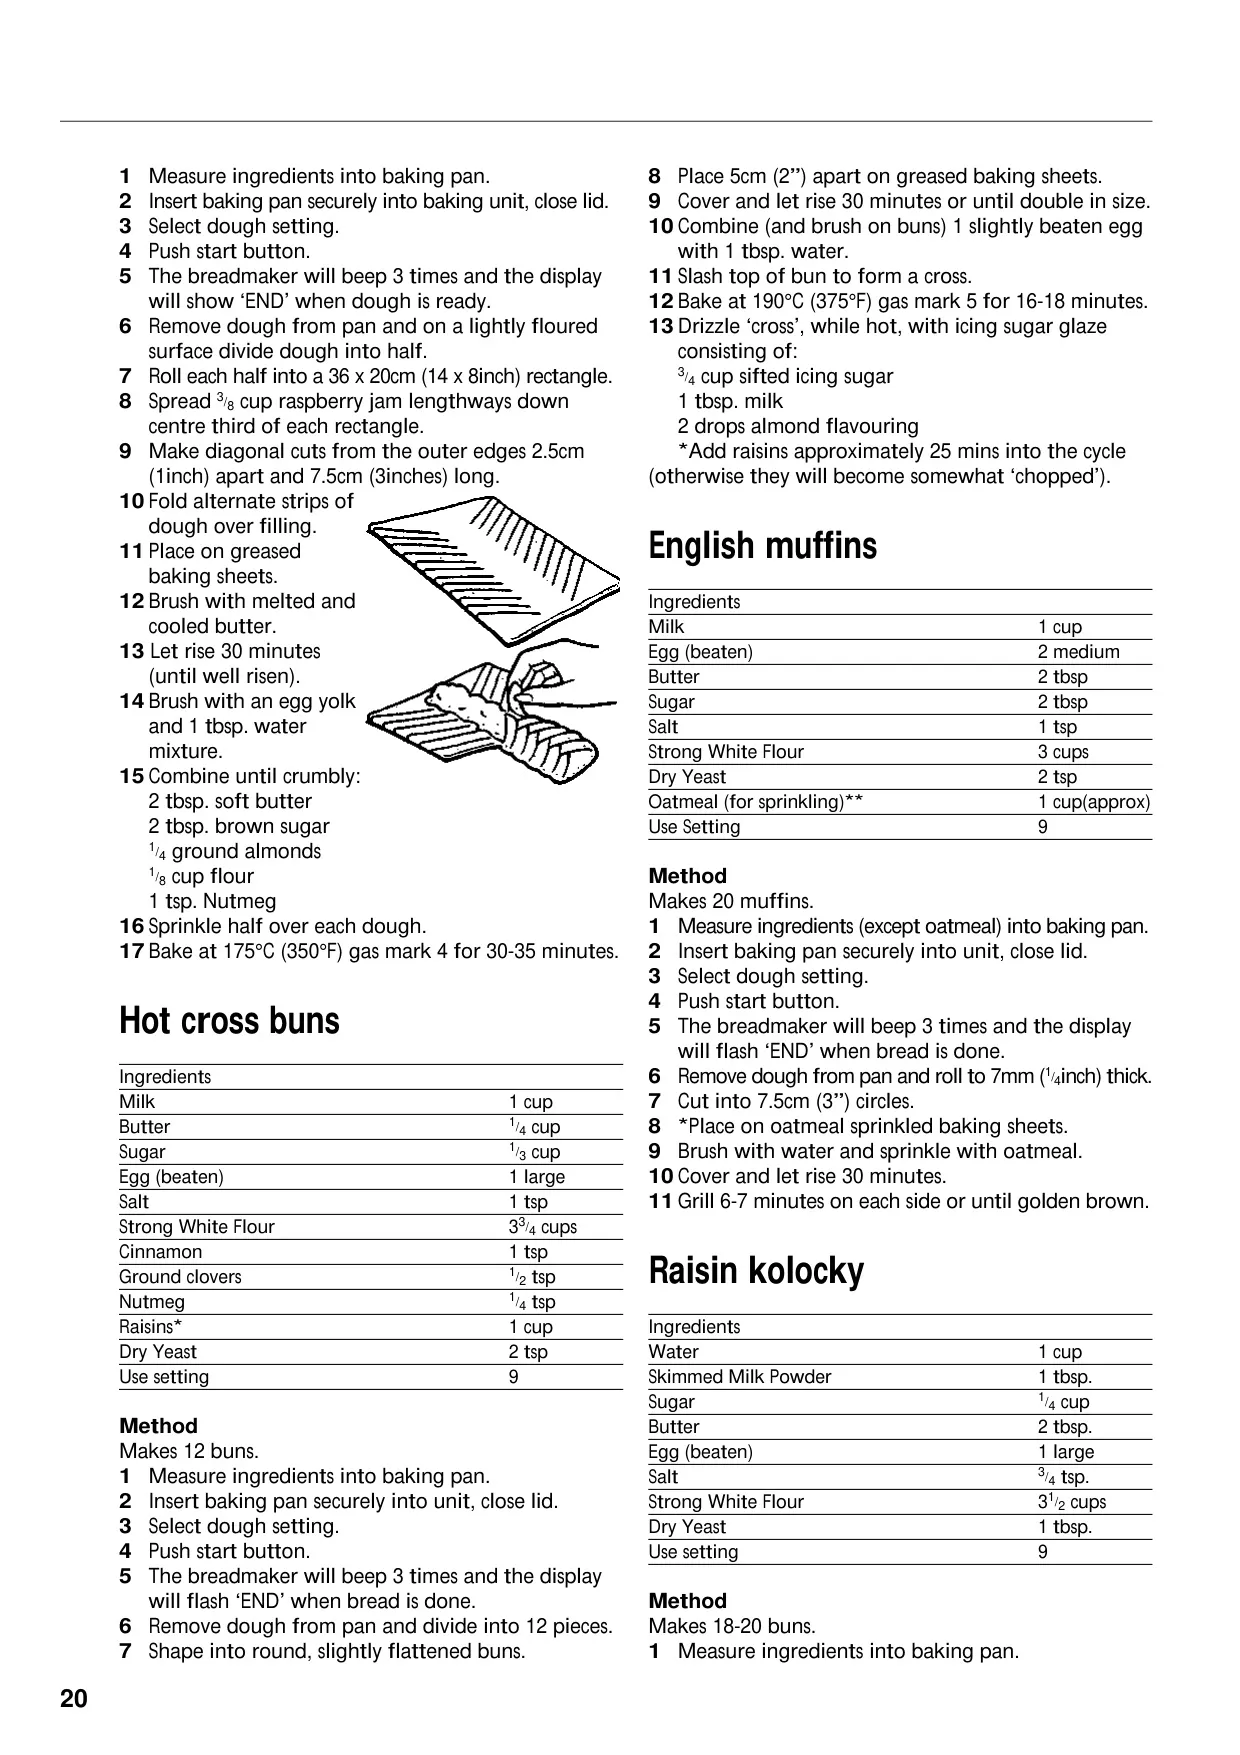
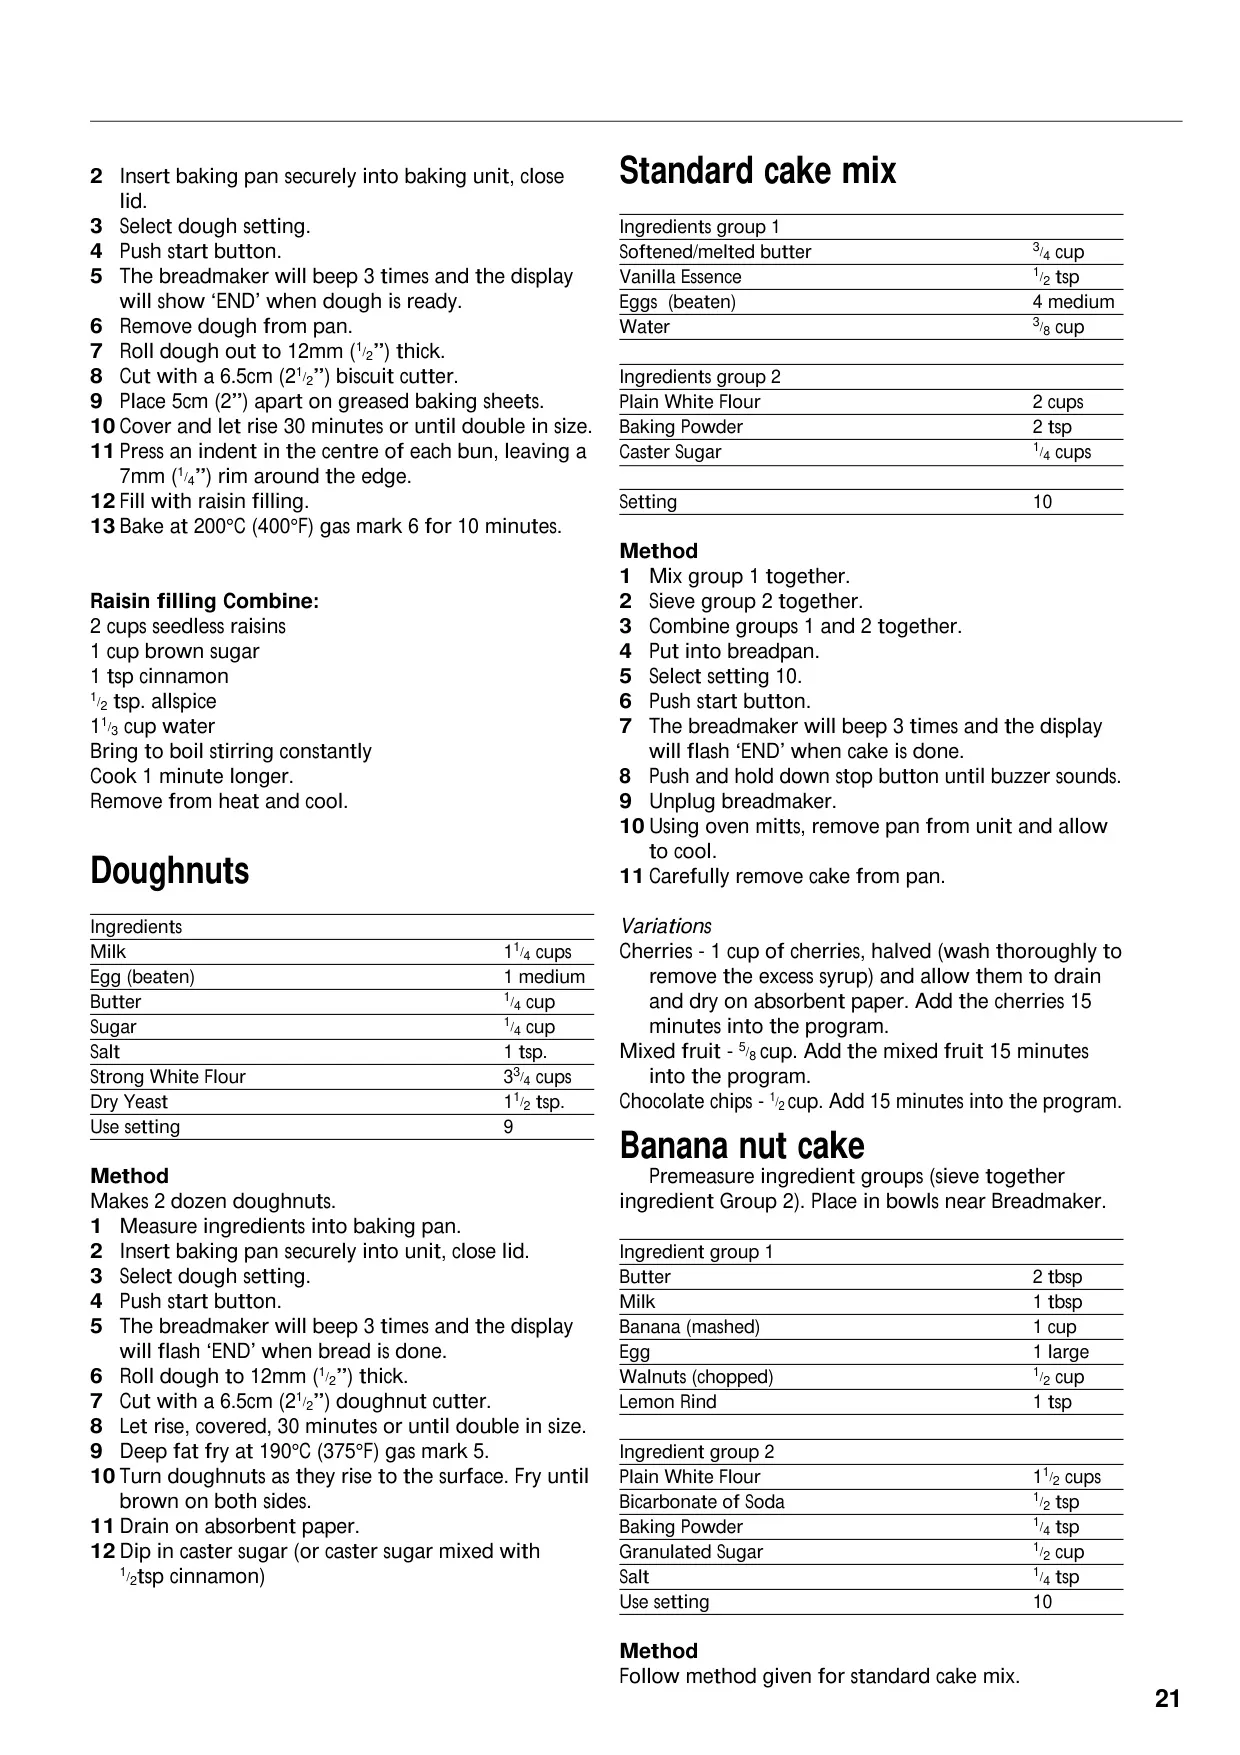
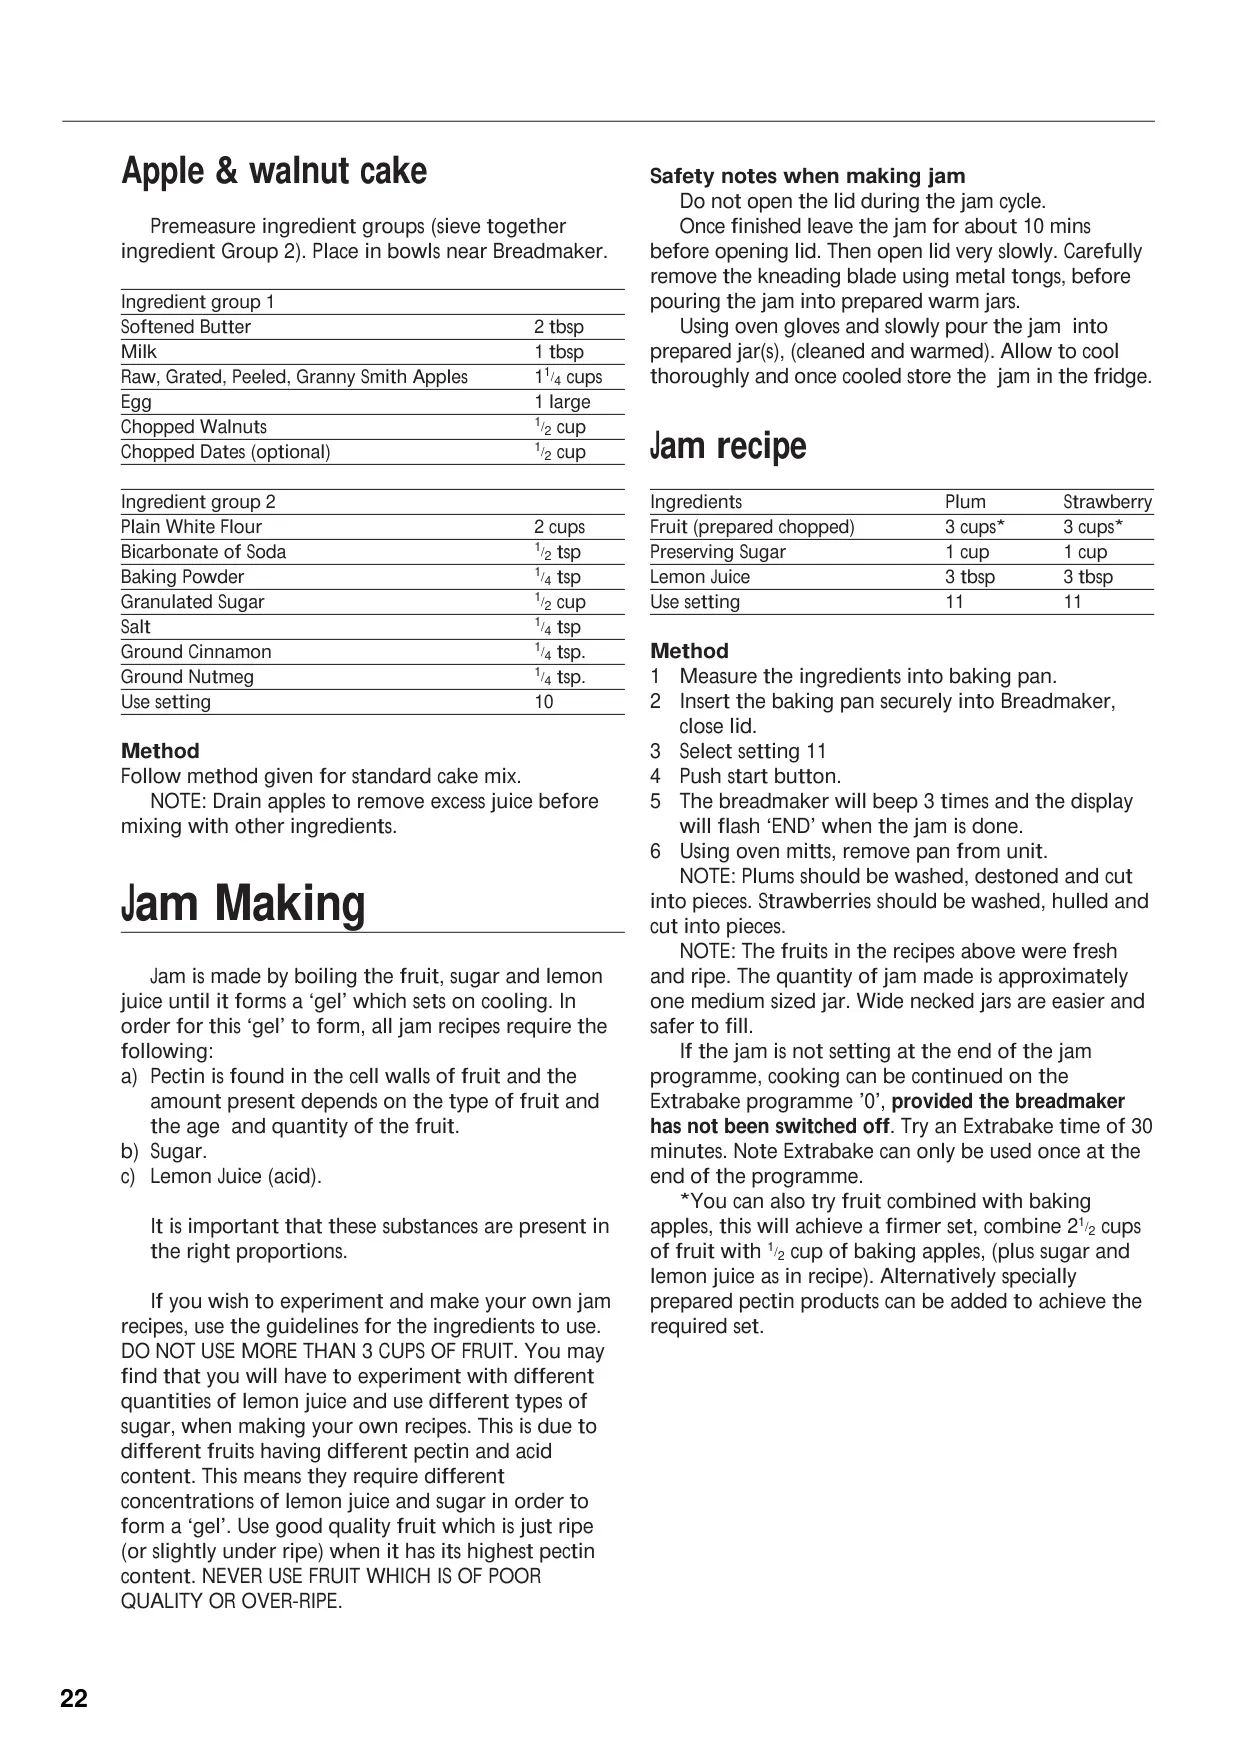
For those who prefer to shape their own creations, the Dough setting prepares perfect dough for pizzas, rolls, bagels, croissants, and doughnuts, ready for conventional oven baking or frying. The Cake setting is specifically formulated for quick breads and cakes, utilizing raising agents like baking powder and bicarbonate of soda instead of yeast.
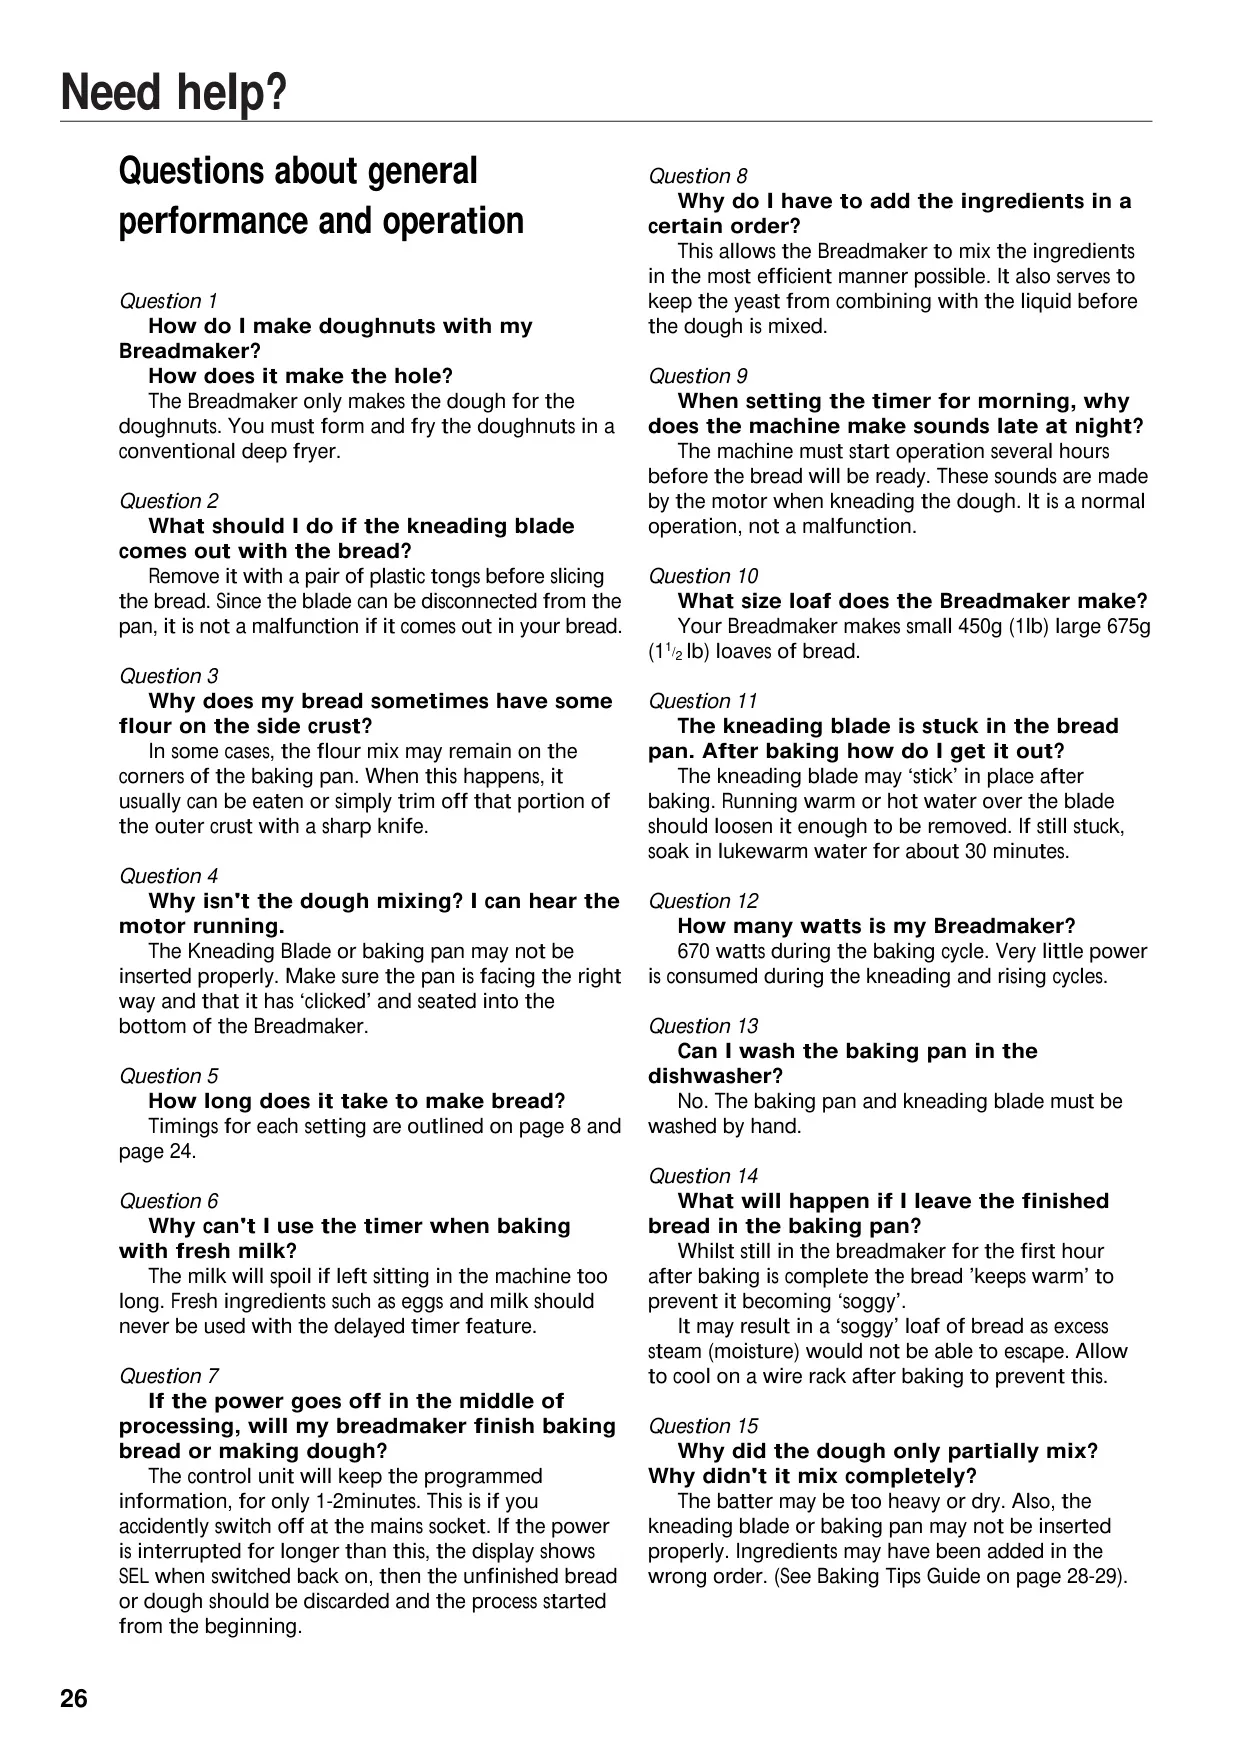
A notable feature is the 'Keep Warm' function, which automatically activates for up to an hour after baking. This clever design prevents the bread from becoming soggy by maintaining an optimal temperature, ensuring your loaf stays fresh until you're ready to remove it. This function, however, is not available for the Dough or Jam settings.
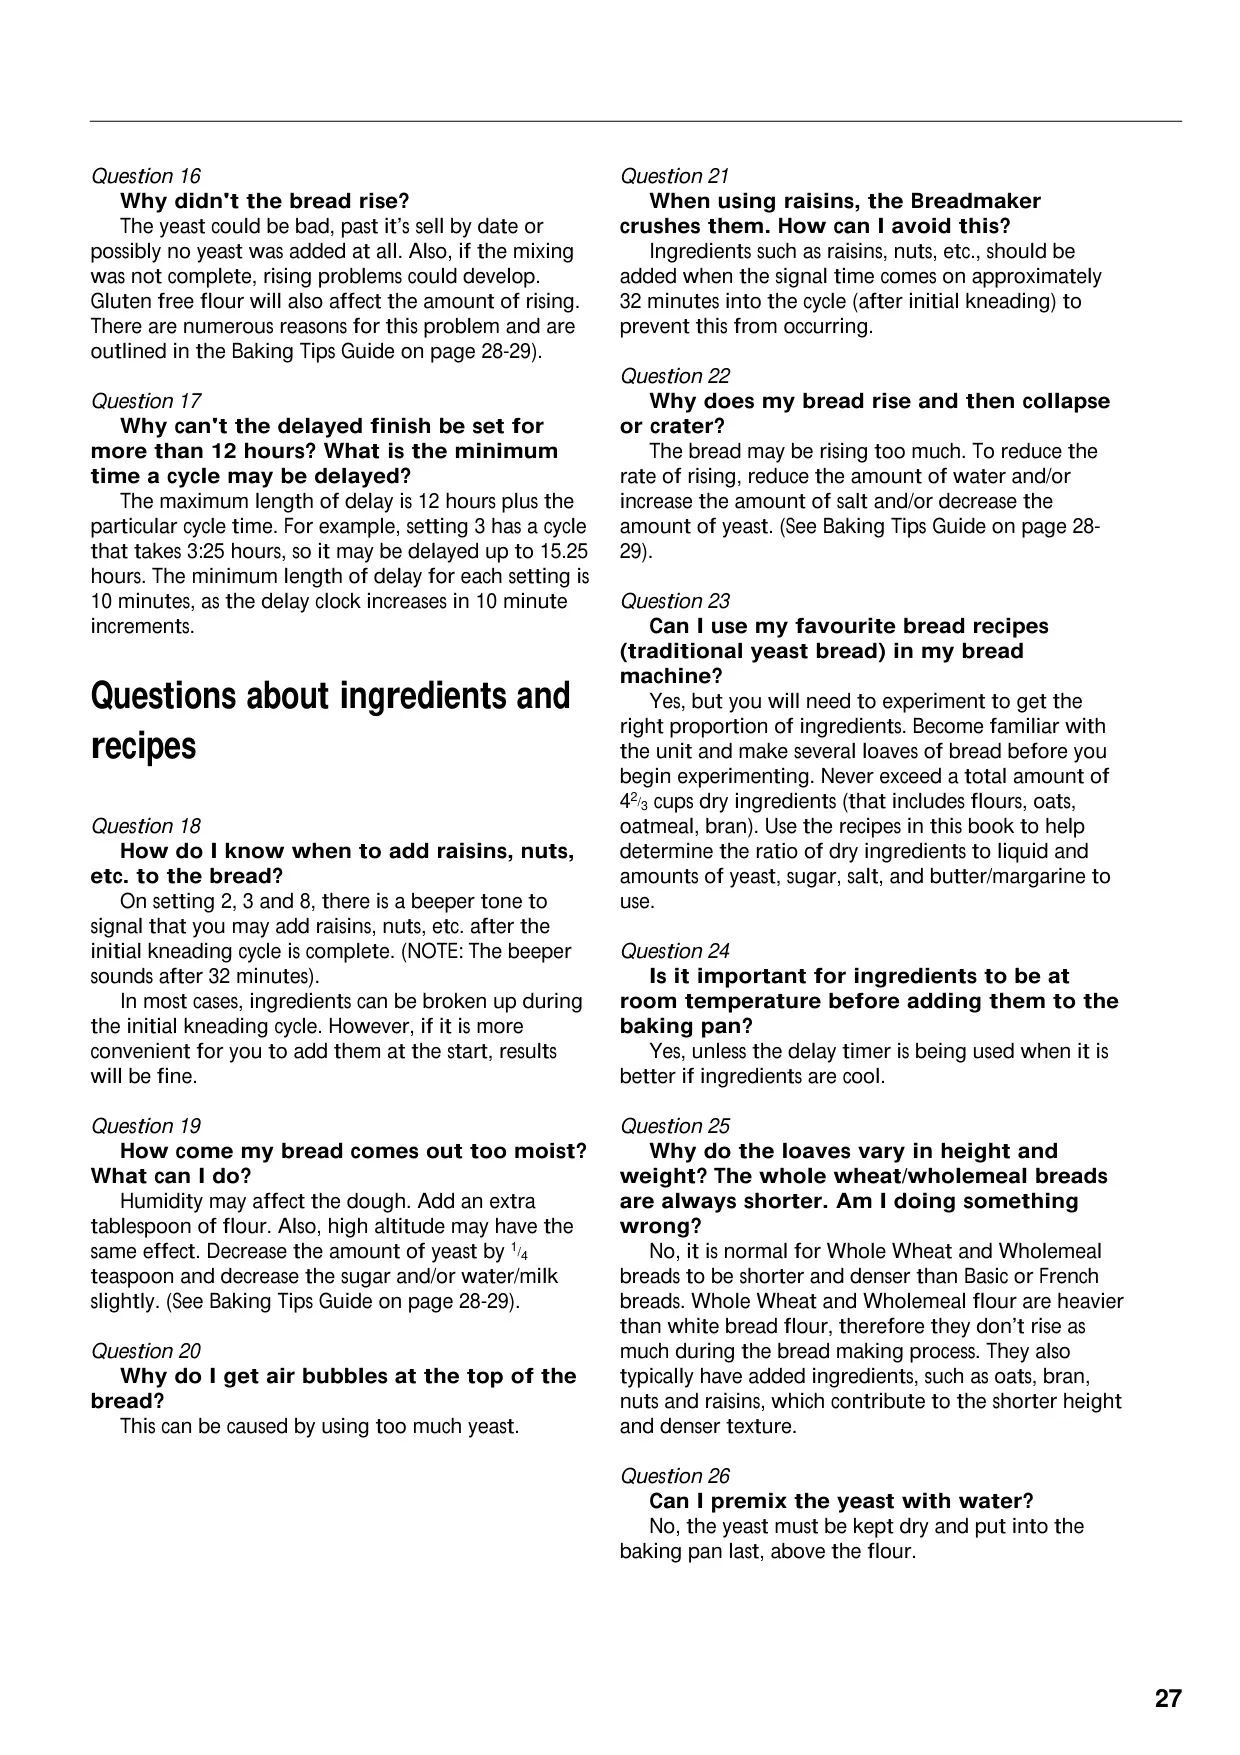
The ‘added-ingredient’ function is a thoughtful addition, signaling with an audible tone precisely when to add delicate ingredients like fruits or nuts. This timing, typically 32 minutes into the cycle, ensures these additions remain whole and are not excessively chopped by the kneading blade, preserving their texture and integrity.
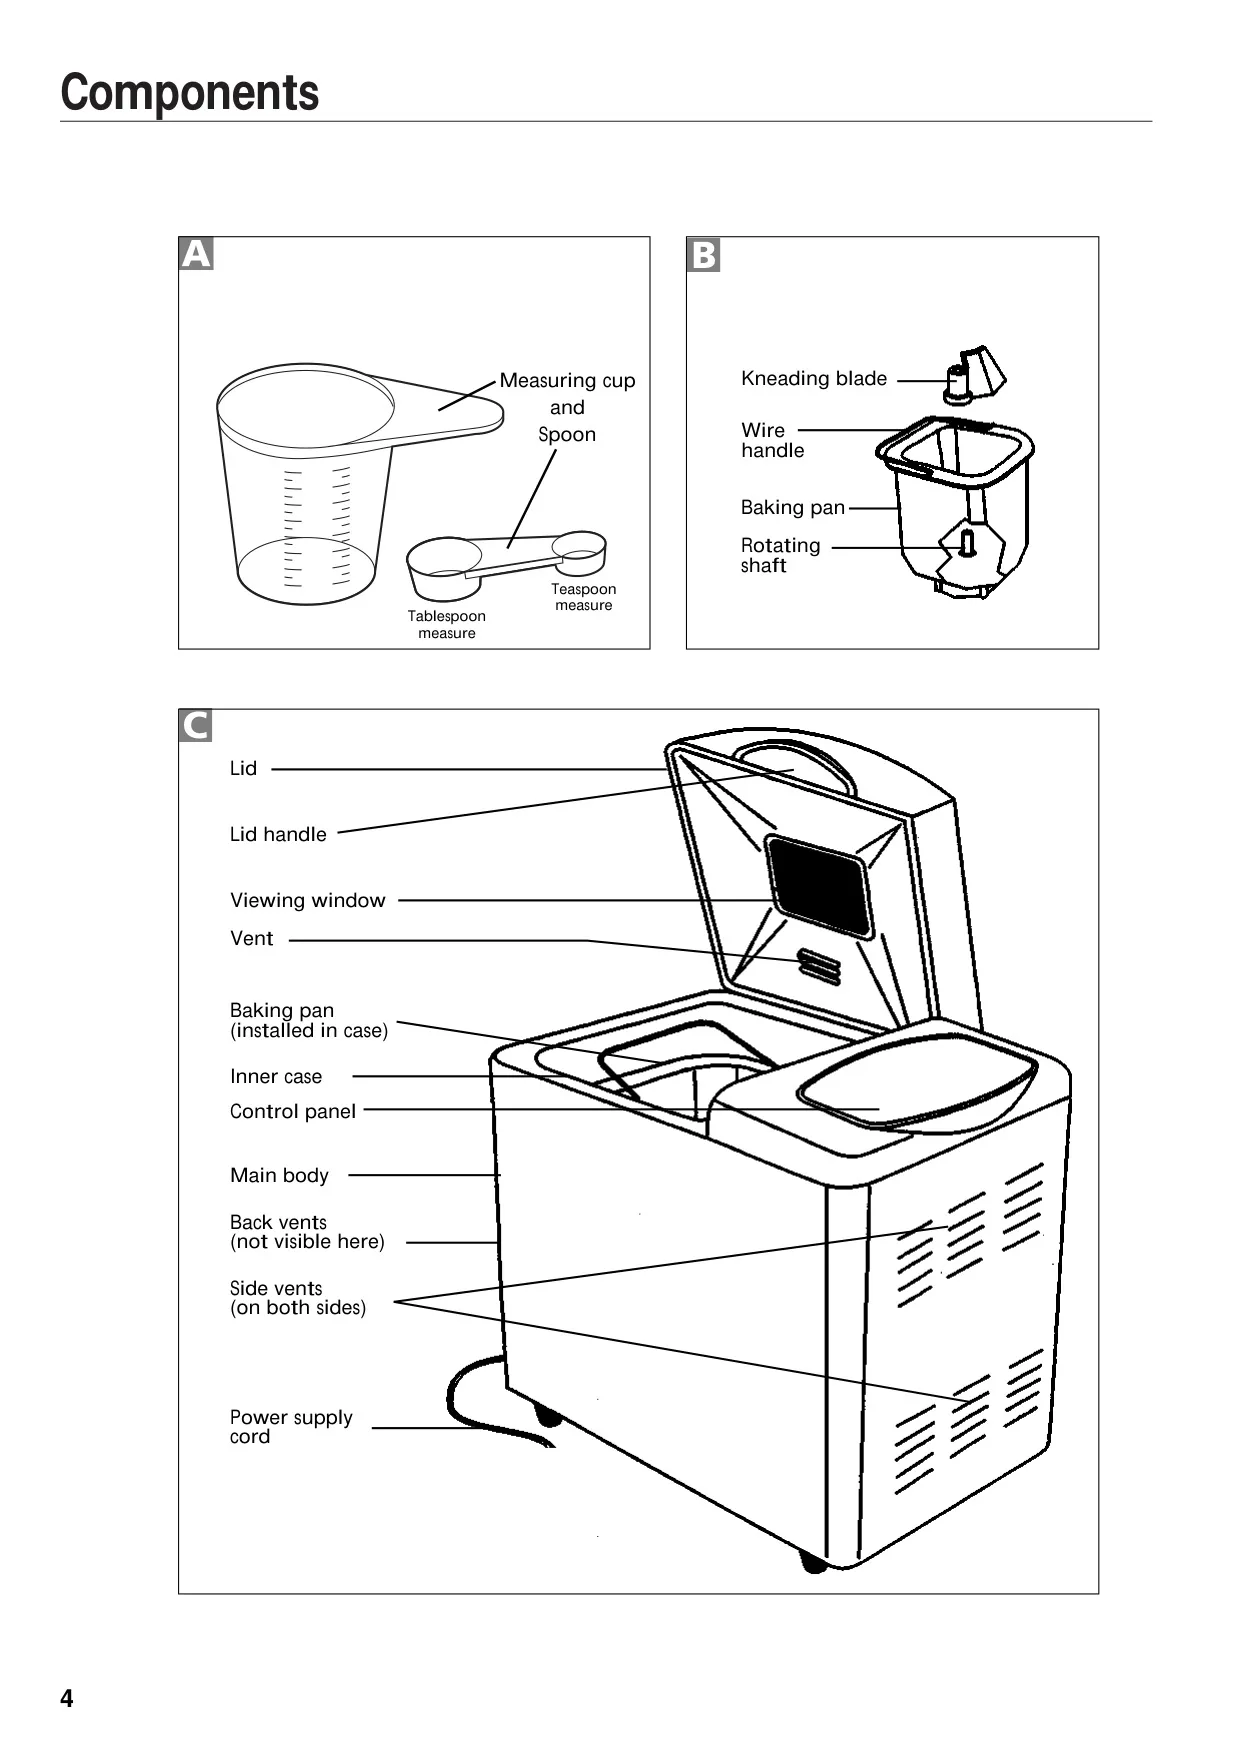
The appliance includes a convenient viewing window, allowing users to monitor the baking progress. While it's fine to lift the lid during mixing and kneading, it's crucial not to open it during the baking cycle (roughly the last hour) as this can cause the bread to collapse, affecting the final result.
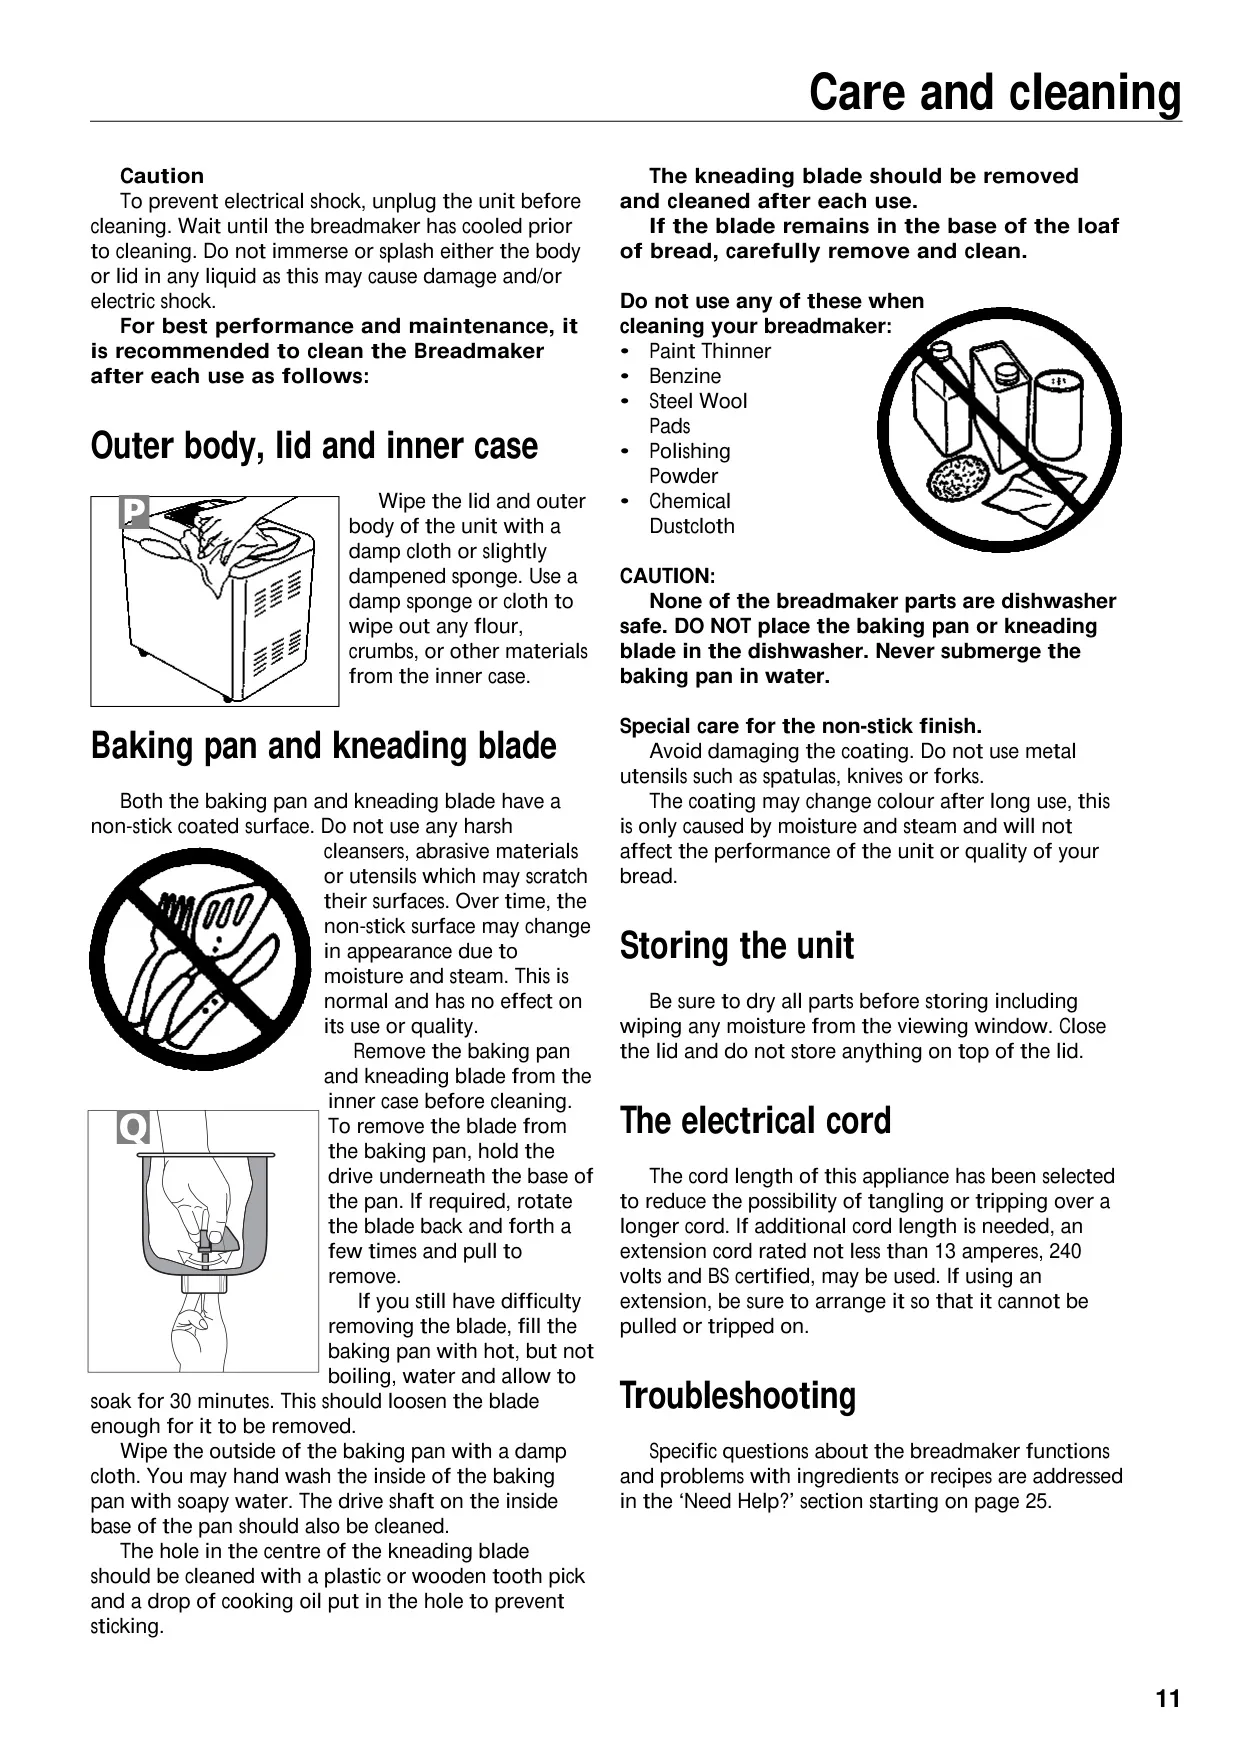
Care and cleaning are straightforward, though specific guidelines must be followed to maintain the unit. Both the baking pan and kneading blade feature a non-stick coating, making removal of bread easy. It's imperative that these components are only hand-washed and never placed in a dishwasher, nor should abrasive cleaners or metal utensils be used, to prevent damage to the non-stick surface.
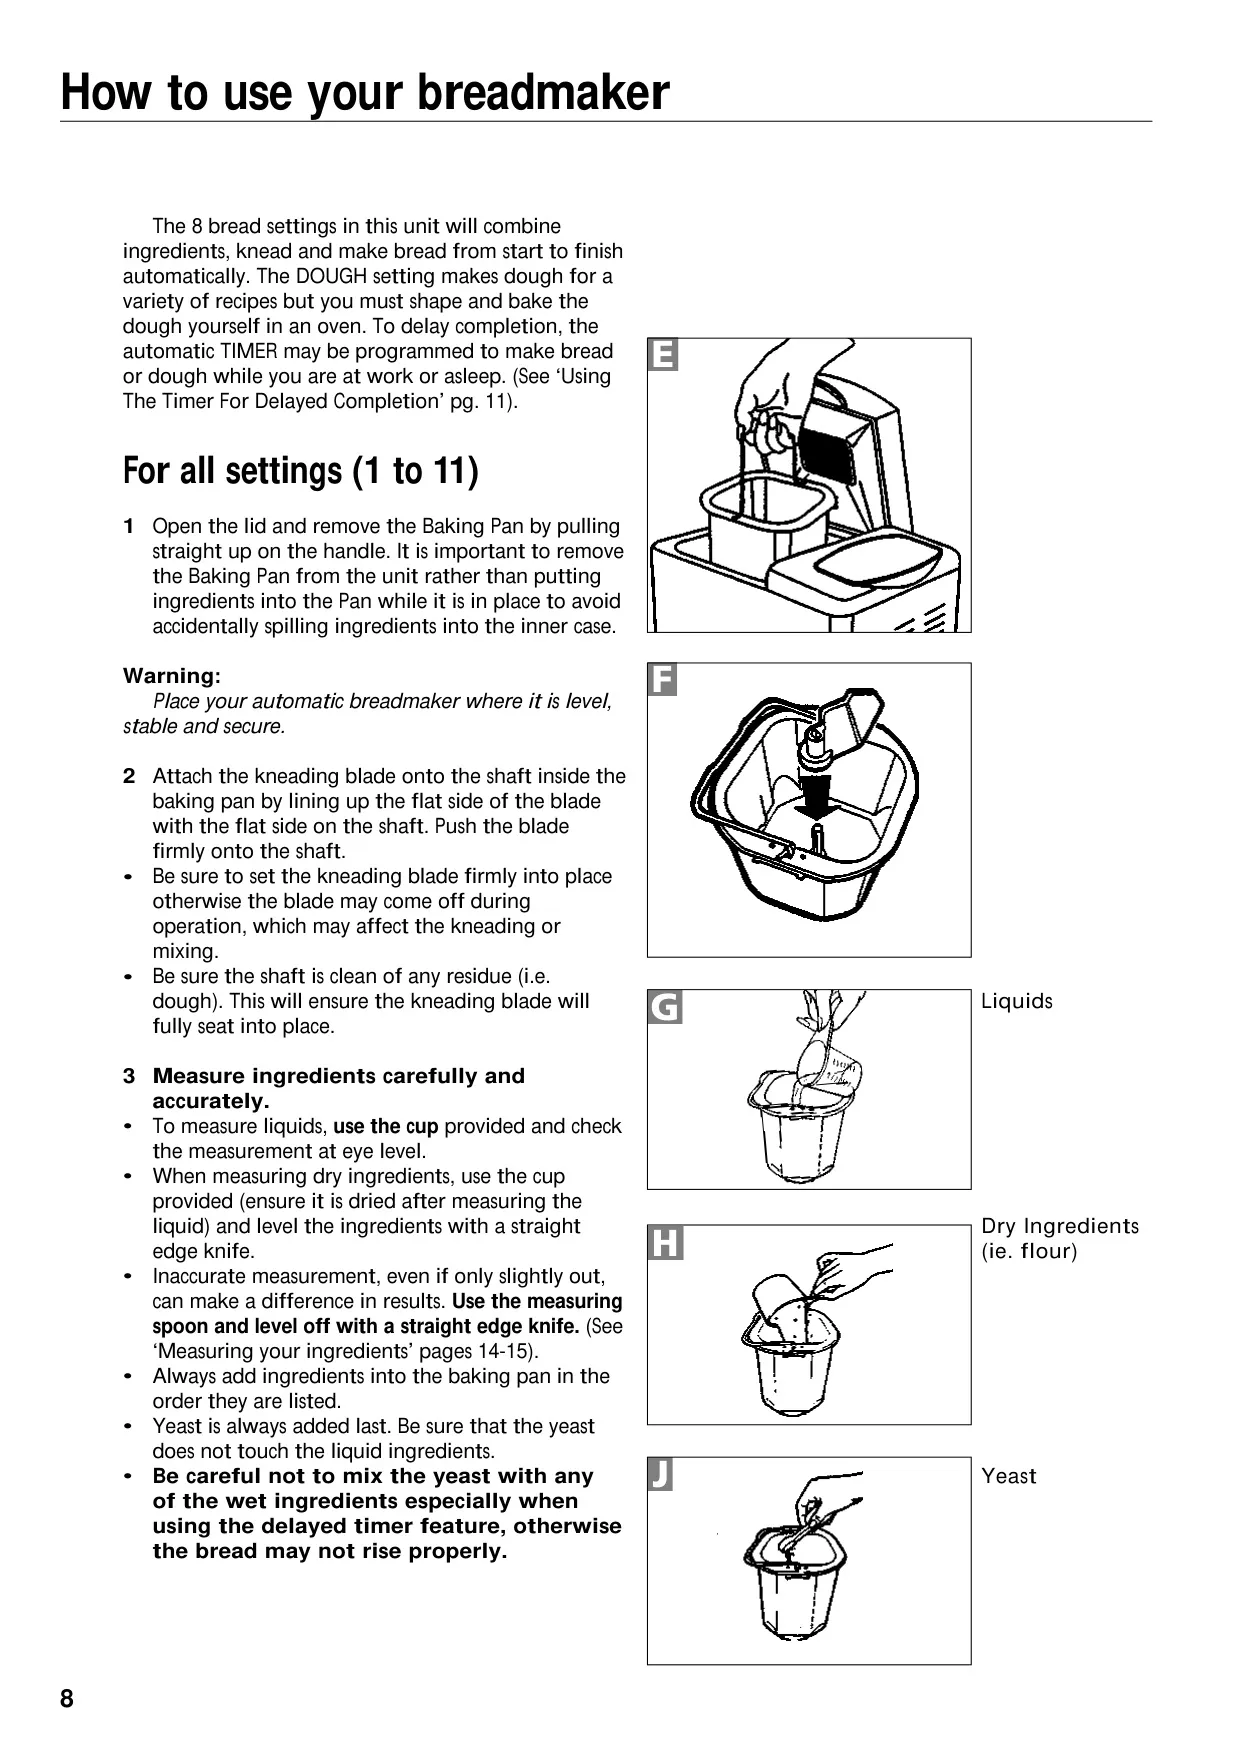
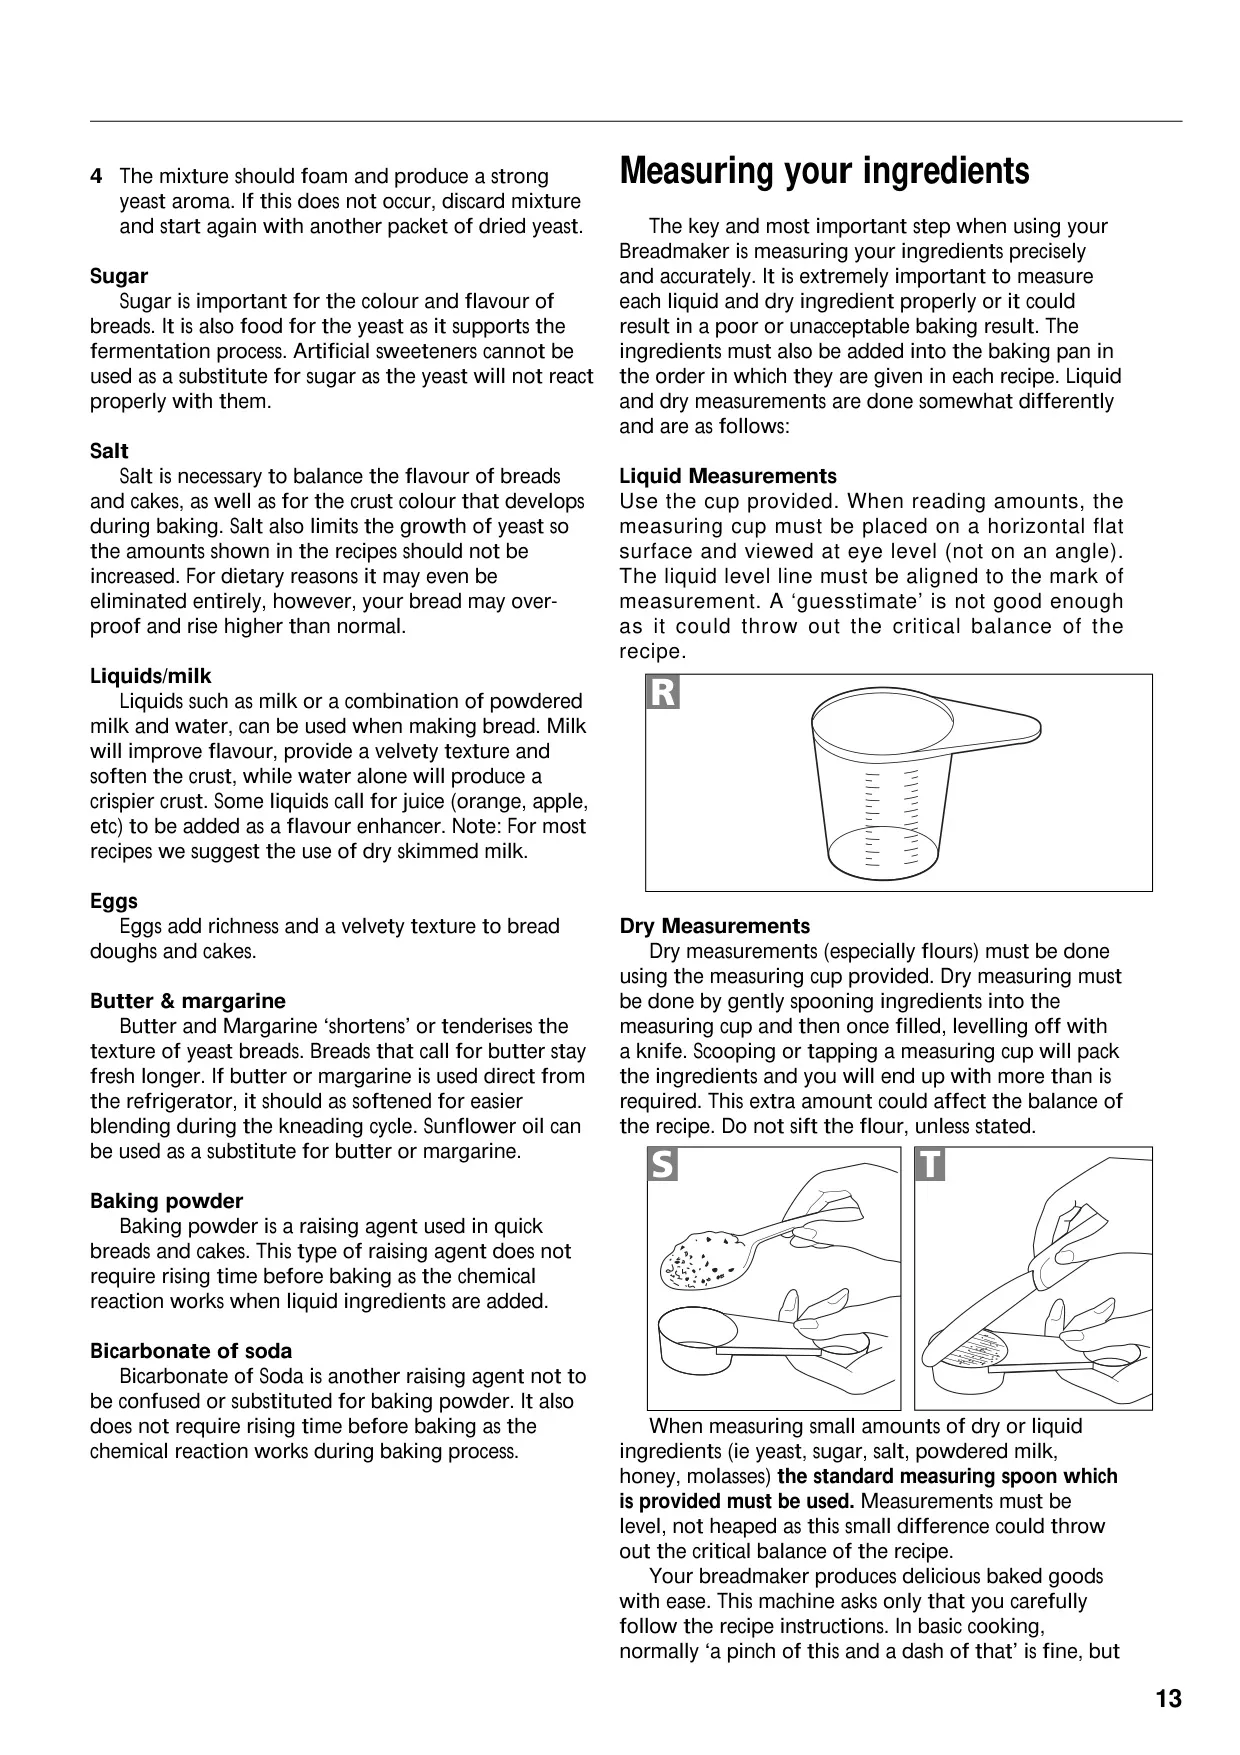
The importance of accurate ingredient measurement cannot be overstated for optimal results. Liquids should be measured at eye level using the provided cup, while dry ingredients like flour should be gently spooned and leveled. Yeast, sugar, and water proportions are critical, as they dictate the chemical reactions that form the bread.
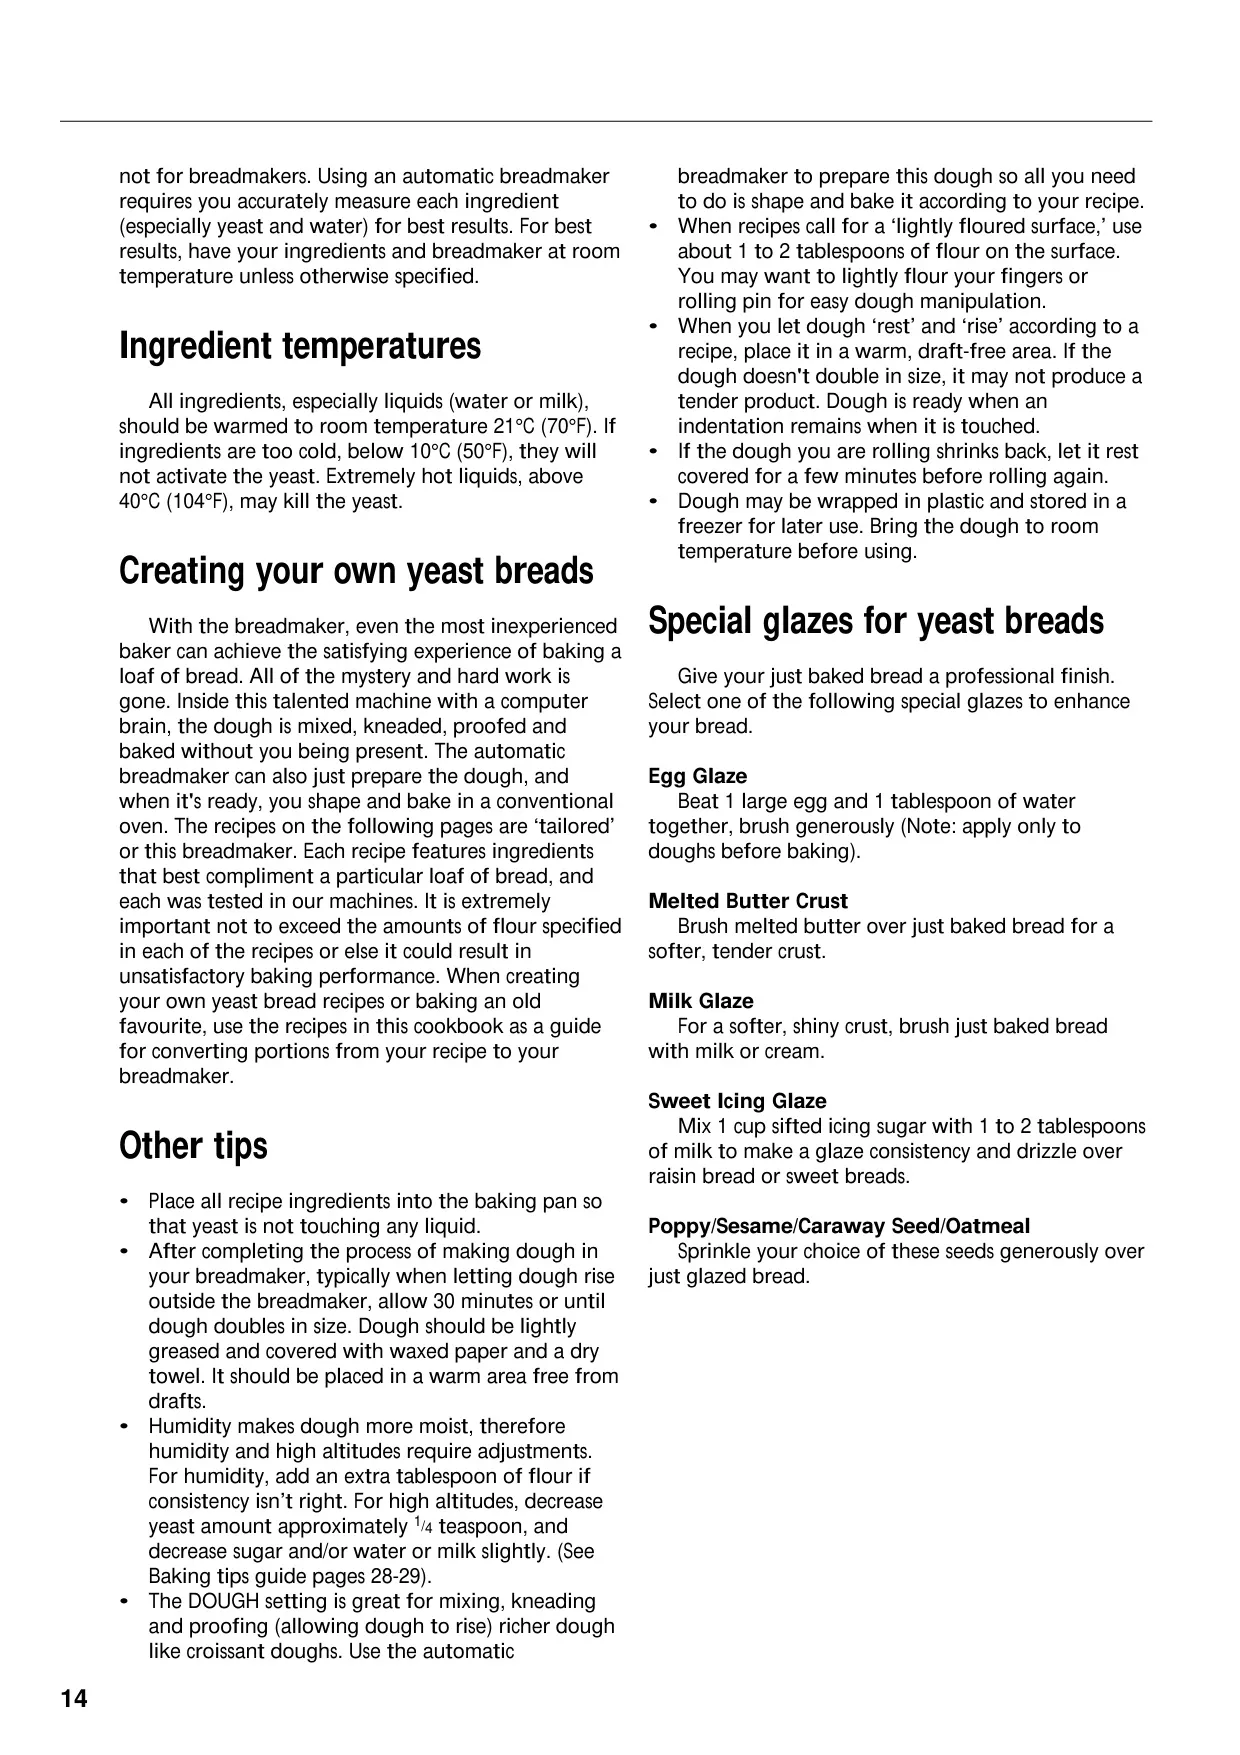
Ingredient temperature also plays a vital role; most ingredients, especially liquids, should be at room temperature to properly activate the yeast. Using liquids that are too cold or excessively hot can either inhibit or kill the yeast, leading to poor rising and unsatisfactory bread texture.
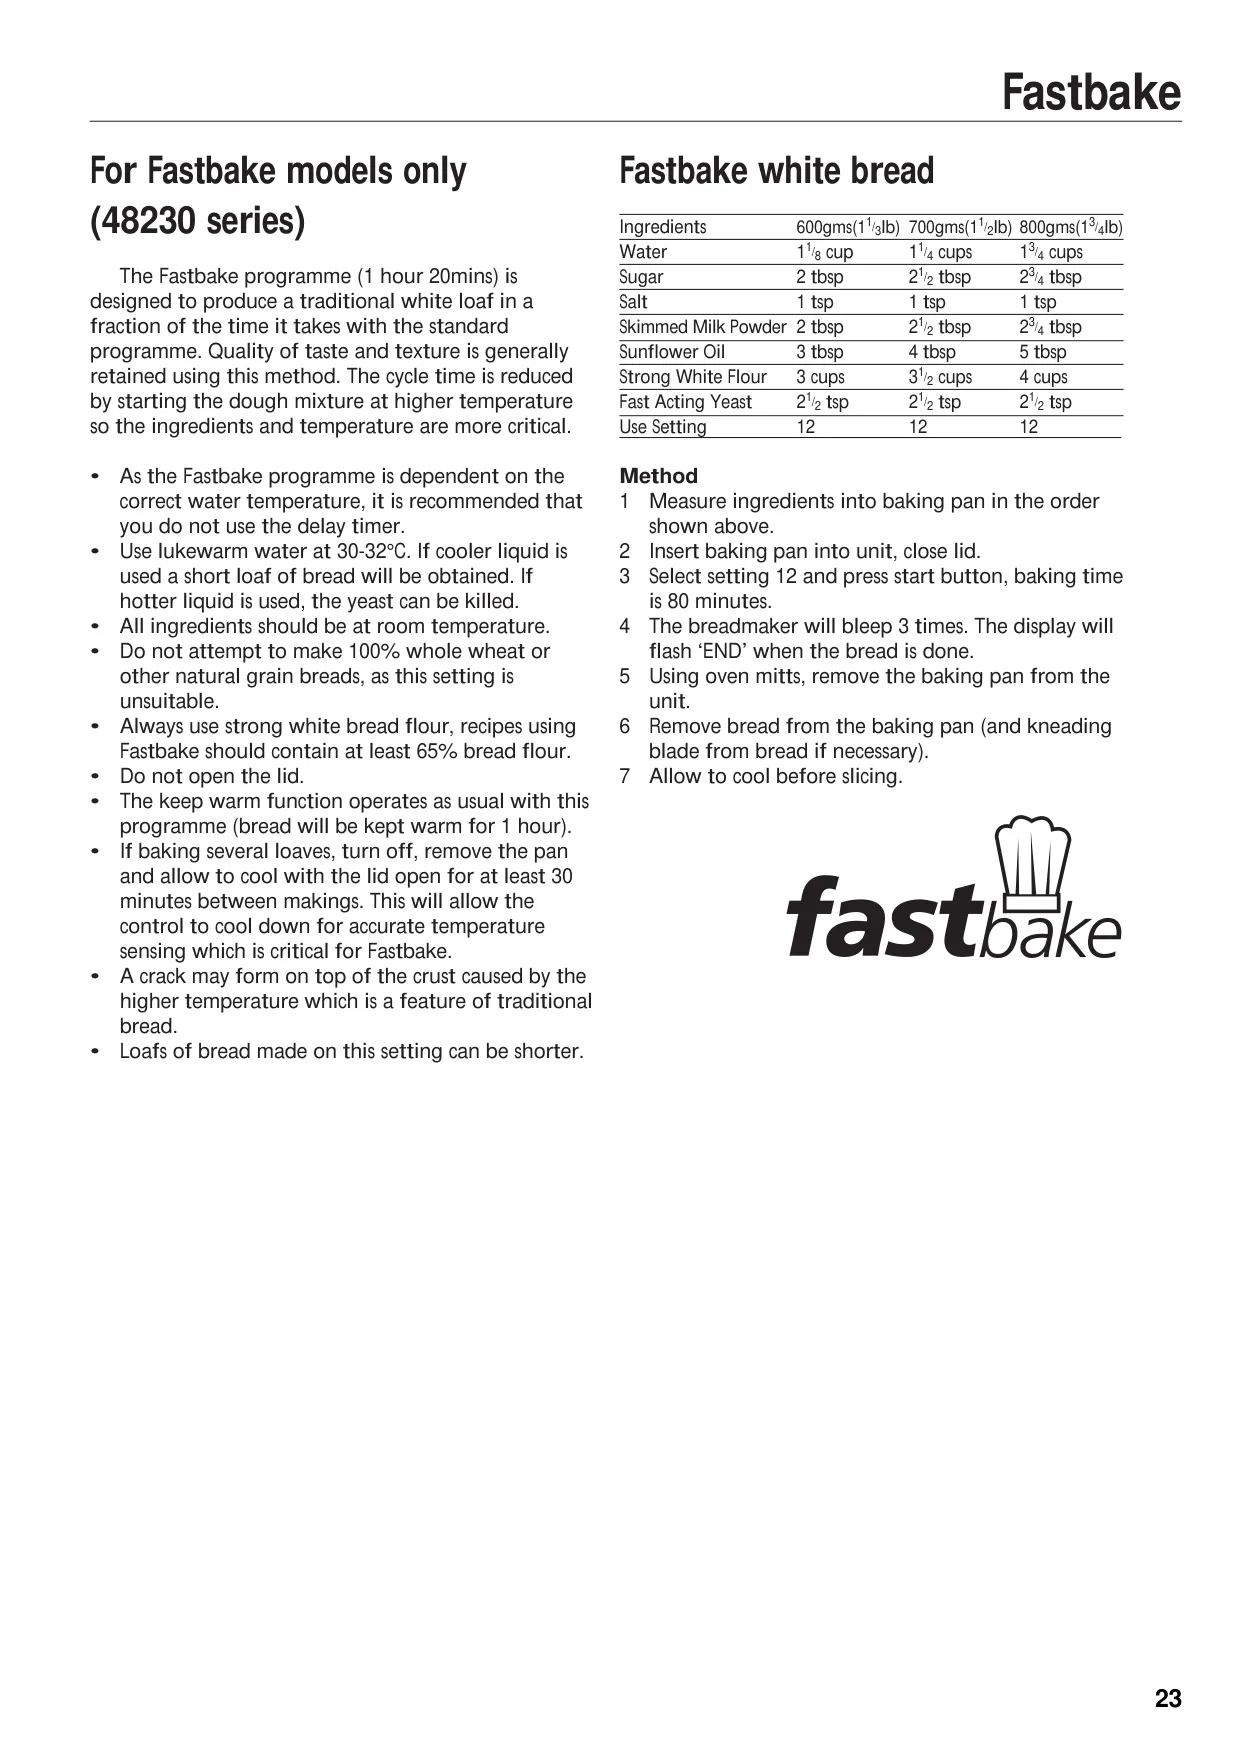
The Fastbake program, while incredibly efficient, requires specific conditions such as lukewarm water (30-32°C) and strong white bread flour. This program, available on specific models, significantly reduces baking time while retaining taste and texture, although loaves might be slightly shorter with a characteristic top crust crack due to higher temperatures.
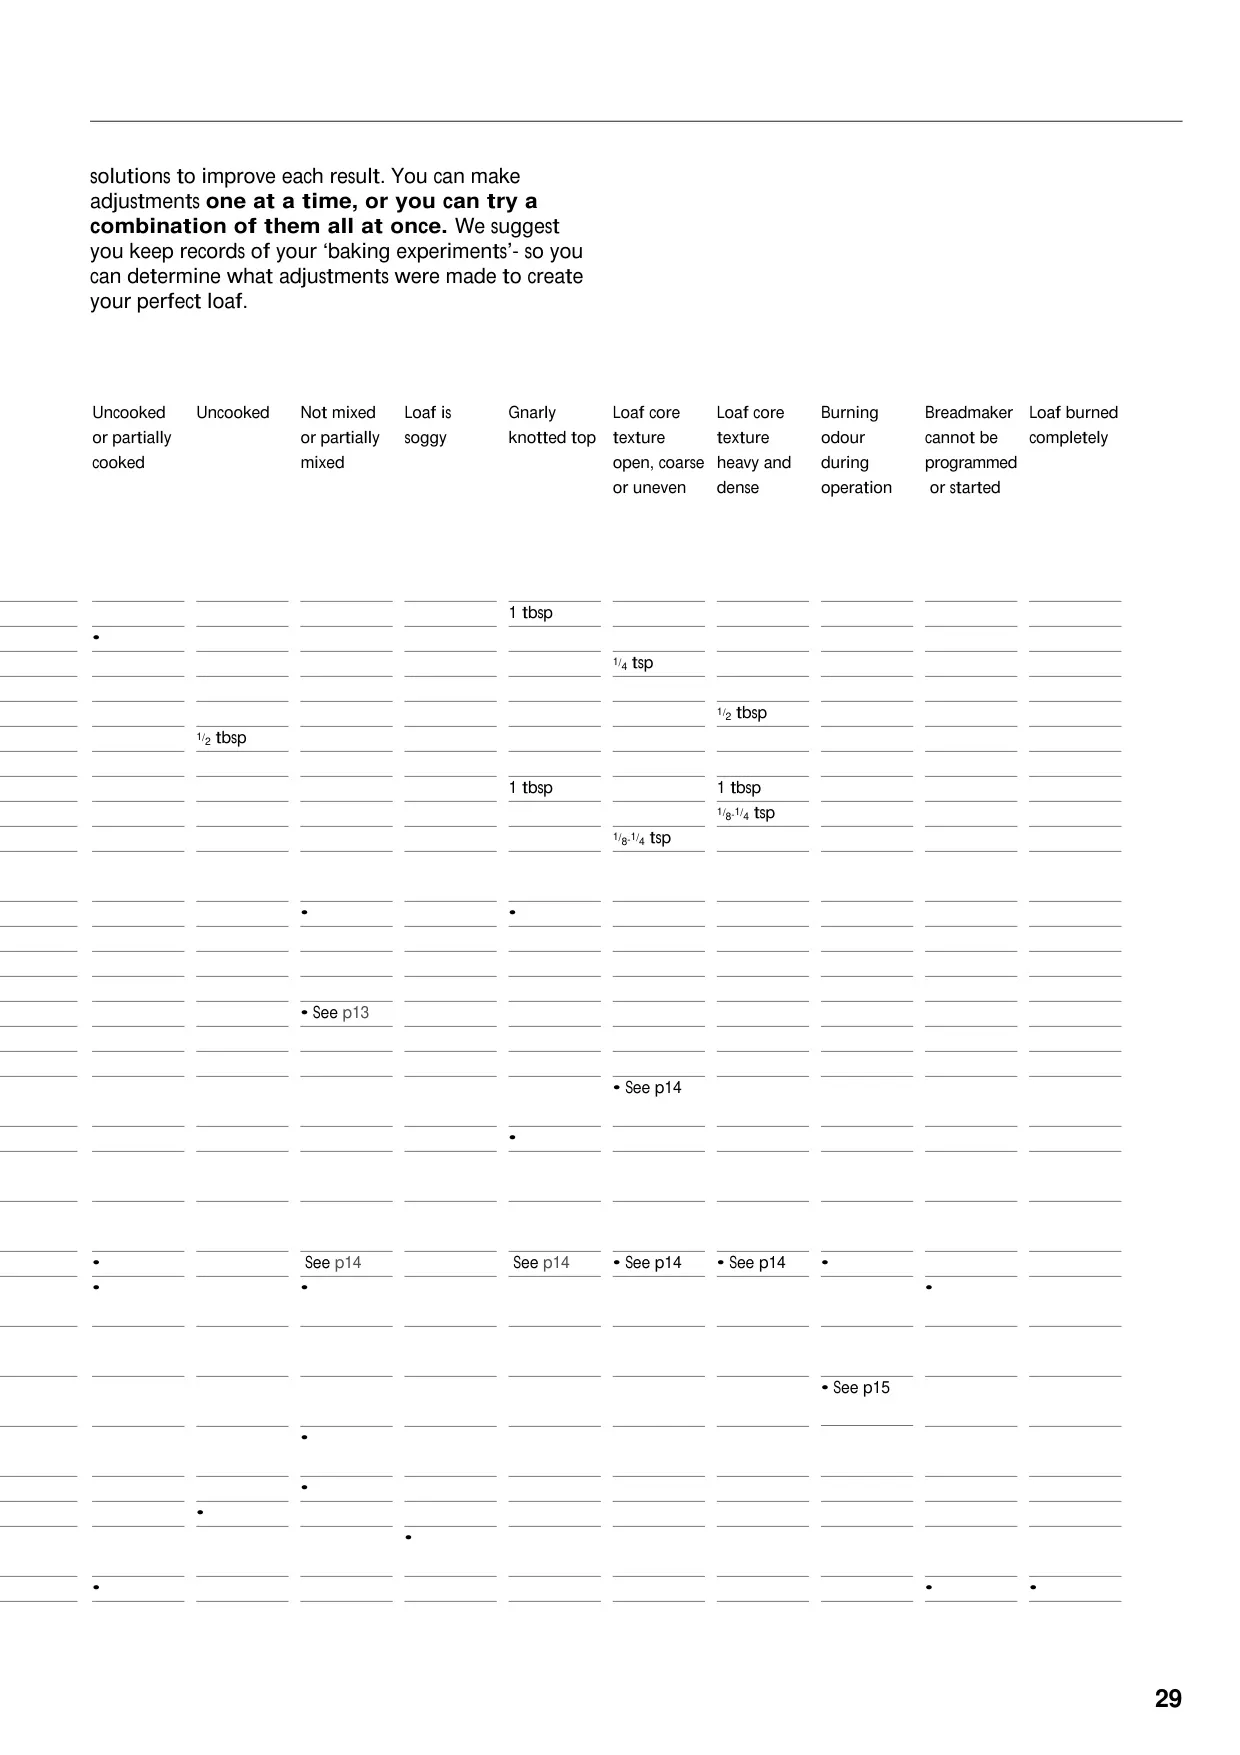
For troubleshooting common issues, the manual provides guidance on various outcomes like cratered, mushroomed, or gnarly loaves, often linking them back to ingredient ratios, temperatures, or procedural steps. This comprehensive approach ensures users can refine their baking techniques for consistently perfect bread.
Finally, the breadmaker is built with important safety safeguards, including warnings against touching hot surfaces, immersing electrical components, and using the appliance for non-household purposes. These instructions are vital for safe and effective operation, ensuring long-lasting enjoyment of your breadmaker.
Frequently Asked Questions (FAQs)
Can't find the answer you need? Here are some frequently asked questions about the Morphy Richards 48220 Fastbake Breadmaker, and we answer them below.